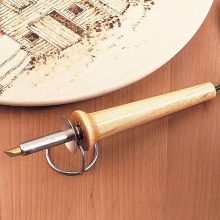
Do-it-yourself wood burner
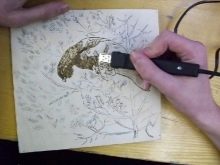
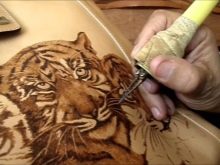
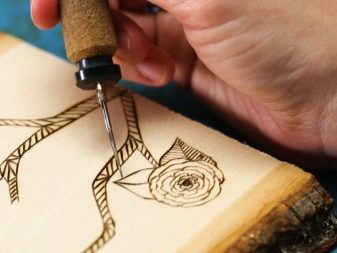
Burning masters, whose work has been put on stream, but they did not learn to draw pictures, and they do not have the talent for this, act as follows. Taking any picture, they print it on paper, and then, attaching it to a piece of plywood or a board, they trace the contour of each detail of the image with a burner. Moreover, many people use their own burners.
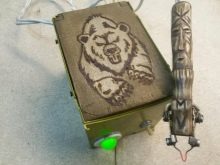
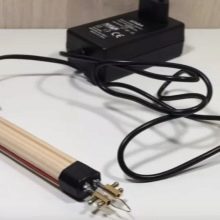
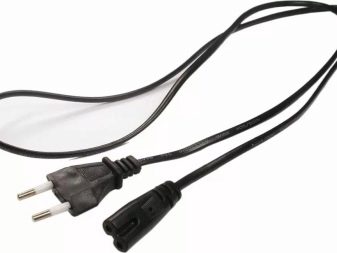
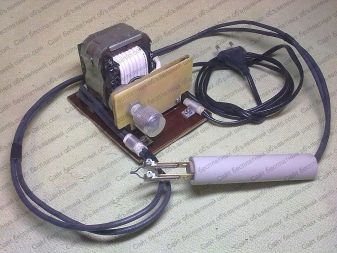
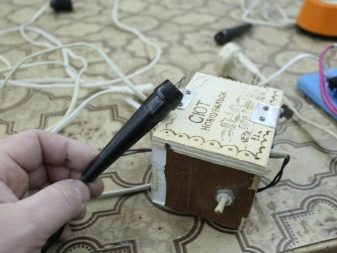
Burner from the phone power supply
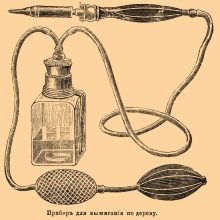
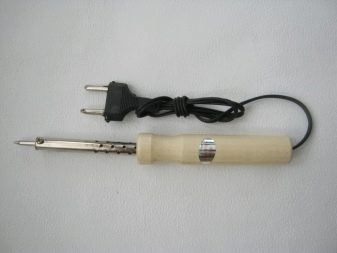
In the old days, paintings were burned with red-hot iron. To get rid of unjustified time and human costs, some of the users, even during the late tsarist Russia, came up with the idea of using a thin soldering iron with a power of 20-40 watts for burning, sharpening its sting sharper so that the contours come out thin and clear. More advanced minds made a burner with a sting of nichrome wire, thin needles, using an electric heating element similar in principle of operation. And now both of these ideas are not forgotten, only the technologies for making blanks from working materials are being improved and, possibly, the dimensions are decreasing.
As an improved version of a do-it-yourself burner, the craftsmen offer a device powered by a power adapter for a smartphone or tablet. The circuit diagram of such a device is transferred to a reduced supply voltage (up to 12 volts), which will be harmless even in humid rooms.
Tools and materials
The following attachments and devices are suitable as tools.
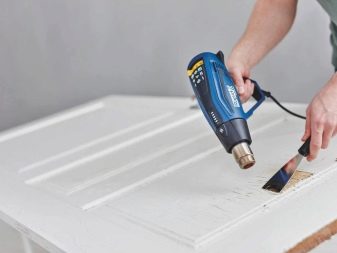
- Building hair dryer. The usual option for drying hair is not suitable.
- Electric soldering iron. It is possible to connect reliably without it, for example, a spiral with a wire, using screw or crimp electrical contacts.
- Pliers. You will also need wire cutters, possibly a knife (for stripping the wires).
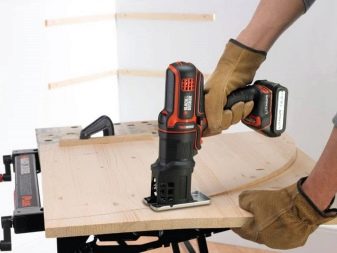
- Electric jigsaw. You can also use a simple hacksaw. Portable cutters are produced for small jobs.
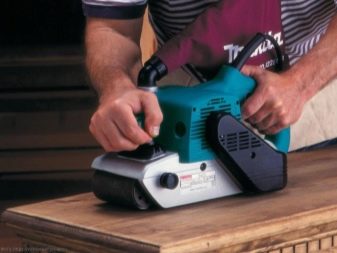
- Grinding milling cutter with grinding attachments or grinder with grinding discs. Cutting discs for wood or metal will also replace the hacksaw.
If you make homemade woodburners for sale, then milling the supporting elements will help to give industrial accuracy to your products. Consumables can be as follows.
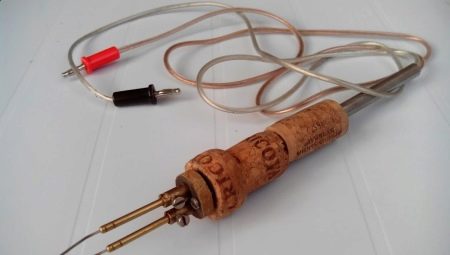
- Rail or staple for wooden windows. These elements fix the glass in the window or door.
- Epoxy adhesive. Creates a secure attachment of wires and heat shrink tubing to the wooden handle in places where they are not completely seated.
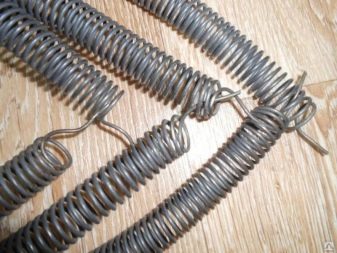
- A piece of nichrome spiral. A high-power coil (up to 5 kilowatts) is recommended: it is more wear-resistant and durable.
- Wire or two-wire cable. It is advisable to take a ready-made network cable from any device that cannot be repaired, for example, from a fan or a soldering iron.
- Heat-shrink tubing. It would be possible to use electrical tape, but on the adhesive, which holds it for a number of years, manufacturers began to save money, including in order to create one-piece and non-separable joints.
Any one with a voltage of 5 volts and an operating current of up to 2 amperes is suitable as a power source (charger).


Manufacturing
To make a homemade woodburner, do the following.
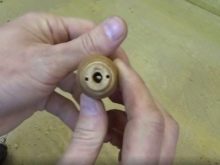
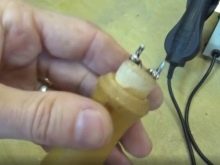
- Cut the desired piece from the lath or window glazing bead. On average, its length will be about 10 cm.
- In the future handle, drill a hole for the wires with a drill or screwdriver.
- Expand a few millimeters of the drilled channel close to the exit point of the wires: here the nichrome wire will be fixed.
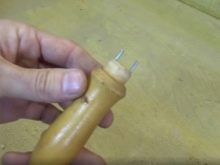
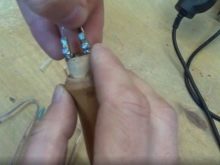
- Solder the connector under the charger plug to the free end of the wire coming from the burner.
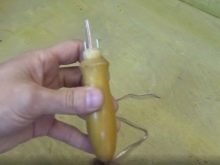
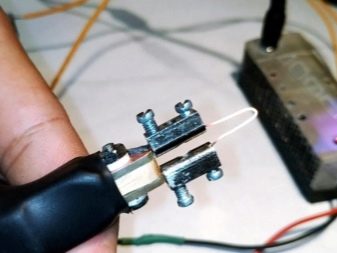
- From the side of the tip, where the ends of the wires come to the nichrome wire, solder its segment itself - a U-shaped element. Pull the wires inward, and after them he will be pulled in. Make sure it is securely fastened.
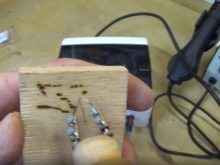
- Place the heat shrink tubing over the wooden handle itself. Warm it up with a hair dryer.
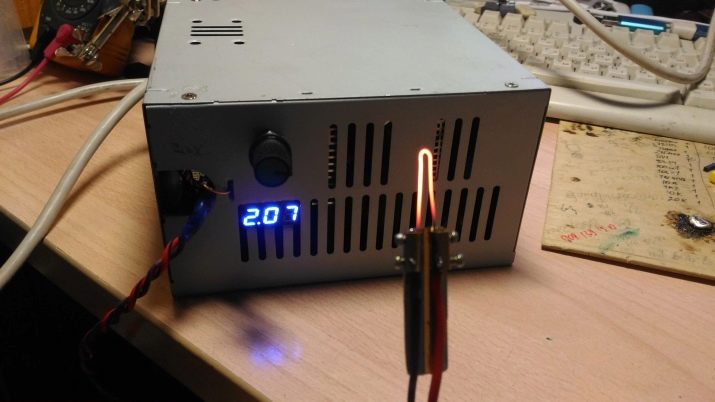
Connect the charger to the burner. The nichrome wire should glow evenly. A reddish or crimson glow indicates that the burner is ready for use.
Needles can be used instead of nichrome wire in the burner. The cross-section of the needle (tenths of a square millimeter) is such that a power of at least 30 W is capable of heating it up to several hundred degrees.
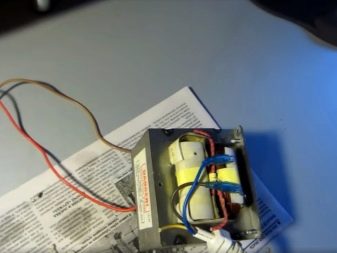
How to make a microwave from a transformer?
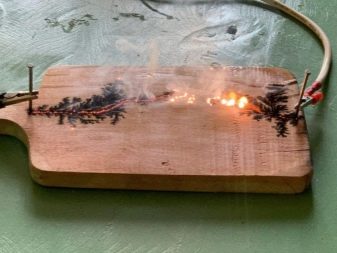
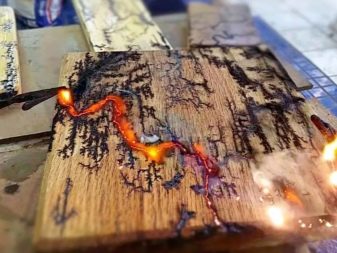
A transformer in a microwave oven generates high voltage, which can exceed the mains voltage by 10 times, giving out 2200-4400 V. The effect when using extra high voltage is as follows. The workpiece is impregnated along the burned-out contour with salted water. In the simplest case, you get an electrolyte that conducts well.
If a potential of several thousand volts is applied to the ends of a wet track formed by an electrolyte absorbed into wood (or paper, as well as any other moisturizing medium), then a high-voltage discharge is formed, which bakes the burned out surface.

This method is used by craftsmen who do not yet have sufficient confidence in their movements to lead a uniform contour through the wood with the help of a conventional heated element without shadows and transitions that are not inherent in the concept of a drawing. For the manufacture of a transformer version of the burner, the steps are arranged in stages as follows.
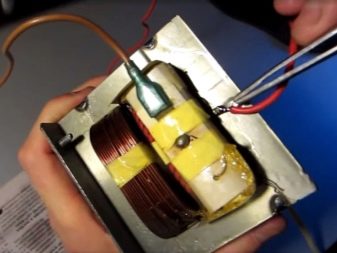
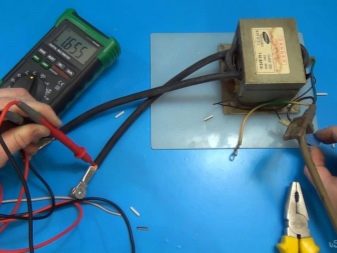
- Connect the transformer to the mains (220 V, socket) using any power cord with a plug. The wires are soldered to the terminals, usually marked with numbers 1 and 2. This is the primary winding. It is wound with a wire 10 times thicker in cross-sectional diameter than the secondary. But the secondary winding has a wire as thin as a hair. Since the transformer is a step-up, the primary winding is thicker than the secondary one in terms of the diameter of the enamel wire.
- Connect a securely insulated high voltage cable to the secondary winding. It is important to avoid short circuits at the ends of the winding.
- For convenience, connect the clamps ("crocodiles") to the high-voltage cable.
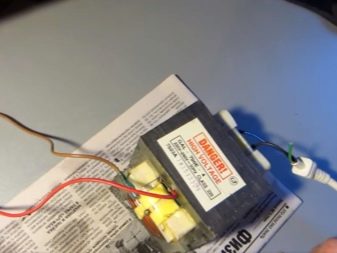
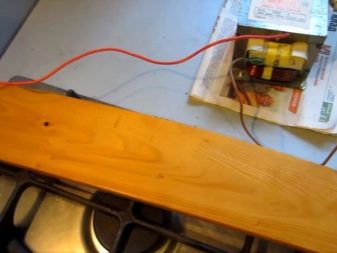
Before plugging in the device, check that the insulation is intact. Apply a layer of electrolyte to the board and try to “ignite” it by applying voltage to it. High-voltage current, passing through the moistened wood, causes its darkening. The advantages of this method are the ability to burn out the entire pattern at once, moistening the tree along the necessary lines, as well as the uniformity of burning. In the dark, closed circuits formed by an electrolyte path can produce a corona discharge that vaguely resembles lightning.
Useful Tips
When using a high-voltage (transformer) burner, no additional parts are required, except for sufficiently reliable electrical insulation to prevent electric shock to the master. To work with such devices, you must have permission to work with electrical installations with voltages over a kilovolt, and also use protective equipment. If a rectifier diode bridge is used, then the diodes must be rated for high voltage. From the alternating current, a constant current is formed. And when it is still possible to survive with an accidental shock with an alternating current, then the permanent one is guaranteed to kill the careless and unlucky experimenter.
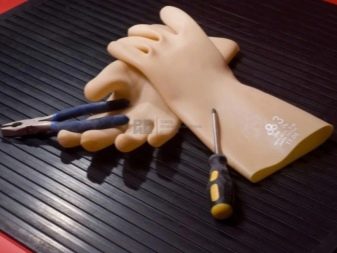
When working with high voltages at home, wear insulated gloves before applying current. Place a non-conductive mat or pad under your work area (chair legs if sitting, or legs if you work while standing). For example, a rubber car mat comes in handy. Use shoes with sturdy heels and thick soles. Do not operate the High Voltage Burner in a damp environment.
If the transformer from the microwave is cast (the windings are filled with epoxy glue), non-separable, then you can check the position of the primary and secondary windings by measuring the resistance. The value, which is an order of magnitude different, will help determine the correctness of the connection to the network: the more turns, and the thinner they are, the higher the resistance. If you connect the transformer to the network with the "wrong" winding, then at best you will not get 2200, but, say, 22 V, which will still require the use of the classic version - a piece of nichrome wire, and even then provided that the overall power of the converting the cell voltage is at least 30 W. In the worst case, there will be a short circuit. For DIY, use an optional automatic fuse and fuse links to prevent damage to the wiring.

In most cases, standard two-pin connectors are suitable for low-voltage burners powered by mobile charging, in which the center conductor is located in the center of the space bounded by the ring outside. A USB socket, in which only two extreme contacts and the corresponding plug for it would be used here, could heat up significantly in the place where these contacts fit.
More powerful devices would require more than 2 A. There is no power reserve here: as a result, they overheat, and their failure is possible. To create a two-threefold reserve, it is recommended to use 2 or 3 such chargers, respectively.Alternatively, you can connect their outputs in series. The higher the voltage, the lower the current value is required: this helps the wires (and the fuse) not to overheat, and the charges themselves also do not wear out, which is why they will last not several weeks or months, but up to tens of years.
Parallel connection, for example, not 15 V and 2 A, but 5 V and 6 A will also (by volt-amperes, by consumed watts) create the required power reserve. For a series connection that proportionally increases the supply voltage itself and not the operating current, it may be necessary to adjust the filament. In the simplest case, this is a high-power (tens of watts) variable nichrome resistor (rheostat), a thermostat from an electric stove or another device that is connected in series (in a circuit break) and limits the current consumption, and with it the voltage on the device under load.
Size the secondary power supply (AC adapter) so that its parts do not overheat when operating with too much power. A constant temperature of +70 will quickly destroy semiconductor elements (diodes, transistors, the simplest microassemblies, controllers) operating in the unit under frequent and continuous load. You cannot fix the heating element with epoxy glue: the temperature here will reach hundreds of degrees, and the epoxy filling will burn out in a matter of minutes, while releasing toxic fumes.
Do not use lithium-ion cell phone batteries or AA batteries for power. You cannot achieve long and stable operation from low-power batteries and accumulators.
Even external rechargeable batteries for smartphones and tablets, producing 2A at 5V, are unable to make the process of burning wood completely convenient and fast: you need a current of at least 4 A. Working with a building hair dryer will require reaching (to warm up the heat shrinkage) a significantly higher temperature at the nozzle outlet than 70 degrees. For high-quality heat shrinkage, heating of the order of 200-350 degrees is required.
Due to the low electrical resistance of the "needle" steel, it is more difficult to light the needle red-hot than a piece of nichrome spiral. To ensure long-term operation of the device, it would require an equal number of times the capacity of the batteries and / or the power of the power supply unit. In addition, steel is of little use as a red-hot "feather": unlike nichrome, it becomes scaled and burns out relatively quickly. And together with the needle, the wires heat up: overheating of the insulation leads to its cracking and shedding. In this case, it is still better to use nichrome: in comparison with other steel alloys of high electrical resistance, it heats up better at a lower power consumption. In this case, a bridge is created for dissipating heat, which would otherwise be released in other elements of the electrical circuit - where this is not required.
Next, see a master class on making a wood burner with your own hands.


