Methods for weaving the bottom from newspaper tubes
Making truly creative things is not difficult at all; weaving from newspaper tubes is considered a striking example of this. Of course, it will take a lot of time to make them, but you are guaranteed to become the owner of truly original and exclusive crafts. Let's dwell on the features of this technique.
Preparation
Weaving from paper tubes is also called plywood. Before getting started, blanks should be prepared - the straws themselves, which will be the main material. You can wind them up from glossy magazines, newspapers and any advertising brochures. To do this, you will need directly paper, as well as a glue stick or PVA. In addition, stock up with a piece of dense wire, a wooden skewer or a long knitting needle, and their diameter should be about 1.5-2 mm.
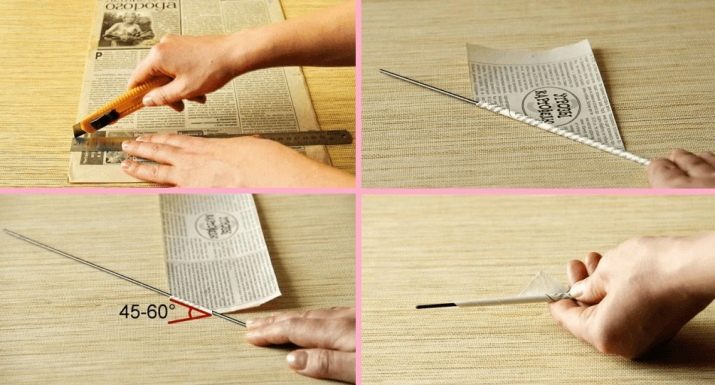
To form tubes, the paper must be cut into pieces of the required size, so that the aspect ratio is 1 to 3 or 1 to 4. For example, it can be pieces of 27x9 or 35x10.
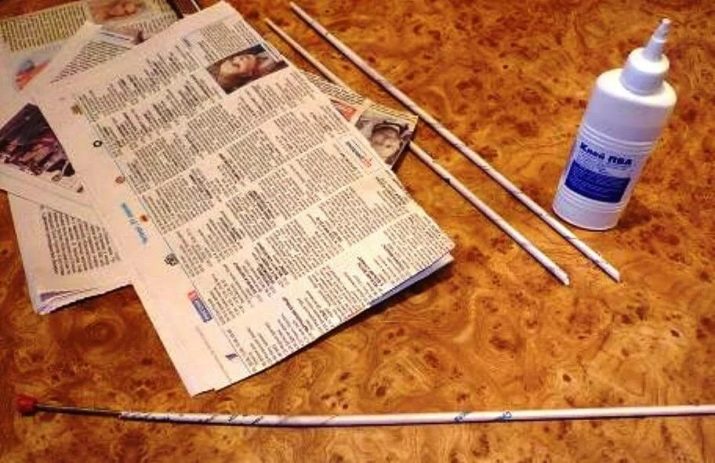
Next, the paper strip is fixed at the edge of the knitting needle and begins to wrap. To achieve the necessary strength of the straw, the paper is laid in relation to the rod at an inclination of 45 degrees - in this case, it will turn out to be strong enough, but at the same time it can be easily bent.
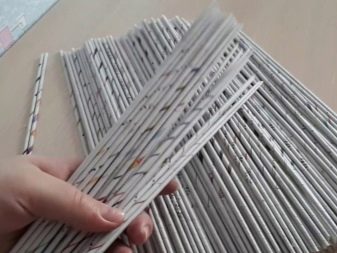
At the end of the work, the knitting needle is removed. If the tube is not particularly long, then you will have to make several blanks. If you performed all the actions correctly, then one end of the tube will turn out to be thin, and the other - more thickened and hollow inside.... If you want to fasten two tubes together, drip a little glue into the thick part and fix the second workpiece in it with the thin side and wait until the composition adheres.
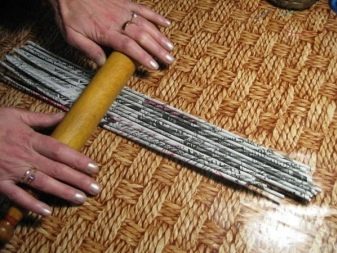
Sometimes, to perform the simplest weaving, the straws are additionally rolled with a table rolling pin, as a result they acquire a flat shape - in this form it will be much easier to work with the blanks, that is, pass between the rows.
To make the tube bend better, it should be moistened with water from a spray bottle before use.
Step-by-step instruction
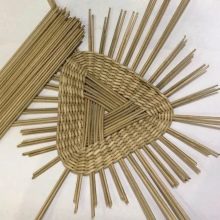
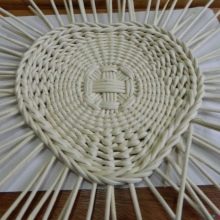
For most crafts based on plywood weaving, the bottom is first formed, it can be round, semicircular, triangular, square or rectangular. There are two main options. The first one is to make it with cardboard, having decorated the racks along the edges. This is a fairly simple and affordable method, which is optimal for those who are just taking their first steps in weaving, since braiding only the walls is much easier than giving the necessary shape to the bottom.

The second option is more complicated, it offers weaving of the bottom from newspaper tubes. This will require long blanks made up of two or three blanks. There are many ways of weaving, but the principle in all cases is the same - straws one by one or in small groups weave together, making a single center. After that, the resulting base is braided with separate "vines", adding size and giving the desired shape.
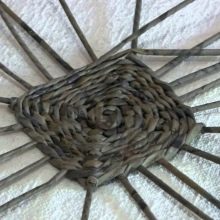
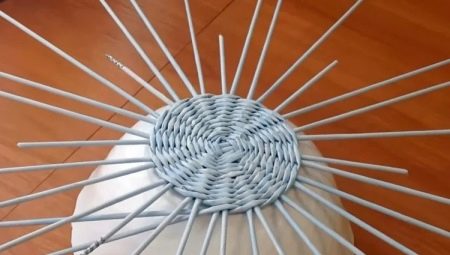
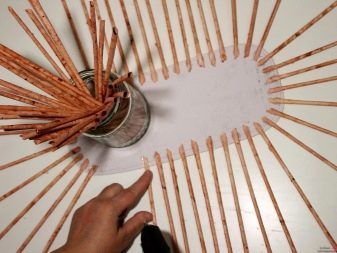
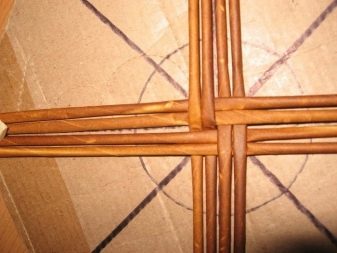
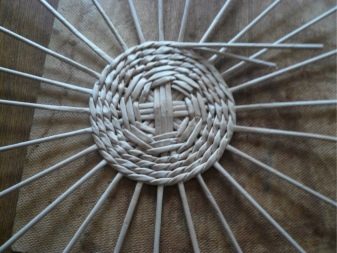
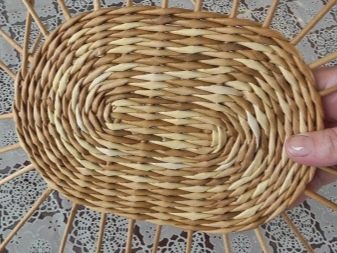
If you are giving the bottom a round or oval shape, it is best to cross several straws nested inside one another... For example, take 5 blanks and weave them together so that the bottom is not too bulky - you can crush it a little (this is done with a rolling pin or a regular bottle, rolling 3-4 times). To facilitate further work, the intersection points are coated with glue.
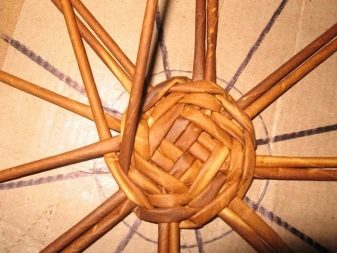
Then you need to take a paper straw and start tying the bottom; during work, the straw is passed through 3 tubes - thus two rows are formed. Then they knit a few more rows, passing a straw through two tubes, and weave the last 2-3 rows, already passing it through only one straw.
We draw your attention to the fact that during the weaving of the tubes, the base should be parted at an equal distance, initially this is how it comes out, but it is important to constantly monitor that this proportion is maintained.
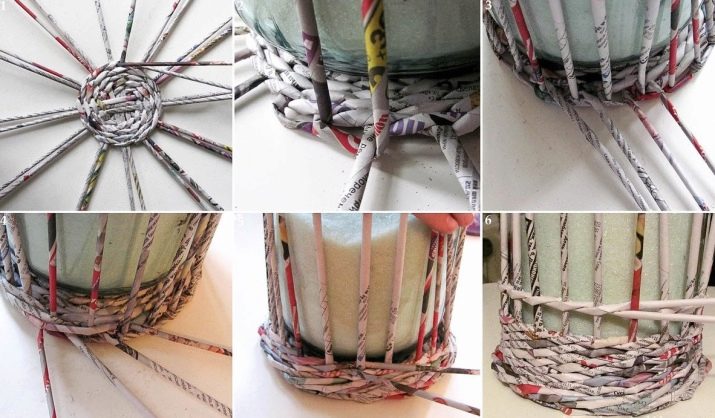
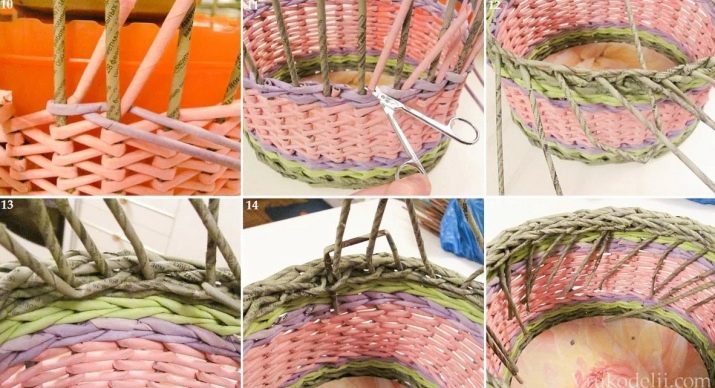
When passing to the walls, the tubes are crossed - this allows you to make the products denser and more stable, and the transition, accordingly, is more reliable. For weaving the walls, working straws are most often taken - the same ones that were used to form the bottom.
To make the finished product look aesthetically pleasing and neat, at the final stage of work, it is necessary to remove all working tubes, and also to form an edge... First, the working tubes are fixed, most often they are closed directly in the weaving - in the place of the closest binding. To perform this operation, you will need an elongated skewer or a regular knitting needle. Having stepped back 2-3 down, the skewer is inserted so that it comes out near the working tube.
Next, put the straw on a skewer and bend the entire structure, and then carefully remove it in the place where the skewer was originally introduced. After that, the straw is cut as close to the weaving as possible and all the manipulations with the rest of the working elements are repeated.
This method is considered one of the most reliable and at the same time simple, it allows you to firmly fix the working tubes so that they are inserted into the weaving and remain clamped.
At the last stage, they begin to design the edge. There are several ways, the easiest is to do the same as with workers, but bend them inside the finished product.

Recommendations
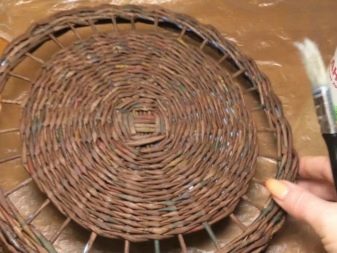
Many users do not like the natural color of newsprint, they prefer not to see the letters - in this case, the twisted straws should be tinted.To do this, take a stain or acrylic paint - both compositions fit tightly and interact well with a paper base of all types, do not spread and dry very quickly. The workpieces covered with acrylic varnish with the addition of a colored pigment look beautiful - in addition to their aesthetic appearance, these workpieces become much more resistant to moisture.
Of course, painting each tube with a brush is too long and laborious, because it is best to take a large tray, pour enamel into it and lower the finished elements. After dyeing, the workpieces are placed on a thin layer of polyethylene film to dry.
Tip: before starting paper weaving, be sure to study the master classes - you can find them on the Internet, where they are freely available. Experienced needlewomen in them tell you how to make stylish home decor items from magazine tubes in stages - this will greatly facilitate your further work.
Next, see a master class on weaving a round bottom from newspaper tubes.


