Bending master class "Rod" made of newspaper tubes
Today, weaving from newspaper tubes is becoming a very popular type of needlework. There are few weaving elements in this type of needlework, the main thing is to carry them out correctly. Completing the product in a spectacular way is a very important part of the job. How to make a "Rod" fold out of newspaper structures: we present a step-by-step master class.
Peculiarities
At first glance, the "Rod" fold made of newspaper pipes seems to be a difficult element to perform, but thanks to its beautiful ornate pattern and the neatness of the edge of the product, it is deservedly popular among needlewomen.
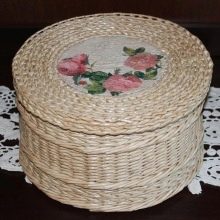
The design of the product with the "Rod" fold looks neat and elegant.
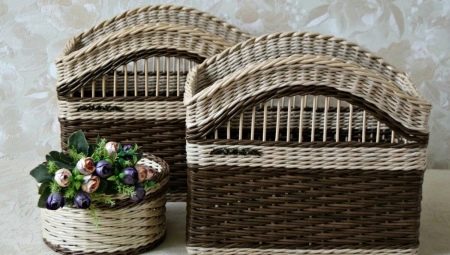
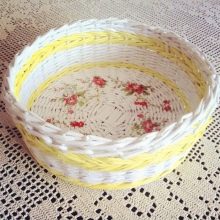
The different way of completing the fold allows you to give the products a beautiful appearance. With the help of the "Rod" you can make air baskets, vases, napkin holders that have a patterned edge when bending with links. By making a fold without links, you can get a product with a tight and even edge.
Tools and materials
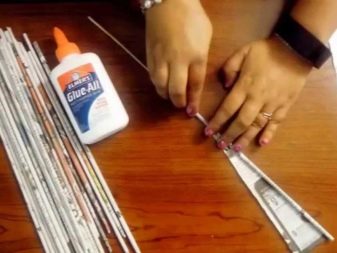
To complete the "Rod" fold you will need:
- tubes from newspapers;
- water;
- spray;
- spoke;
- PVA glue.

Step weaving
A step-by-step master class will help you understand the basic principle of weaving the "Rod" fold, so that you can complete products from newspaper twists with original weaving without stumps from the cut-off racks.
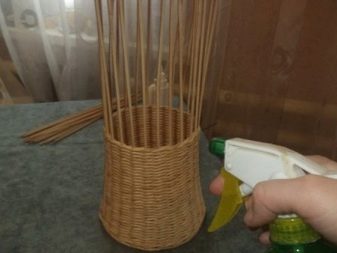
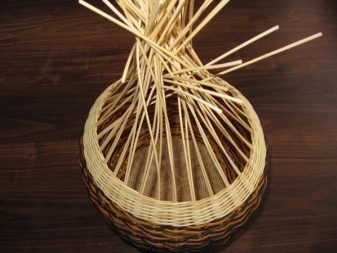
- You need to weave the volume of the product to the desired height, leaving the racks long enough. The length of the uprights will create a nice pattern on the fold.
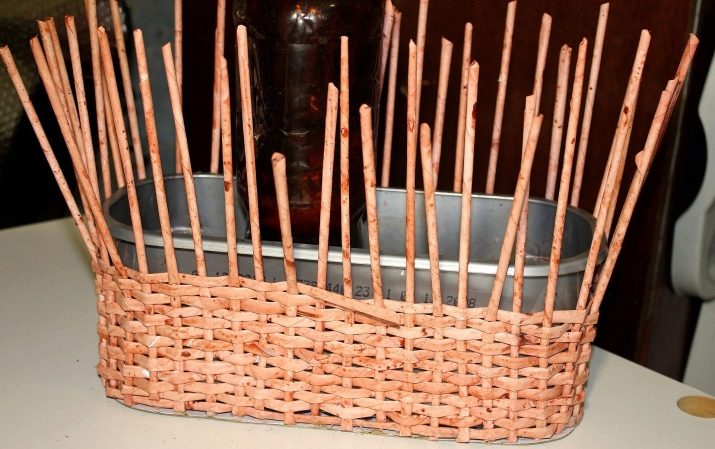
- After completing the weaving of the main volume of the product, we extract the shape of the base from it. An important detail is that before performing the bending, it is well to moisten the racks. Wet tubes are easier to work with, they are elastic and can be easily woven.
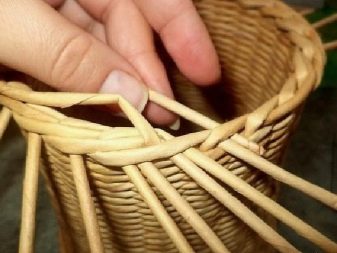
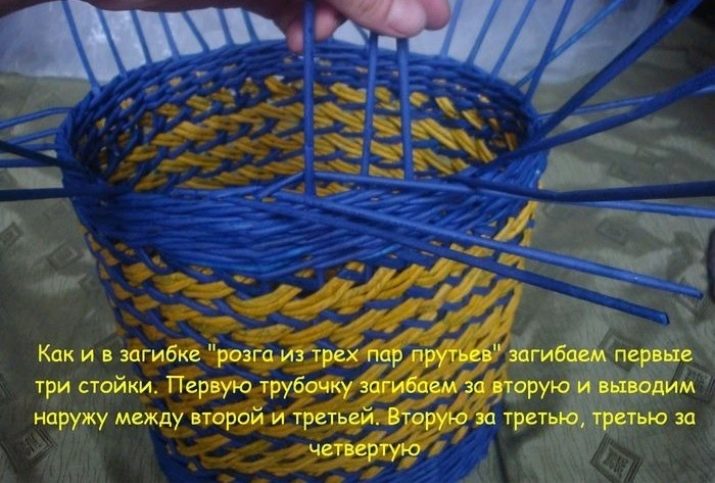
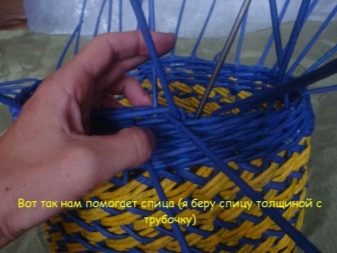
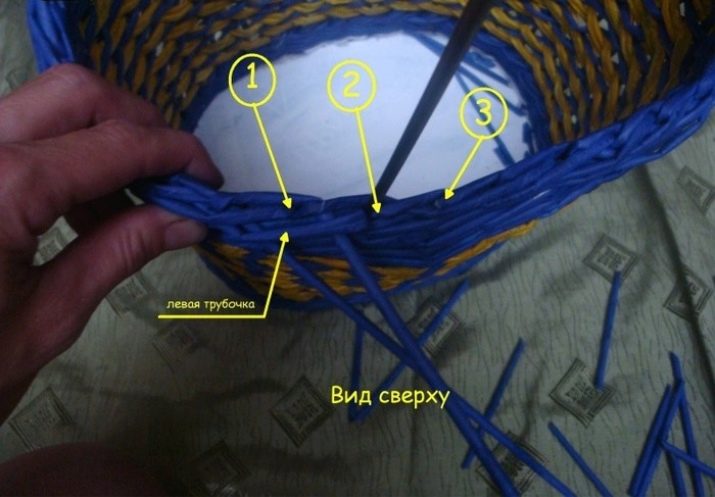
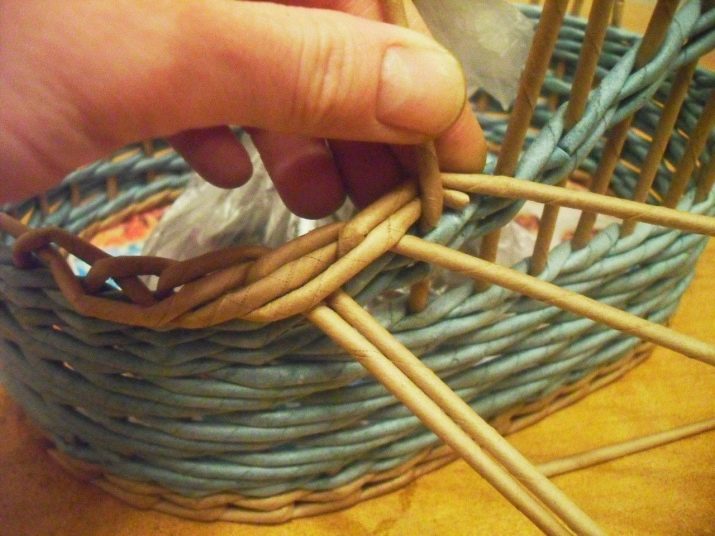
- We put an additional tube under the first rack and bend the rack behind the adjacent one. We fold the second and third in the same way. In order to bend the elements more easily and evenly, you can use a knitting needle. The inserted knitting needle helps the tubes slide along the weave.
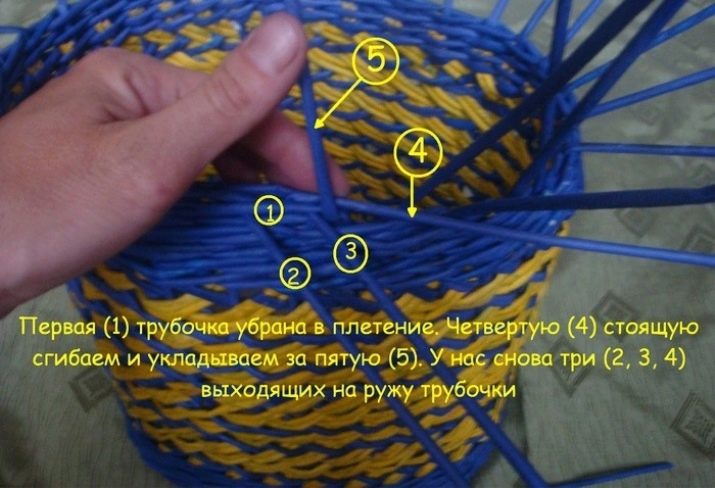
- Next, you need to return to the first rack and gently bend it over the fifth. We also fill tube number four behind tube number five.
- Next, we sequentially bend the second and fifth racks for tube number six.
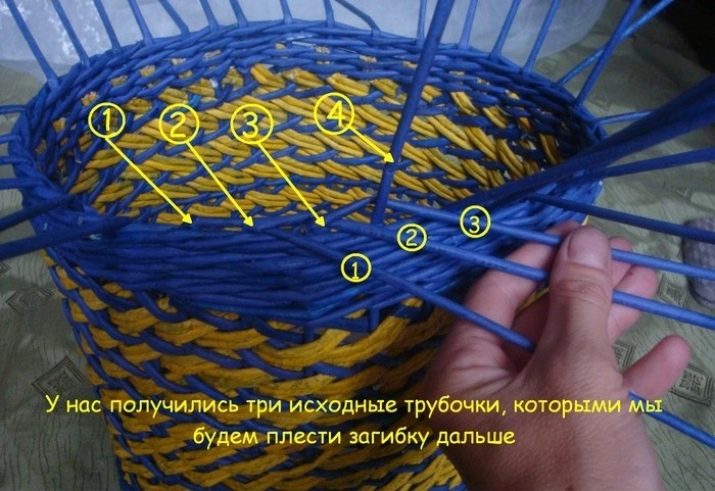
- Now we have tubes number three and six, they need to be filled in turn at the seventh rack. When performing such actions, three pairs of tubes turned out.
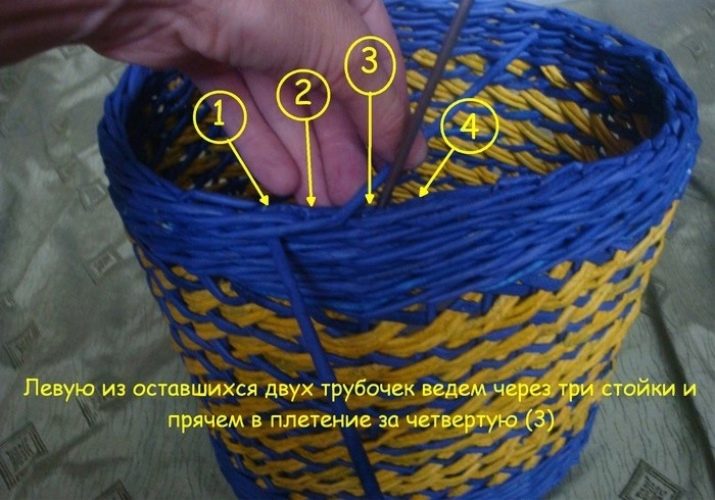
- We bend the next tubes remaining on the right side according to the same principle: we bend the free tube under the adjacent one from below, then we start it behind the next rack.
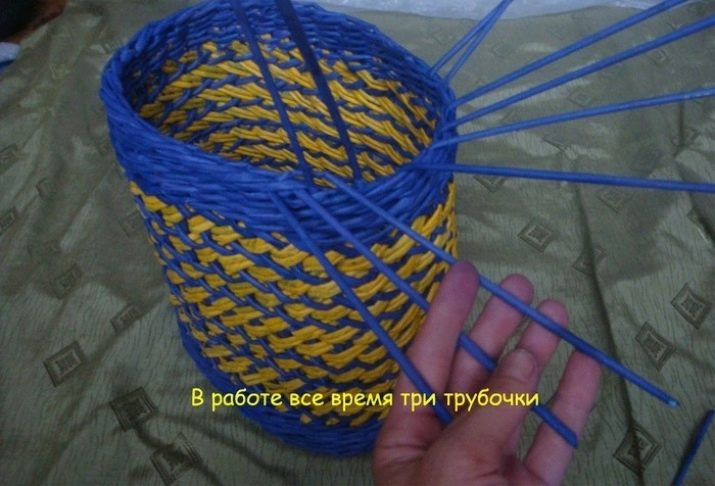
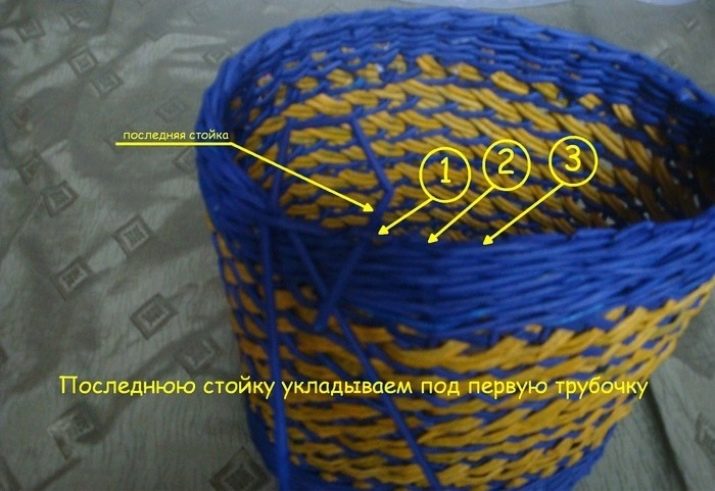
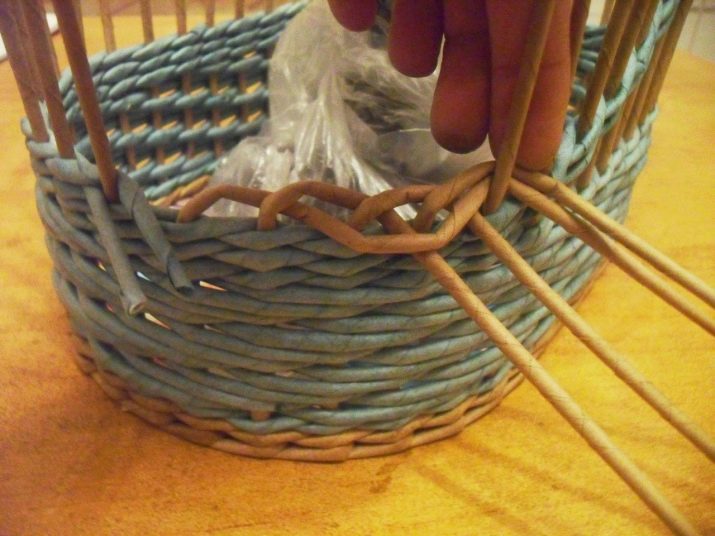
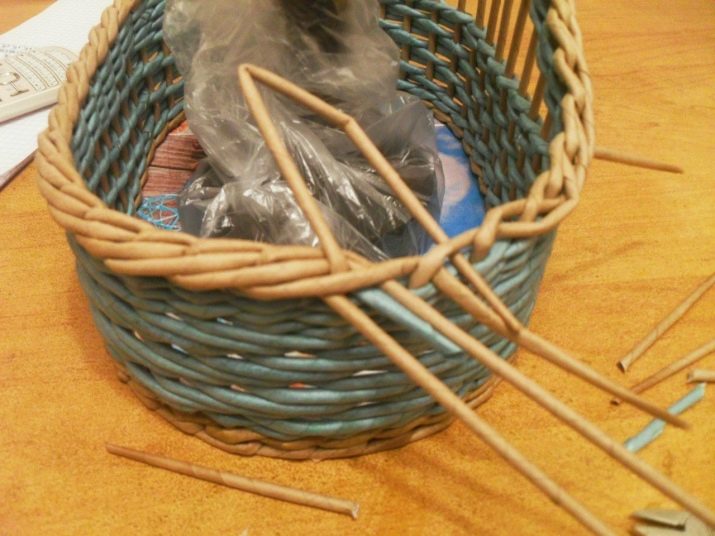
- We work this way until a couple of newspaper tubes remain. With the correct manipulations, all other racks will be bent in three pieces. Now you can shape the links in the "Rod" fold pattern. Here again, additional twisting from the newspaper is required. We add it to the first stand and bend it over the extreme. According to this principle, we form the entire row, braiding the previously bent tubes. We stretch the last tube of the row instead of an additional tube, carefully pulling it out of the weave.
- We bend the next row in the same sequence, with a difference in the direction of the bends. Each next row, when forming links, is woven in the opposite direction. You can add the "Rod" as long as the remaining length of the tubes allows. The more rows, the more voluminous the product.
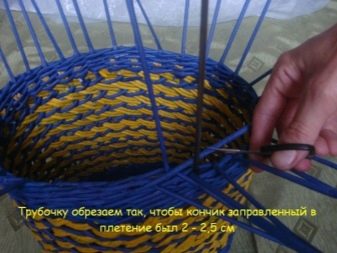
- Having completed the weaving of the fold, it remains to tuck in the remaining ends of the newspaper twists. We carefully coat each rack with PVA glue, priming the surface. When the glue dries, cut the remaining ends of the tubes evenly.
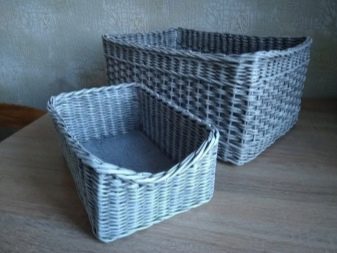
There is one more option for completing the "Rod" fold. It is used if the edge of the product does not need additional pattern and thickness.
Having completed the weaving of the product itself, we begin to bend. Add an additional twist, bend the first post behind the adjacent one. We do the same with the next three racks.
After that, we fill the first and fifth in turn at rack number six. Then - the second and sixth for the seventh, third and seventh for the eighth. The principle of weaving the folds remains the same as in the previous description.
We bend the remaining pair of racks as follows. We start the first one for the second, and fill it instead of additional twisting. Gently bend the remaining rack into the first loops of the row of bends and bring the remaining end into the product. The folding is completed.
The edges of the tubes are primed with glue, cut and glued to the main fold from the inside.
Recommendations
There are several key considerations when making this braided finish.
- For ease of operation and accuracy of execution, it is important to sufficiently moisten the newspaper rolls before folding. It is better to spray water from a spray bottle, so the product will be moistened evenly, and you will have the opportunity to spray it again at any time to increase elasticity. But do not get carried away - excess moisture deforms the material.
- It is better to stretch the tubes with a metal knitting needle, of a convenient length and thickness.
- It should be remembered that the tubes are long enough. The length allows you to form a beautiful, even pattern. The longer the length of the links at the end of the pattern, the more delicate the edge of the product will be.
- Do not tighten the weaving too much. In this case, a dried-out product may deform.

Next, watch a master class on bending the "Rod" from newspaper tubes.


