Weaving willow baskets for beginners step by step
Many lovers of home handicrafts who are just mastering this type of creativity want to learn how to weave beautiful and neat baskets from a vine with their own hands. Not having an idea of where to get and how to prepare the vine, how to paint it at the end of the work, it is difficult to cope with the task at hand. A simple master class with instructions on the step-by-step weaving of simple round willow baskets will help even people who are just beginning to learn this art to figure it out.


Peculiarities
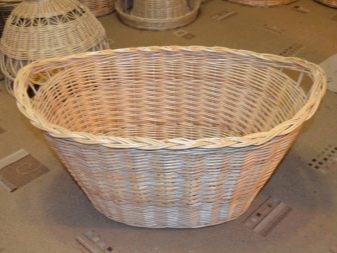
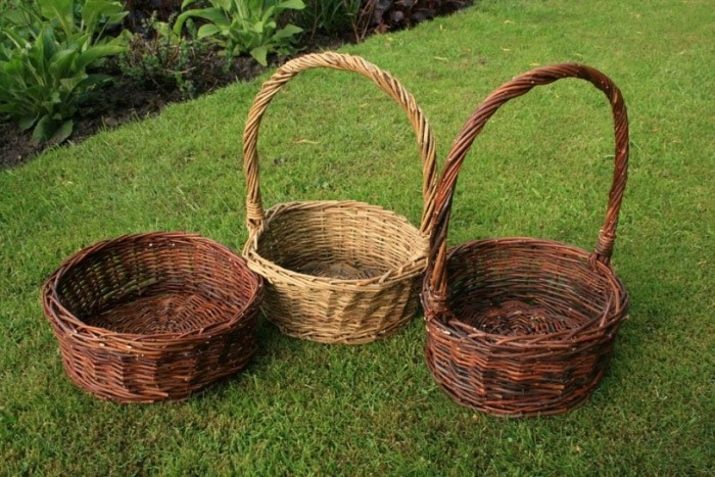
Weaving willow baskets is a popular craft that has been in demand in Russia since ancient times. The availability of raw materials, its strength and durability have become the main advantages of this type of material. A modern needlewoman is also quite capable of weaving a basket of twigs for mushrooms or for a picnic. The methods of creating such products are quite varied, they vary depending on the region. From the branches, an experienced craftsman can easily create a basket of round, oval, conical or rectangular shape, the desired size and purpose.
Vine products have a number of obvious features that other household containers do not have.
Willow bark and branches are rich in tannins. Mushrooms, berries, vegetables placed in a basket woven from them retain their "marketable" appearance longer, natural ventilation prevents them from spoiling. The used vine is connected without additional fixtures or fasteners, solely thanks to the skillful weaving. The service life of a finished product can be tens of years.
Required tools and materials
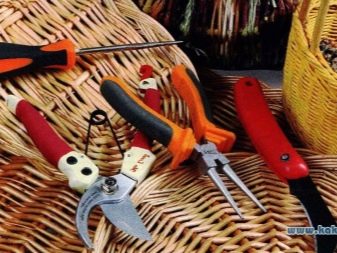
Vine weaving is a type of handicraft that uses natural materials. A special machine may be required to process large quantities of raw materials, but in most cases it is possible to do without it. The following tools will come in handy at different stages of making a basket:
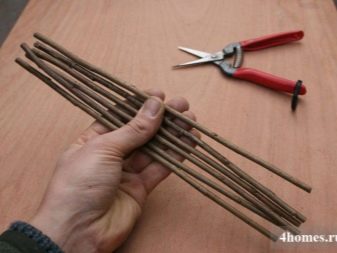
- secateurs;
- manual or electric jigsaw;
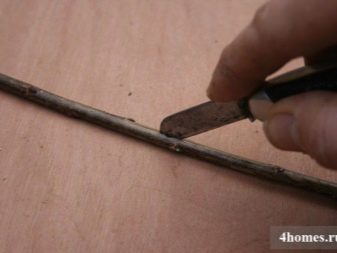
- a sharp knife with a beveled blade;
- tailor's or garden shears;
- drill;
- capacious containers for soaking rods;
- pliers;
- durable clothespins;
- tweezers;
- brushes, varnish, stain.
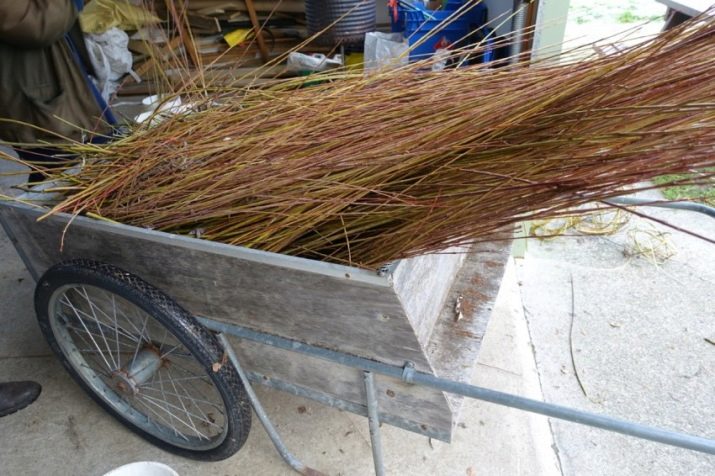
The main material that is needed to make a basket is willow twigs... They are easy to get on their own, some craftsmen even grow raw materials on their site, choosing the best varieties and types of shrubs. You can also buy prepared materials in the store. When preparing yourself, you should take into account a number of basic recommendations.
- The best raw materials get on loamy and sandy soils... You should choose young, healthy shrubs with long, straight shoots.
- For the blank is used secateurs... The longest shoots should be selected that do not have a large number of lateral branches.
- The cut is made at an angle... It is important to leave a few buds under the line along which the raw material is procured.
- Only branches with a narrow dense core are used... A loose middle section indicates that the material is too old for weaving.
- Check raw materials during procurement... For this, 1 branch is cut, the resulting material is bent 180 degrees. If it can withstand the load without cracking or breaking, the vine is considered suitable for weaving.
- Observe the recommended thickness. For the bottom of the baskets, solid rods are taken, for the walls, the material is split into thinner elements.
The optimal time for harvesting suitable rods is when the sap flow is minimal.
Shoots cut in March-April are easily peeled from the bark without additional effort. The material collected at other times will have to be soaked or scalded before processing. It is worth considering that after such treatment, the shoots will acquire a glossy shine, will be reliably protected from darkening, exposure to moisture... The rods that have not been digested will gradually darken and lose their decorative effect.
How to prepare the vine?
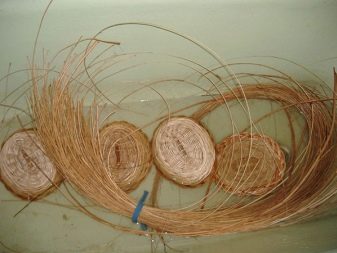
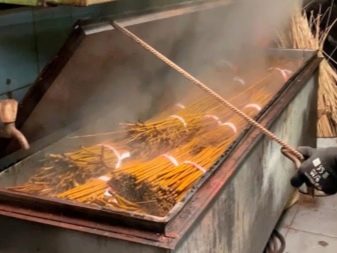
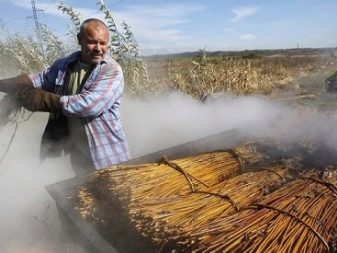
It is not enough just to prepare the vine. All materials cut not in early spring will have to be further processed... They are soaked in a flowing reservoir or barrel, trough, changing the liquid daily. Before diving into the river, the twig stream should be taken and tied into bundles, and then placed under oppression. Maintain raw materials in water from 7 to 14 days. It is possible to shorten the preparation time of the rods by evaporation. In this case, the processing process involves the use of one of the following methods.
- Shoots are placed in a container, poured with cold water, put on fire. After boiling, the rods are boiled for another 60-120 minutes. After this time, the raw material is taken out, cooled, then proceeded to remove the bark.
- The vine can be immediately poured over with boiling water.... After that, it can be boiled for only 30 minutes. After cooling, the bark will easily come off the surface of the branches.
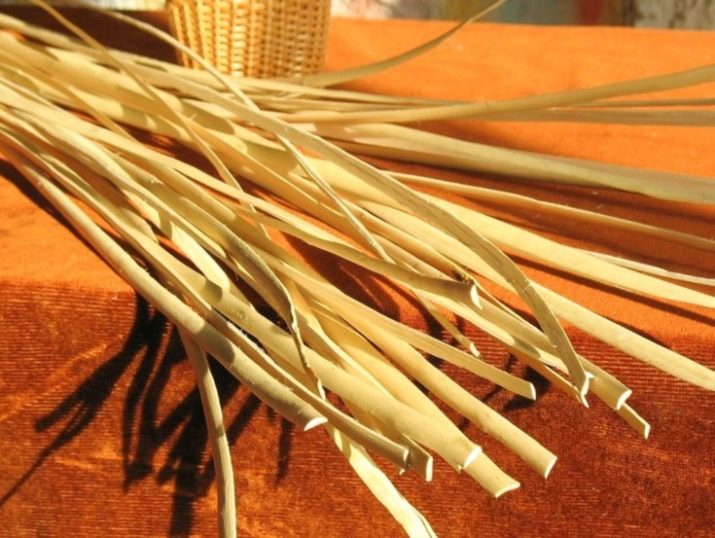
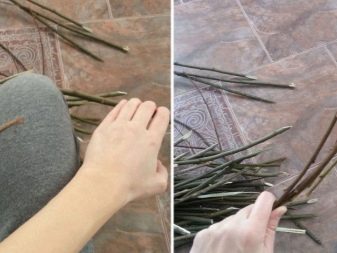
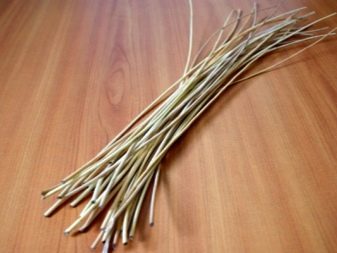
It is important not to wait for the vine to dry out. They begin to clean it from the butt - the area close to the base, again laying the rods in the water in between work stages. Cleaning is carried out by hand or with a sharp knife. Debarked shoots are sorted by size, sent to dry in the sun.
Not every willow variety is suitable for weaving. It is better to give preference to shrub forms with more flexible shoots. Weeping willows with long, weak branches are also not good for the job. They are too thin, the product will not keep its shape. It is believed that twigs with a diameter of 0.5-1 cm, covered with red or orange bark, are best suited for weaving.
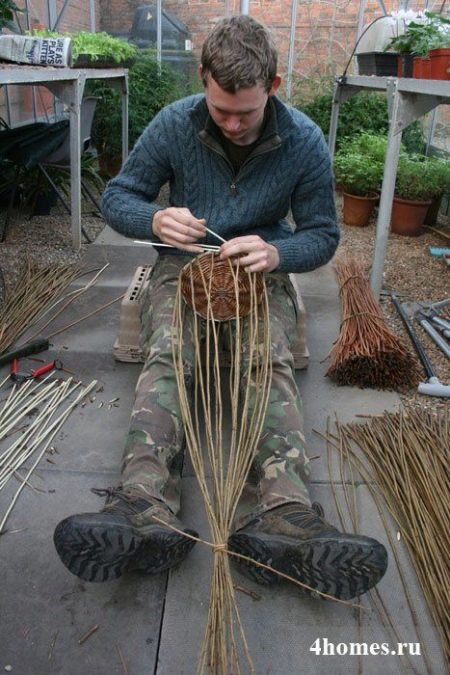
Master class for beginners
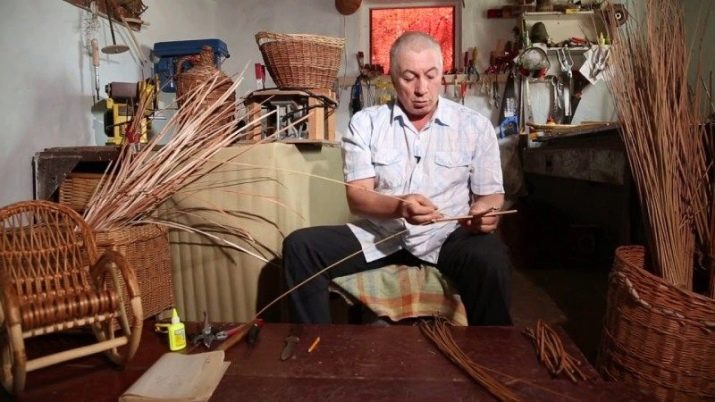
Before the first weaving, prepared rods, tools and materials are placed in the access zone.It is important that everything you need is at hand. The rods are sorted into thicker knitting needles, as well as knitting in the form of thin and flexible elements. After the frame parts are transferred from a horizontal position to a vertical position, they are already called racks.
A simple instruction will help you figure out how, step by step, to make a square or round basket with your own hands. The templates that define the configuration of the product will come in handy. Weaving technique can be any - Belarusian is suitable for beginners, quite simple and understandable.
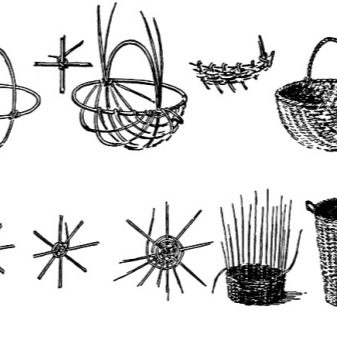
The basic scheme for creating a simple basket in this case will include the sequential formation of the bottom, sides, handle. The procedure is worth considering in more detail.
Basic stage
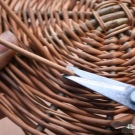
The beginning of work requires the greatest physical efforts from the master. The basic stage involves cutting the materials into the required number of rods.
- For the bottom, they take rather thick branches with a length of 35-40 cm.
- Long rods, including 24 pieces, are harvested on the sidewalls.
- The racks and walls are made of thin vines. You will need 50 pieces - 25 for each part.
The work is carried out using a secateurs... At the edges, the cut is made straight, without bevels and sharp edges. High-quality raw materials will not create problems in further weaving. It is worth considering that the material can be overdried. In this case, it is sprayed with water from a spray bottle or immersed in water for a while in order to return the rods to their former elasticity.
Weaving the bottom
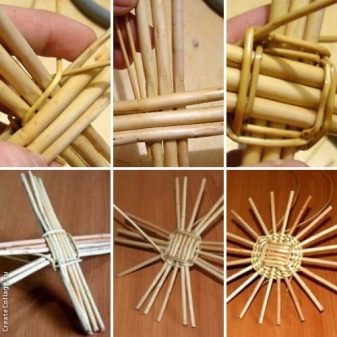
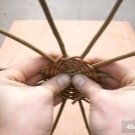
Weaving the bottom begins with the selection of rods of equal length. There should be 6 or 8 of them, with a diameter of 0.5-0.7 cm. When weaving, it is important to achieve the most tight fit of the individual elements of the vine.
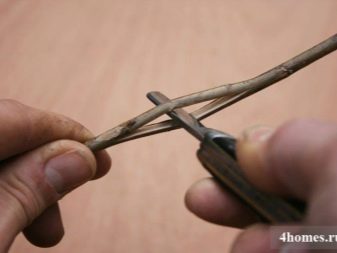
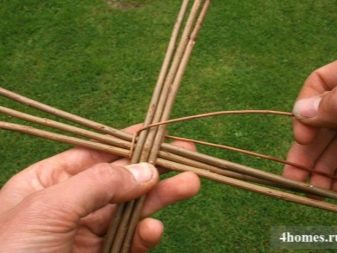
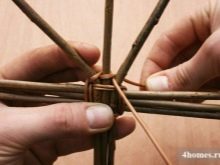
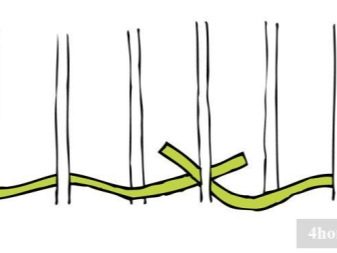
- The prepared materials must be divided in half. In 4 rods, cuts are made in the center.
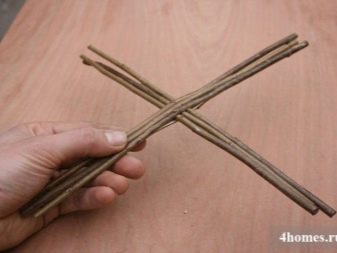
- Insert the remaining segments into the resulting blanks so that you get an equilateral cross.
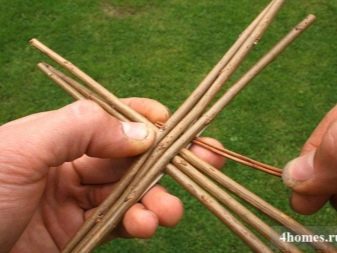
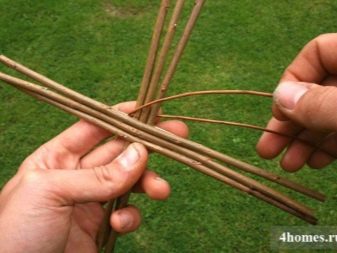
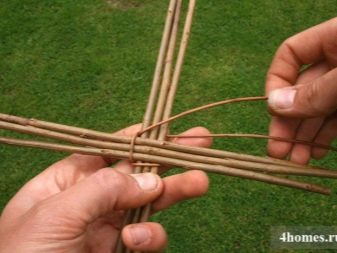
- Thin rods are threaded through the slot. They are wrapped around the base in 2 rows.
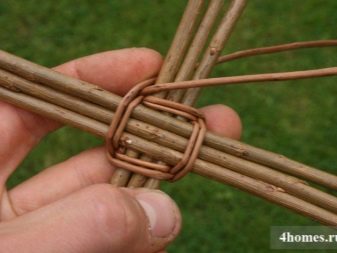
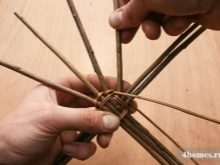
- 3 spokes next to each other are spread apart, braided separately. In this case, flexible thin rods are passed from above and below the main elements, intersecting with each other.
Weaving continues to the very edge of the bottom. As soon as one section of the vine comes to an end, it is increased by another, trying to ensure that such sections do not coincide. Splicing is done by weaving the pointed edge of the bar into the gap between the 2 adjacent rows. Weaving continues with a new vine, the edge of the old one is cut off.
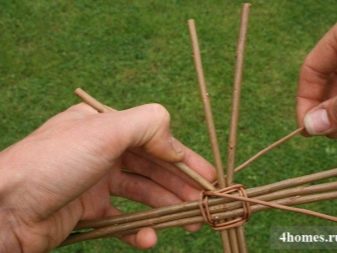
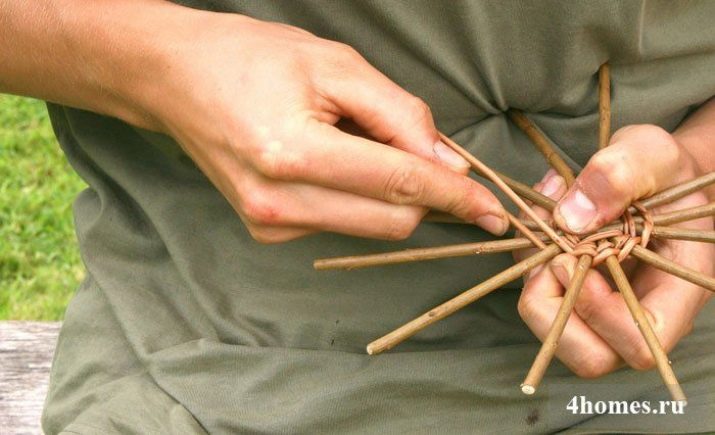
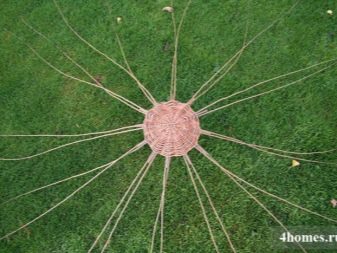
It is important to follow a specific order when creating the bottom. Twisted weave is used only on the first 5 rows. Then the work continues in a straightforward way. Each spoke goes inside and out, all the way to the edge. In order to get a circle, you will have to insert an additional knitting needle to get an odd number of elements.
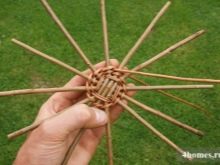
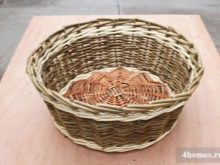
In order for the basket to maintain good stability, it is important to provide it with a concave bottom... To do this, upon reaching a diameter of 70-80 mm, the weaving is tightly wrapped around by hands, directed upwards. It is necessary, as it were, to push the central area outward. After that, weaving continues until the bottom reaches the diameter selected for the basket.


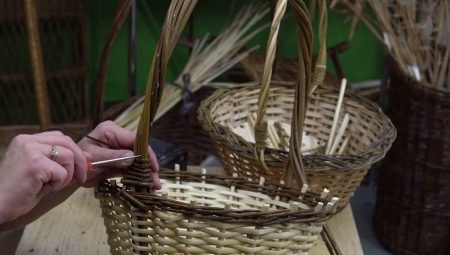
Base breakdown
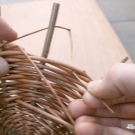
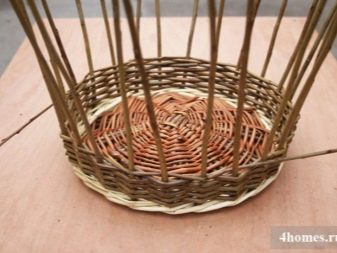
In the finished bottom, for the transition from horizontal to vertical weaving, you need to place racks. They are made from straight shoots of willow of medium thickness. Each such support is sharpened at the end, threaded between the needles. The protruding elements of the vine of the bottom are cut off. The number of rods in the split should be equal to that used in the base.
When forming a breakdown the natural direction of the bending of the vine must be taken into account. Each rod from the prepared 24 must be cut off along the thick edge. You should have a long bevel, either inward or outward.


In order to insert new racks, you will have to expand the weaving areas near the knitting needles with a screwdriver with a narrow sting or an awl. After that, 1 new one is placed on each side of the old frame element. It is important to insert with the inner side down, otherwise the vine will gradually move apart. You can form a kink on the supports by simply pressing them with your fingernail at the base, stepping back about 5 mm from the bottom weaving edge.
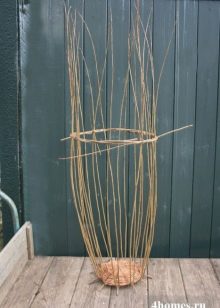
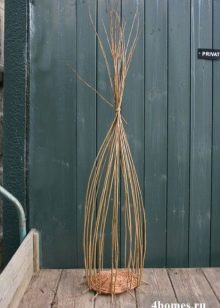
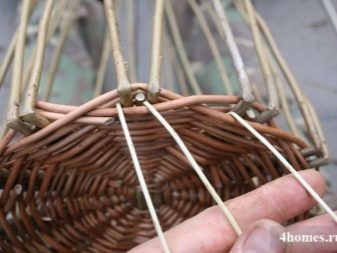
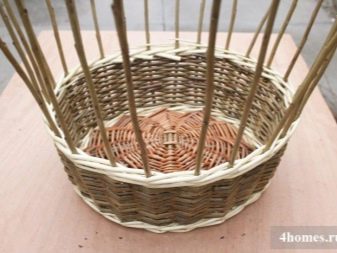
We collect the bottom and walls
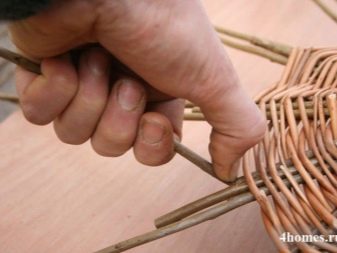
Connecting the elements of the rack is not difficult. They are taken, crossed with 2 others, then folded up. The same is repeated with absolutely all racks, until a vertically directed frame is obtained. At this stage, it is good to use a hoop or stencil that allows you to form a basket, you can also simply tie the free ends of the vine.
At this stage, it is important to take the softest and thinnest twigs. Material up to 5 mm thick is suitable. 3 rods are enough to form the transition. The easiest way to work the basket during the vertical weave step is to place it on a tabletop or on your knees. The tips of the vine are inserted into the weaves adjacent to the uprights, immersed to a depth of about 50 mm.
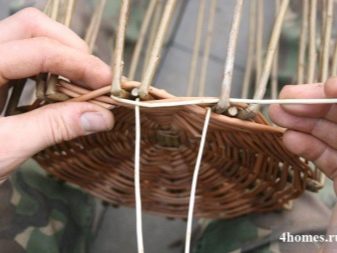
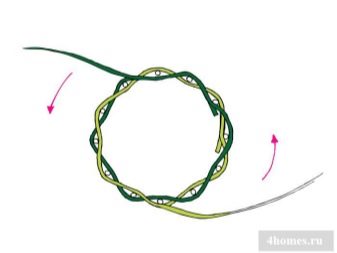
Placed one behind the other, 3 rods sequentially braid the side posts in a twisted way.
You need to move in the direction from left to right, repeating the actions with each vine... The braiding must be tightly tightened, ensuring the product acquires a beautiful shape. A rod in operation is always positioned on top of 3 others. New elements are introduced gradually, in the same direction - usually 2-3 rows of braid are enough for the transition.
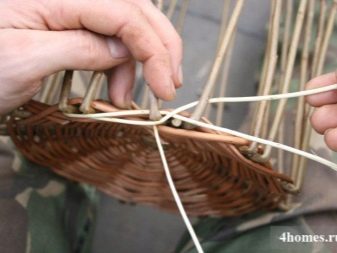
Weaving walls
The process of weaving the walls of the product begins with 4-5 rows of twisted connection. Then the work process proceeds as usual. The walls are formed to the desired height. It is important to consider that with an odd number of racks, you can braid in 1 vine. When they are arranged in pairs, 2 rods are used, with their passage from the inside and outside with crossing after each turn.
If the hoop is still in use up to this point, remove it when the braid height is about 10 cm.
Rods that are too long will crumble and can be cut or left stuck together. The next 3 rows are woven by analogy with the junction of the racks and the bottom. This alternation is maintained until the desired height is fully reached.
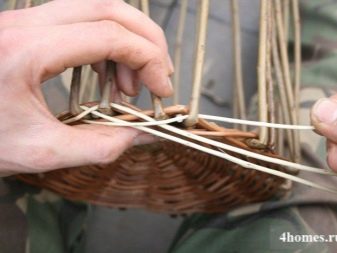
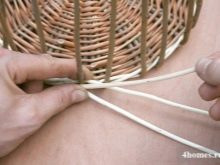
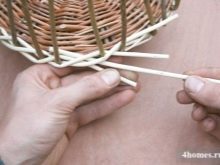
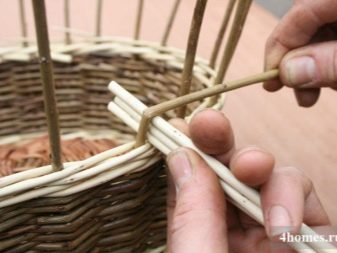
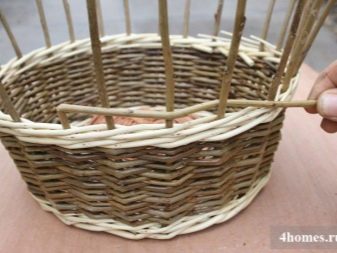
Making a fold
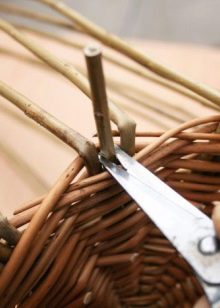
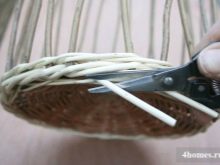
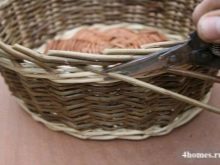
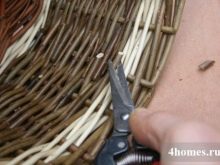
This stage provides for the completion of the main part of the basket in weaving. The extreme rack is bent down, being placed behind 2 subsequent ones. The rest of the elements are hidden in the same way. The ends are first removed inward, then taken out and cut as close to the base as possible. In the end, the entire basket is examined, any protruding edges of the rods are cut off with a pruner - the product should look neat.
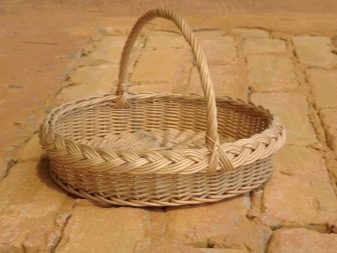
A pen
Making the handle completes the basket making process. Its base is a thick willow shoot, which is cut to the desired length. The ends are sharpened so that they can easily be pushed into the sidewalls. After that, you need to act like this.
- Take 4-5 twigs. They are stuck into the netting where the handle is attached.
- The base of the handle is braided several times. Then the same rods are introduced from the other end.
- The process repeats, new thin and flexible shoots are taken.
- The last rod is stuck in, with its help the base is braided. The vine is pulled into a knot. The free edge is cut off with a sharp knife.
The handle is ready. The only thing left to do is to cover the basket with an appropriate decorative and protective compound. After that, the product can be used for its intended purpose.
To learn how to weave a handle, see the video.
How to paint?
Finishing the vine is an essential step in making the basket. During processing, as well as in the process of weaving, the vine is covered with roughness, microcracks, scratches. Of course, you can leave everything as it is, but if you want to bring the product to perfect condition, you should make an effort for additional surface treatment. The flaw removal process takes place in stages..
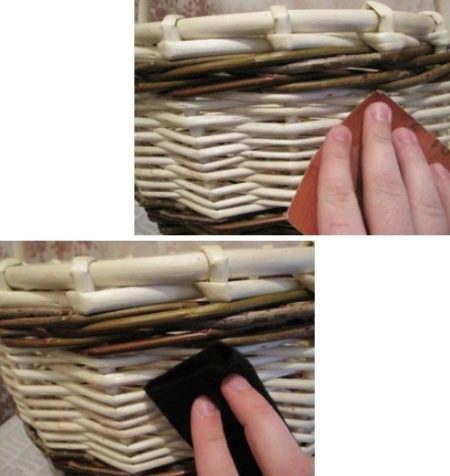
- Grinding... All weaving surfaces are processed with the finest grit sandpaper.The top edge, handle and outer walls must be treated with particular care.
- Polishing... It is done with a soft woolen or woolen cloth. Rub all surfaces until smooth and shiny.
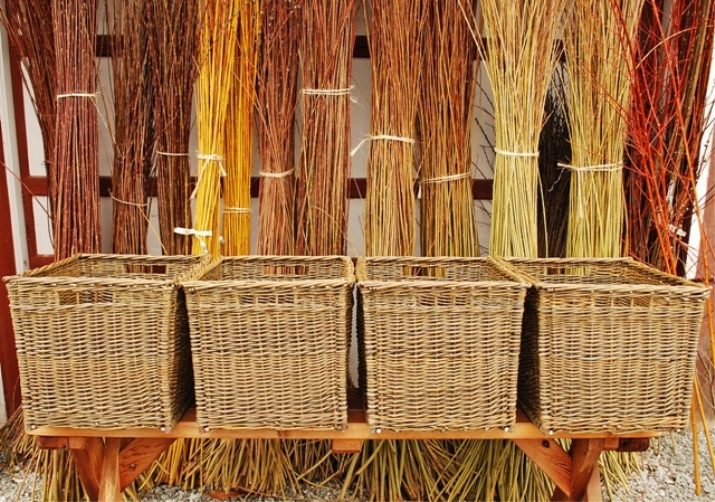
Subsequent finishing involves applying a decorative finish to the surface of the basket. Most craftsmen prefer to use a combination of water-based stain and varnish here. This allows you to paint light debarked vines in almost any color - from noble light or dark to bright orange and red. Staining consists in applying the composition with a brush or sponge; work should be carried out with gloves and a respirator.
The basket is finished with clear varnish.
The product with such a coating has a spectacular appearance, is well protected from water and mechanical damage. A transparent glossy or matt varnish is well suited as a covering for willow vines. The strongest and most durable in this case will be a polyurethane yacht cover, but it is quite expensive. A compromise solution is a water-based, odorless acrylic lacquer.
When varnishing the basket, it is recommended to observe the following recommendations:
- pour the composition into a separate container;
- use a medium-width brush;
- cover areas difficult to process with a thinner tool;
- apply varnish only to the outer sides, part of the bottom and the handle.

Even after applying the decorative coating, the vine continues to dry. That is why varnish is not applied to the inner surfaces of the product. The rods can dry completely after 2-3 months. At this time, you need to keep the basket in a dry place, without contact with sunlight, at room temperature.
It is important to ensure precisely the natural drying conditions.... This will have a beneficial effect on the subsequent operation of the product. If necessary, you can use the basket while it is drying. It will carry significant weight at first. As moisture is removed from the branches, the product will become lighter.
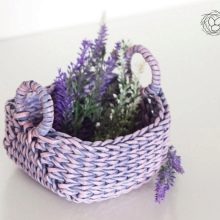
A small decorative basket can be painted in one or several colors.
The work is done with an artistic brush, starting from the bottom, and then gradually rising to the handle. Do not paint on an already varnished basket... The simplest and most natural tinting option is the application of tea leaves, depending on the strength, you can vary the range of the product. In addition, ready-made aniline paints of all colors and shades can also be purchased in the store.