Origami for March 8: creation ideas

Every year, on the eve of March 8, crowds of men run through the streets in search of a gift for their beloved women. They buy perfumes, cosmetics, jewelry and the main attribute of the holiday - flowers. Of course, a woman is pleased to receive a bouquet of roses, tulips or daisies. Their scent allows you to feel the arrival of spring. But after a few days, the beauty of the bouquet fades, the smell disappears, the petals crumble. And no matter how the owner of the bouquets tries to revive the flowers, it will no longer be possible to restore their condition. That is why, as an alternative, it is proposed to try to make a gift for your beloved women in the form of an origami bouquet.
How to make a bouquet?
Origami is home to Japan. In this country, there is even an individual language of flowers, called hanakotoba among the people. It affects all cultural layers, even those that are far from floristry. In simple terms, the language of flowers expresses the feelings of the giver towards the recipient of the gift.
- Rose is an expression of love and tenderness.


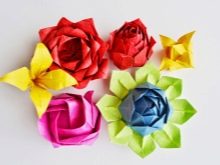
- Bells are an expression of gratitude.
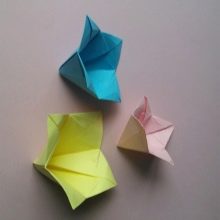
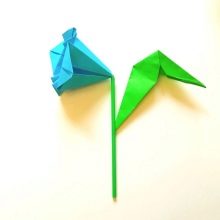
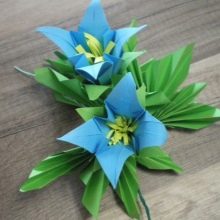
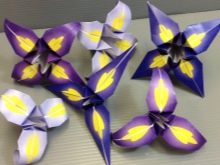
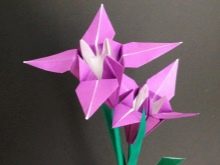
- Iris is an expression of loyalty.

- Chrysanthemums are an expression of openness and truthfulness.



The Japanese are of the opinion that any flower arrangement should take into account the characteristics of the hanakotoba. And after all, any person can use this ancient tradition. Most often, small children make paper crafts. They can make unusual paper cards not only for March 8, but also for other holidays, and not only for mom, grandmother, sister, but also for other relatives.
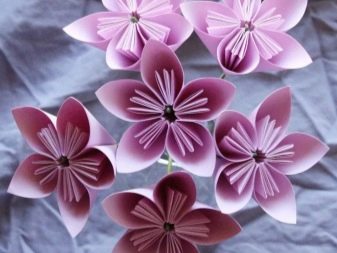
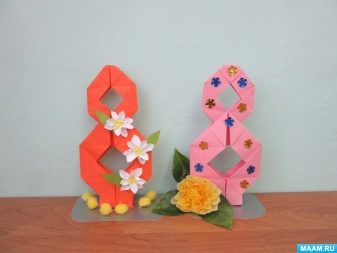
But it is much more unusual when mom receives a paper flower made by her beloved spouse. And let the craft be a little crooked. The main thing is that a person created it with his own hands, put his soul into it.For novice craftsmen, it is best to take lighter origami patterns. And for primary crafts, you should stock up on paper for an A4 printer. That is to say, to hone your skills.


Simple option
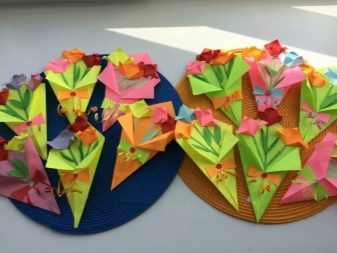
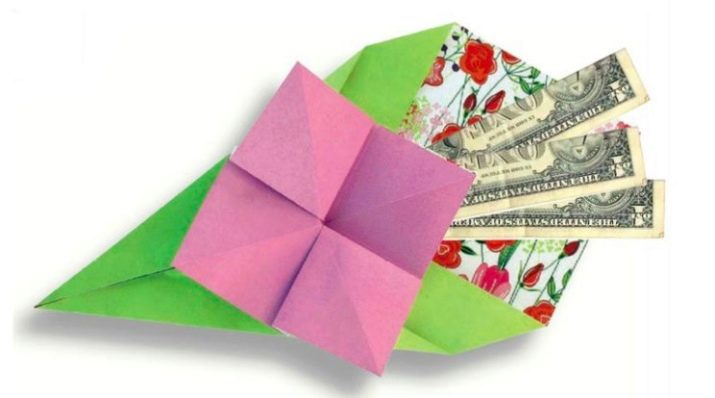
Beginners with origami crafts should start creating simple bouquets. It will be possible to put a congratulatory note, a discount card in the recipient's favorite boutique, or money in them. For work, you will need to stock up on thick paper, but not plain, but with a pattern.
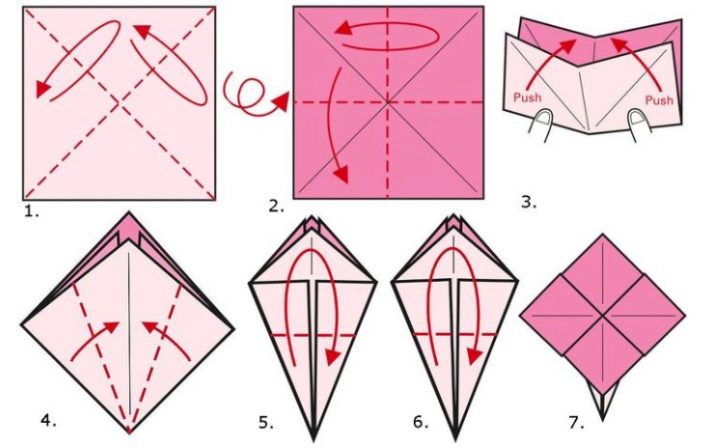
- First you need to make a few squares of pink and green. Their dimensions should be 15x15 cm.
- You need to take a pink square, place it with the wrong side up. Then fold in a diagonal direction. Then open the workpiece and turn it over.
- The sheet must be folded in half in a position from bottom to top and from left to right.
- The base folded in half must be assembled to the center to get a figure - a double square. It must be positioned with a free edge towards you.
- The side corners of the lower layer are bent to the center. Then the figure is turned over and similar actions are repeated.
- The workpiece must be bent in half and opened.
- Next, you need to pull on the upper part of the near layer, thereby lowering it to the lowest point. With this action, the side elements of the base begin to rise. They need to be flattened and smoothed.
Next, you need to make the leaves of the flowers.
- The green square must be placed with the wrong side up and folded diagonally.
- The side corners from the resulting diagonal line must be folded along the fold line.
- Bottom obtuse corners need to be wrapped to the center line of the base.
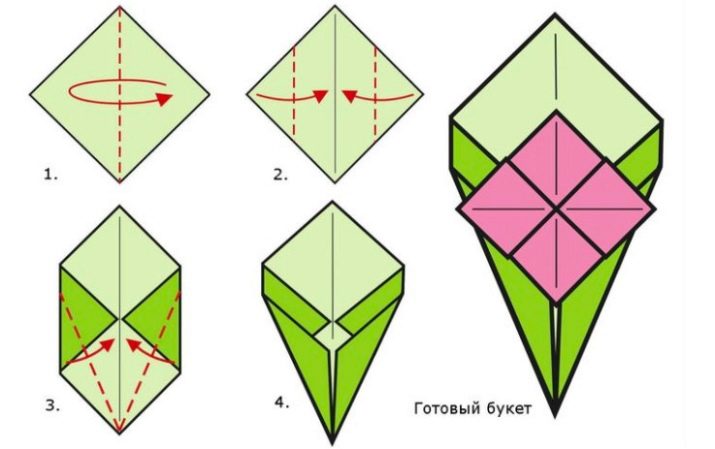
When the individual elements of the flower are ready, you can combine them into a bouquet. In the rhombic hole of the leaf, a flower is glued and set aside until it dries completely.
Such a bouquet can be made in a larger size, and at the bottom you can hide a present, for example, a gold ring, a chain or a brooch.
Pansies
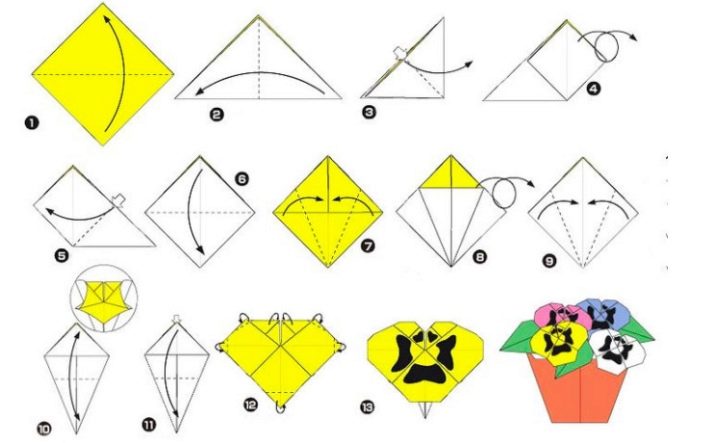
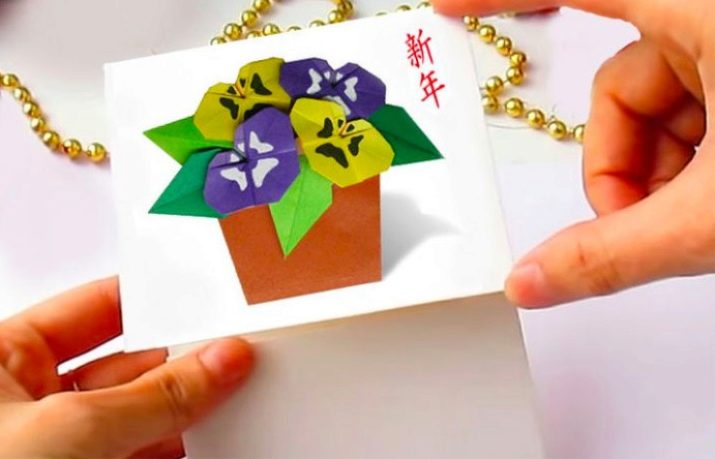
To work, you will need to purchase some materials. You will need 5 multi-colored squares measuring 8x 8 cm, 4 green squares 4x4 cm, a sheet of terracotta shade measuring 15x15 cm, a sheet of A4 thick cardboard, as well as a black marker and white gouache.
- To begin with, take 1 multi-colored square measuring 8x8 cm. Its upper corner is connected to the lower one. The workpiece itself is bent diagonally.
- For the resulting triangle, you need to connect the right and left corners in the middle of the base.
- The top layer of the workpiece must be opened from the inside and flattened to the right side.
- It is required to turn the figure over, then repeat steps 3 and 4.
- The resulting double square should be positioned with a free edge away from you. The middle layer needs to be lowered.
- The right left corner of the workpiece must be bent towards the central part.
- Turn the craft over and repeat step 6.
- The workpiece must be folded in half and returned to its original position.
- The upper part is required to open from the inside and bend the corners.
- Add the rest of the squares in a similar way.
- Around the circumference of the resulting core, it is required to draw spots, which are a distinctive feature of the pansy flower. To design light buds, you need a black marker. The dark buds are adorned with whitewash.
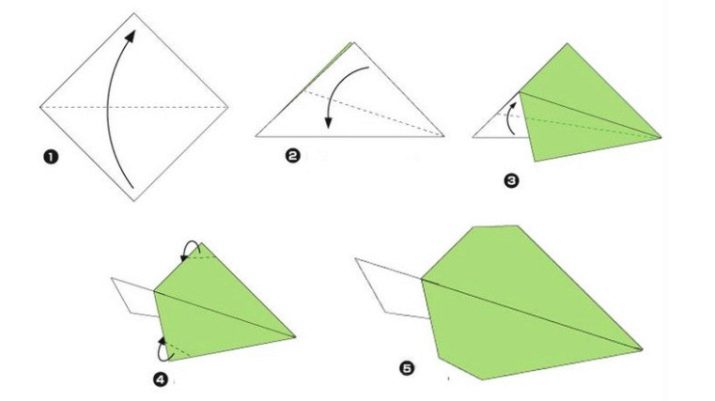
Now you need to prepare the leaves. This is exactly what the green squares were required for.
- A green square is taken, its lower corner is aligned with the upper one.
- The nearest layer of the collapsed triangle needs to be folded back.
- The reverse side of the leaf is folded in a similar way.
- The lower part of the workpiece must be folded in half.
- It is necessary to bend the corners and round their shapes.
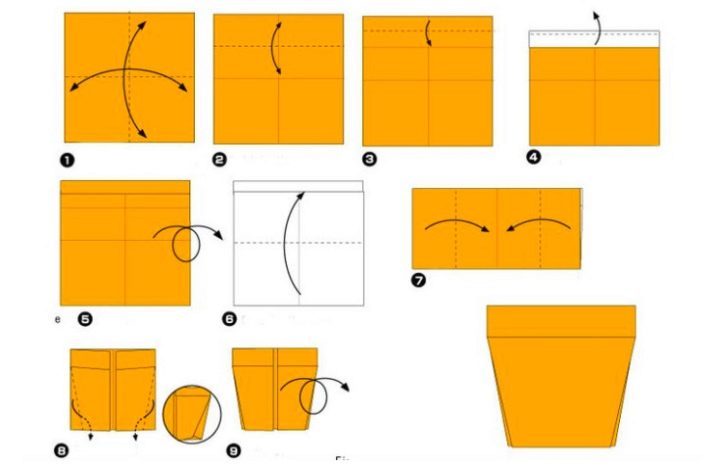
It remains only to make the pots.
- A terracotta-colored square is taken, folded in half from bottom to top, from left to right. After which the sheet returns to its original position.
- The upper half of the sheet needs to be bent to the middle, characterized by a fold.
- To the resulting line, you need to lower the upper edge.
- It is necessary to return the fold to the top by making a slight shift.
- It is required to turn the workpiece over.
- The lower part of the base should be lifted up.
- Bend the left and right sides towards the middle.
- Bend the bottom corners of the planter slightly to the middle of the workpiece, not reaching its center.
- The workpiece must be turned right side up.
It remains only to assemble the individual elements into a finished craft.
Tulips
For work, you will need to stock up on double-sided tape, colored paper, glue, scissors, skewers and green corrugated paper. Colored paper should match the color of the tulips. Ideally, go for a red or orange hue.
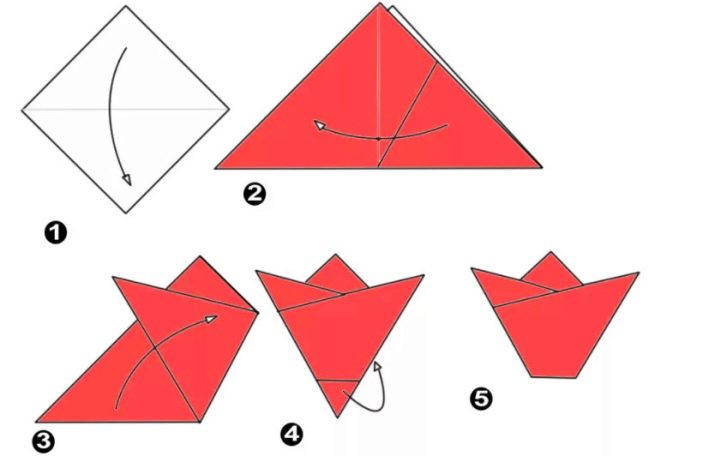
- It is necessary to cut a square with dimensions of 15x15 cm from colored paper.
- Fold the square diagonally, then unfold.
- In a similar pattern, you need to fold the square on the other side, creating 2 diagonal lines.
- It is necessary to turn the sheet over, and then bend it in half.
- Then the base is turned over, the diagonal lines should be connected together to form a triangle. The lower corners of the resulting triangle must be bent to the central part of the base. Then the craft is turned over to the other side to do the same.
- The upper parts of the shape should be joined together. This will create a square shape with a diagonal fold.
- The upper right side of the base must be folded to overlap the centerline. The same must be done on the other side. The pocket obtained at the top needs to be opened in order to insert the right side of the blank into it.
- The base must be turned over and similar actions must be taken from the reverse side. As a result, you should get a workpiece with a central hole. It is necessary to blow into it so that the tulip bud opens.
- The upper petals need to be bent and slightly protruded.
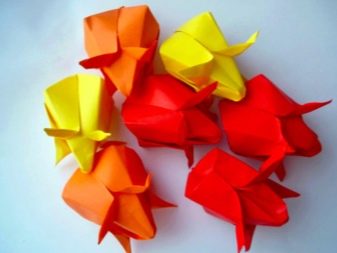
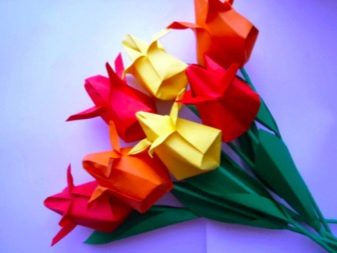
Having made a few buds, you can start preparing the stem. For this, a skewer is taken and wrapped in corrugated paper. Elongated leaves are cut out of green colored paper, which are fixed on a skewer.
The last stage of work is to put the finished buds on the stems.


Roses
Rose is a symbol of love. And the origami rose is a symbol of eternal love.
- First of all, you need to take a sheet of paper 21x21 cm in size, fold it diagonally and in half. Next, expand the square, redirect 1 of the vertices to yourself. Then fold the side pockets by joining them along the center line.
- The workpiece must be positioned with its open face towards you. Close it to the right, while capturing only the layer on top. In this position, a pocket is formed on the left side, where the combined lower and upper corners of the base are inserted.
- The workpiece must be turned over in the opposite direction and similar steps must be taken.
- The bud should be expanded, put the index and thumb inside the holes obtained in order to twist the buds around the axis. The inner part must be rolled into a tube so that the workpiece tightly holds its shape. The opened petals need to be slightly curled.
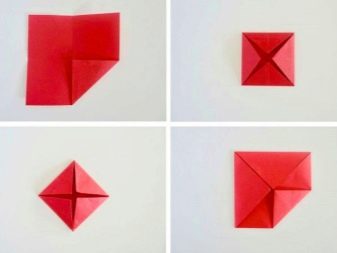
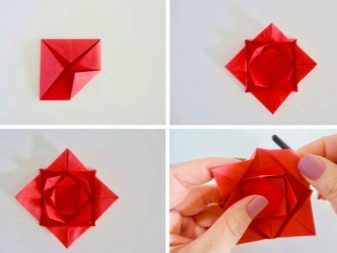
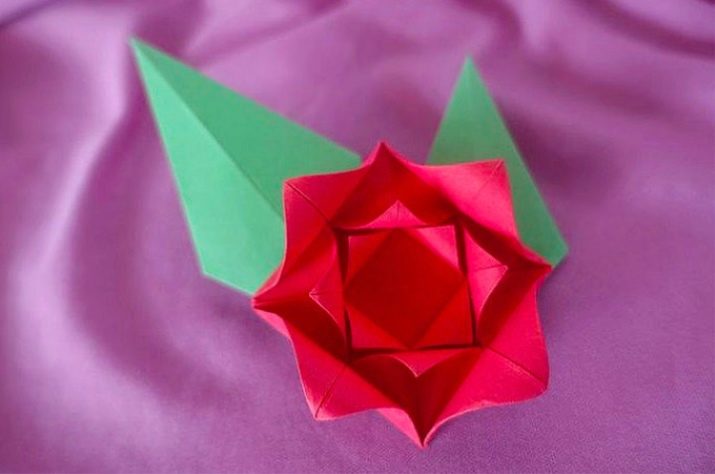
For the stem of a rose, you can take a skewer wrapped in corrugated paper and fix the green leaves on it.
Postcard ideas
3D postcards look quite interesting and unusual. To create them, you need to stock up on some materials, namely, multi-colored paper, glue, pencil and double-sided tape.
- It is necessary to cut 7 squares of colored paper measuring 10x10 cm.
- The squares are folded in four. One lapel is folded diagonally, turned over to the other side, the second lapel is folded on top of it, a triangle is formed. Next, you need to cut out the shape of the petal.
- Having expanded the base, you need to remove one petal from the prepared flower. The outer petals must be connected together with glue. The rest of the flowers should be cut out in a similar pattern.
- Next, you need to attach a small piece of double-sided tape to the petals and combine the buds with each other.
- It is required to cut leaves from green paper, glue them to flowers.
- A cardboard 25x15 cm is taken, folded in half. A folded bunch of flowers is placed inside the postcard, secured with double-sided tape.
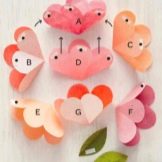
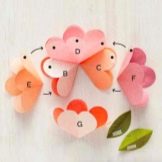
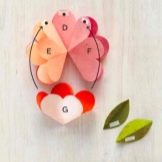
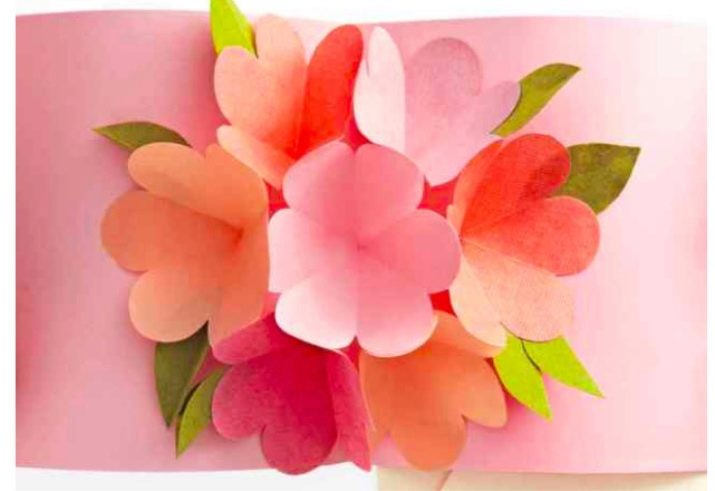
When the recipient of the gift opens it, a beautiful meadow of volumetric flowers will appear in front of her.
Modular origami
On March 8, you can make not only postcards with flowers. By showing your own imagination, you will be able to create an indescribable masterpiece. However, today postcards "dresses" are in great demand. They are made from colorful paper that can be purchased at any stationery store. The main thing is not to rush. All work on assembling the craft should proceed in stages. Having skipped at least 1 step, you will have to start the craft all over again.
- It is necessary to place a 10x10 cm square with the wrong side up, fold it in half horizontally and vertically, then open it.
- Bend the right and left edges to the center fold line. It turns out the shape of the doors.
- It is necessary to turn the bent workpiece over, fold its edges to the center, and then turn it over again.
- It is required to open the blank flaps closest to you. Tuck the top edge by 1.2 cm.
- Bend each side of the bent part so that the extreme right and left sides get an acute angle.
- The figure closes again to the central part. Diagonal folds are made from the bottom side, then the craft is connected in half.
- It is necessary to raise the upper part of the craft again, moving 1 cm from the previous line.
- Side folds define the waist. The protrusions, or rather, the corners, must be bent, and then turn the products over to the front side.
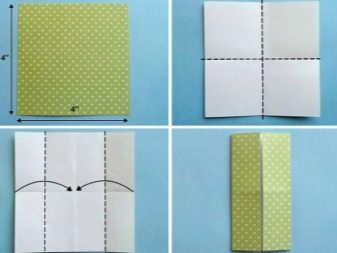
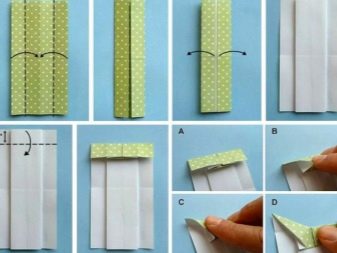
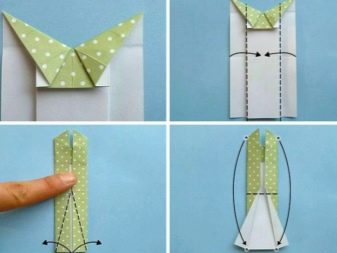

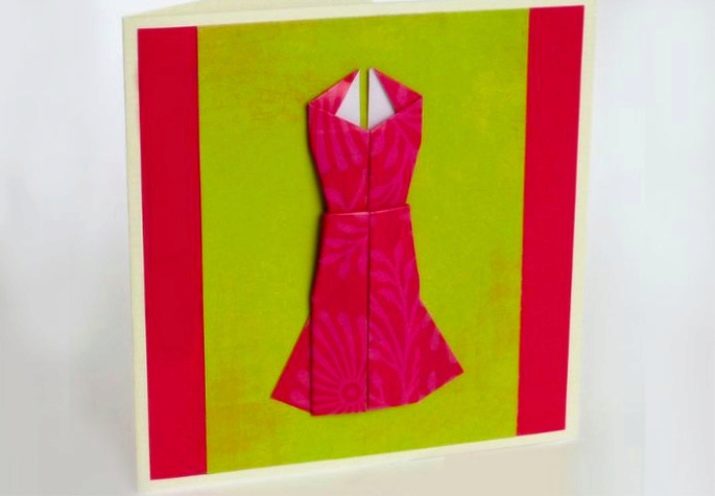
At this stage, the dress is ready. It can be glued to cardboard in the form of an eight - a symbol of the holiday or a heart with voluminous flowers.
Examples of
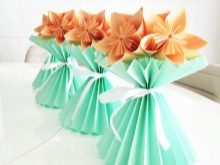
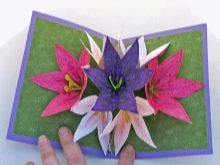
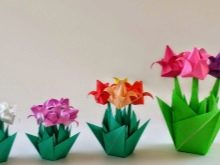
March 8 is the time of male exploits. Washing the dishes, cleaning the house and cooking dinner is no longer interesting. Women with great pleasure receive gifts made with their own hands by their spouse, son or brother. And here are some ready-made examples.



A master class on creating origami tulips in the video below.


