How to make a gift for mom out of paper?

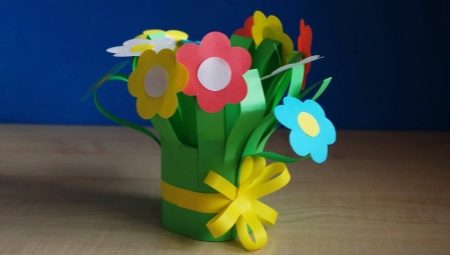
Mom is the main person in our life. If you want to please her and make a nice gift with your own hands, surprise her with an original paper gift. Such a surprise will make her cry of affection, as you put your heart and soul into it.

Required tools and materials
To make a gift from paper, you can use not only this material, but you will also need additional tools. Here is a sample list of the required accessories.
- Paper and cardboard... This is the basis of the whole surprise. The stores sell a huge amount of such materials in a wide variety of price categories. You can combine different colors, textures, and there are even iridescent specimens. There is cardboard, similar in texture to fabric or covered with sequins. Colored paper is easy to cut and is often used as a base for flowers, butterflies and other figures. White paper will serve as a background for a postcard or applique. Both cardboard and paper can be used to make a wonderful DIY gift.
- Colored ribbons... They can also be used by decorating paper and cardboard elements on top. From ribbons, you can twist a bow or fold them in the form of a basket, secure with glue, and glue paper flowers on top.
- Stickers. You can decorate the finished surprise with beautiful stickers. You can get them from office supply stores. It is better to choose something festive: flowers, balls, hearts.
- Beads and rhinestones. You can use beads, beads or rhinestones to make the centers of flowers or eyes for animals on your gift. These elements will look interesting on the composition, emphasizing its originality.
- Scissors. High-quality sharp scissors will help you to work neatly with materials and not spoil them. It is better to choose this object with pointed ends, so that it is convenient to cut out small details.
- Glue. Without PVA glue or a glue stick, you are unlikely to be able to fasten the details of the gift. If the surprise is all about paper, then a regular pencil should be enough. Thicker and larger parts need a strong adhesive, such as PVA.


Step-by-step instructions for creating a gift
What can you do as a gift for your beloved mother? There are quite a few options, but we will consider in more detail on the postcard, applique and origami. Learn how to do these cute things step by step.


Postcards
The postcard is a compact and pleasant surprise. Mom will be able to put it on a work table or chest of drawers and periodically remember you, looking at this picture. You can put all the love and tenderness into this craft, as well as express them in words in congratulations. The postcard does not take up much space and can be stored for many years. The instructions for its creation include several steps.
- Decide on an idea. What will your postcard look like? Expand as a panorama or simply contain a beautiful cover and content.
- Prepare the base. It is better to use thin cardboard for these purposes to give it strength. Fold it in half and make cuts in the fold if you want to make a panoramic postcard. Turn the cuts inward, and glue the outer side with a layer of paper so that no cracks are visible.
- Glue the postcard elements. This stage is the main one. It is important to place all the elements neatly as intended. Do not feel sorry for the glue and try to do everything efficiently the first time.
- Make a congratulatory inscription. Consider which holiday the surprise is being made on, and write pleasant words and congratulations. It's good to say how much you love your mom and how much you wish her well.

Applications
If there is not so much time for a gift, but you really want to please your mother with a surprise made with your own hands, then grab the applique. This craft can be of various subjects.
If you present it in honor of the New Year, then images of Christmas balls and garlands will be appropriate, and on March 8 it is better to attach pictures of flowers and chocolates to the applique.


Beautifully cut from red velvet paper, the heart will delight your mother and tell about your feelings for her.
The step-by-step instructions include several steps.
- Think an idea - what exactly will be shown on your applique. The whole creative process begins with an idea.
- Prepare a background for your creation. It is better to choose it in contrast to the main elements of the applique, so that they look more advantageous.
- Sketch with a pencil. It is much more convenient to attach appliqué elements over easy-to-erase markings. This way you will definitely not be mistaken when creating your masterpiece. Draw all the elements on the back of colored paper or cardboard so that you can cut them out.
- Cut out all the elements from paper and cardboard. Try to do this neatly and clearly so as not to spoil the material. The smallest pieces of the applique are best cut with nail scissors.
- Glue them onto the background you prepared earlier. The final stage of the applique is to glue its elements onto the sheet. Decorate the top of the entire composition with glitter or stickers for a festive look.


Origami
Crafts are of different complexity. One of the tricky options is origami surprise. This is the Japanese art of paper folding of various figures of animals, birds and even flowers. Using this technique, you can fold a whole bouquet as a birthday present for your mom.


There are a lot of types of figures, but you should consider the following step-by-step compilation of one of the most popular figures - a crane:
- prepare a square sheet of paper (you can color);
- fold it into a triangle - that is, pull one vertex of the square to the opposite and bend the fold line;
- fold the resulting triangle in half again;
- turn out the triangle, and press its corner to the bottom of the resulting figure - you get a rhombus;
- unfold the sheet and repeat the same on the other side;
- put the diamond in front of you and press the sides to its central axis, as if you were folding the nose of a paper plane;
- wrap the top of the rhombus along the line of its folded sides;
- unfold the resulting shape again into a rhombus - now you have the necessary fold lines for subsequent actions;
- pull the rhombus up by the bottom corner, fold it along the fold lines made earlier;
- repeat the steps from the opposite side;
- you should have a rhombus with sharper top and bottom corners;
- fold the side edges of the rhombus to its central axis again - perform this action on the back side in the same way;
- open the rhombus and bend its lower vertices inward, then open it again on the previous side;
- pull out the former tops of the rhombus a little, and bend one of them forward - this is the head of the crane; pull the wings with your hands - they should open;
- the crane is ready - you can paint it, draw the eyes and beak, or you can thread a rope through the back to decorate it with a chandelier or a window opening.

Origami is a popular hobby now that develops your intelligence and helps you create something beautiful.
An origami figurine gift will definitely please your mom.
Interesting ideas
In fact, there are many ideas for a paper gift. It's quite easy to make them, and the surprise will come out just wonderful. We bring to your attention several options for such crafts that you can give your mom with or without him.
- Collage. Use old magazines to cut out photos and make collages. If your whole family is going to the sea soon, then glue photos of your family members with your mother at the head on the background of the sea beach. You can also make a funny surprise: find a picture of your mom's dream car and paste a photo of you and your mom in the driver's seat. She will laugh heartily at such a craft.

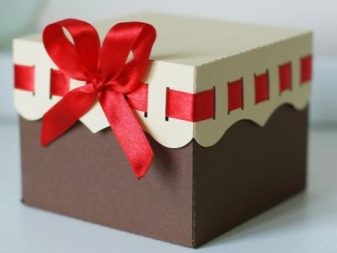
- A beautiful box. Take an old shoe box, for example, and cover it with paper or even wallpaper. Decorate the inside too: velvet paper is perfect for decorating the inner layer. You can make dividing compartments out of cardboard.
Such a gift is very practical: your mother will be able to store various trinkets and trifles in such a box.


- Envelope. Folding an envelope is as easy as shelling pears: look closely at how a regular mail copy is made and repeat it in practice. Make it out of colored paper and cardboard, and decorate the top with appliqués, stickers and sequins.

- Drawing. Draw a beautiful picture on a sheet of paper or cardboard, you can decorate it with applique elements. A drawing with volumetric inserts will look original.

- Notebook. Cut small sheets of paper and staple them with a stapler, you can pre-make a cover from cardboard. Decorate the top of the notebook with a beautiful drawing or the same applique.

- Paper ring chain... Cut small strips of paper and glue the first into a ring. After passing another strip through the first, close it into a ring too. Gradually, you will get a long chain, the links of which can be made in all colors of the rainbow.

Here's how many paper crafts you can give your beloved mom as a gift. Feel free to experiment to surprise her. In any case, mom will be very pleased.
For how to make a paper tulip for mom with your own hands, see the next video.


