How to make a jute napkin holder?

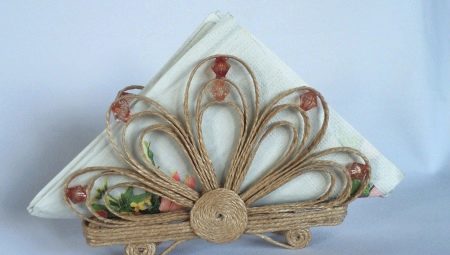
Napkin holder - an integral part of any kitchen that performs not only a functional, but also a decorative function. This element can be created from various materials, including jute twine.


Peculiarities
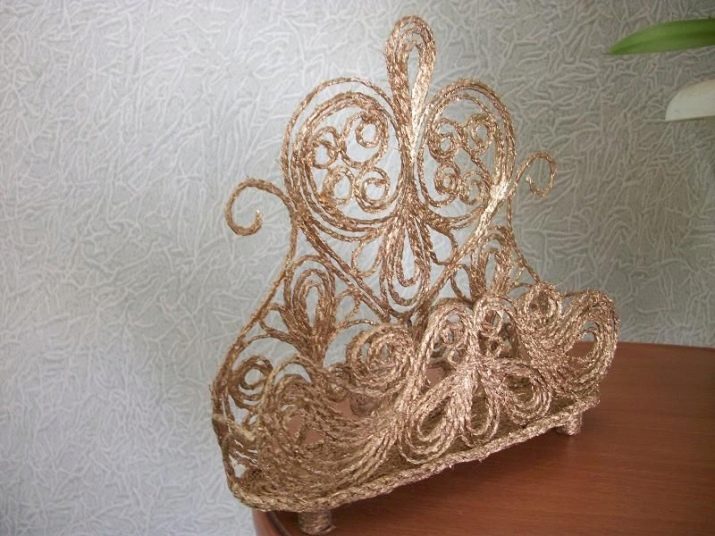
Jute filigree is a relatively new direction of needlework, which allows you to create voluminous openwork work with an abundance of curls, droplets and snails from a simple thread. The material itself is a natural fiber, which is easy to work with, it is absolutely safe for humans. The technology is used to create a variety of decor, including napkin holders, and is suitable even for novice craftsmen.
As a rule, in the final, openwork designs are decorated with shiny beads, glass stones or rhinestones. The finished work can also be coated with colorless varnish.


Materials and tools
For the manufacture of a jute napkin holder, as a rule, in addition to the twine itself, the most common materials and tools are required, and so are present in any household. It usually goes about Moment or Titanium glue, sheets of white stencil paper, a file, scissors and wooden sticks used for the frame.
I must say that the jute threads themselves can have a natural shade or be bleached. It is also important that the glue is transparent and does not stick to the file. Pieces of thick cardboard are sometimes used for the base. A knitting needle can also be used instead of a skewer.


Manufacturing technology
The simplest master class, allowing you to make a do-it-yourself jute napkin holder, will require the use of twine, persistent Master glue and a pair of wooden skewers. To create stencils, you will need sheets of plain white paper, a pencil, a file, a ruler and a compass. It will be more convenient to work with small parts with tweezers. Since the work has to be filigree, it is better to use nail scissors instead of the usual ones. The finished napkin holder will be decorated with half beads.
By the way, before starting weaving, it is recommended to grease your hands with ordinary cream, which will allow them to be quickly cleaned of glue later.


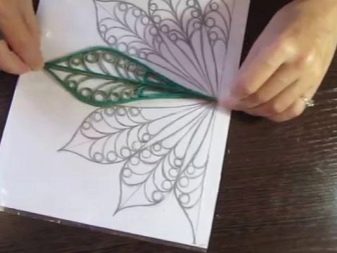
The work begins with what is created on white paper stencil napkin holder bases. Despite the fact that you can download ready-made schemes on the Internet, it is much more interesting to create them yourself, since this process is not particularly difficult. A rectangle with sides equal to 14 and 2 centimeters looms on the sheet.
Inside the figure an ornament of curls and loops is drawn, which is best done symmetrically about the central axis. On top of the base, on each side, a triangle is drawn, which are to become "legs".
The stencil for the sides of the napkin holder is drawn using a compass, as it should look like a semicircle. From the inside, everything is again filled with a pattern that "echoes" the base.


The finished drawing is placed in a file, after which the jute the threads begin to glue along the lines of the stencil. First, the base is processed. Then, for the sidewalls, large glass beads are prepared, around which two twine turns are twisted. Large parts of the stand are glued with jute over the file. The half-beads are fixed with ordinary glue in such a way as to take the central place in the composition. At the end, the legs are created in the same way.
When all the curls and loops are ready, they need let it dry, then carefully remove it from the file and clean it from excess glue. Wooden skewers are trimmed to a length of 14 centimeters and then pasted over with jute. When they are dry, the parts will need to be attached to the sides from the inside out. Further all other components are interconnected: base, a pair of side surfaces and 4 "legs". The finished napkin holder is decorated with miniature beads.


When creating schemes and stencils on your own, it is recommended to focus on your own imagination. In the event that the master takes ready-made blanks, they will first have to be transferred to paper, which will take time. For novice craftsmen, it is better to start with the simplest drawings, and then move on to more complex compositions - for example, a napkin holder with a slightly abstract image of a peacock. In order for the structure to turn out to be colored, it will have to be painted with acrylic paint and dried before the construction begins.
For small template parts, from which a large drawing is made, it is recommended to use pieces of jute 20 centimeters long.


A more complex master class makes it possible to make jute stand in the form of a chestnut leaf... In this case, for work, you will initially need threads of emerald, brown and gray-green colors. The technology of needlework is always unchanged: a template is drawn with clear lines on a white sheet of paper, which is then inserted into the file. The base is coated with transparent glue, after which the threads are laid out on it. The contour of individual blanks is drawn with an emerald twine, and the inner veins - with a gray-green thread.


It will be much easier to create separate leaf-like components of the back surface of the napkin holder, and then connect them at the base into a single whole with jute circles, by analogy with a real maple leaf. The front of the stand is smaller and looks like a small mound with a decorative stone on a round base. The front and back walls are connected by means of a base.
You can make it if you wrap 4 wooden sticks with twine, and then glue them together.At the end of the construction work, 4 legs are attached.


Beautiful examples
It must be said that the sides of the jute napkin holder can be the same or different. In the first case, the structure should be placed sideways, and both surfaces should be decorated in the same way. In the second case, one of the sidewalls becomes the back surface, and the other - the front. The back surface is large and, as a rule, is formed on a large scale: an abundance of snails and curls. The front surface is made simpler in terms of shape and size, but can be decorated with beads or rhinestones.

Despite the fact that for a jute napkin holder, a base reinforced with wooden sticks will be enough, you can strengthen the frame by adding on the sides along the arc, for example, made of bendable plastic or wrapped wire, on which the openwork sidewall will be fixed.
These arcs must be pre-wrapped with the same jute as the bottom of the stand.

For information on how to make a jute napkin holder, see the next video.


