Do-it-yourself beautiful plywood napkin holders

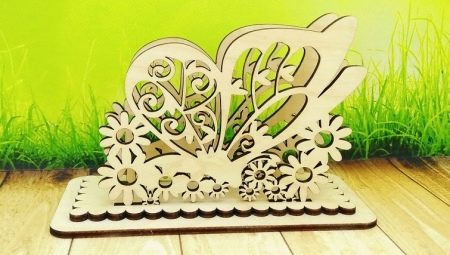
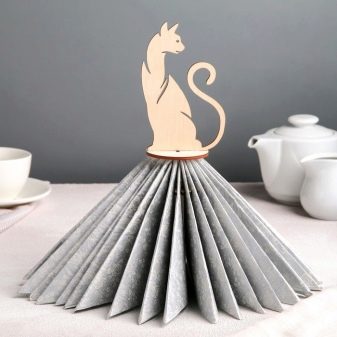
Napkin holders are considered not only an obligatory attribute of any festive table, but also a decorative piece of kitchen interior. They can be purchased ready-made in stores, or made with your own hands from plywood. The technique of making such accessories does not require special experience, it is enough to decide on their colors, shapes, and also prepare drawings.

Peculiarities
The plywood napkin holder is an essential item for both everyday and festive tables. Previously, paper napkins used plastic or glass cups, in which they were laid out in the form of a funnel. Today, serving napkins in this way is considered a sign of bad taste and can spoil the overall impression of the owners of the house. The napkin holder made of plywood, in addition to its main purpose, also plays a decorative role, being an original decoration of the table. In order for this accessory to look harmonious with other serving items, it must be selected individually, taking into account the uniform style of dishes.
The very first plywood napkin holders appeared at the beginning of the 20th century, but at that time they did not differ in a special design. Now on sale you can find many beautiful models of open, closed type, as well as with curly stands. They are usually placed on the table at the rate: 1 item for 4 persons.
Closed napkin holders are usually installed in bathrooms and bedrooms.


Despite the fact that this decorative element is presented on the market in a huge assortment of models, many people prefer to make it with their own hands from plywood.This is due to the fact that the process of making a napkin holder takes a minimum of time and does not require any special knowledge and experience. To make such a product with your own hands, it is enough to read the description of working with plywood, especially when it comes to sawing out parts, during which you cannot rush.
The main feature in the manufacture of napkin holders from plywood is that the material must be cut out by holding the jigsaw strictly at an angle of 90 degrees, while the tool must always move straight from top to bottom. All parts (leg, bottom, sidewalls) must be cut exactly along the marked lines.
If you follow all the instructions correctly, then as a result you can get an original accessory for the dining table.


Tools and materials
Before you start making a napkin holder, you should prepare the material and basic tools. For crafts, you can use plywood with a thickness of 4 mm. If the design provides for the presence of a base, then you will have to separately buy plywood with a thickness of about 20 mm. When choosing plywood sheets, special attention should be paid to its quality (it is best to give preference to grades 1 and 2), absence of defects, shelf life. As for the tools, you will need a set consisting of:
- pencil;
- sandpaper;
- jigsaw;
- cardboard;
- varnish for wood;
- file;
- wood glue;
- brushes;
- rulers;
- electric burner.


Interesting ideas
When making plywood napkin holders with your own hands, you can use various design ideas, but experts recommend that beginners choose models of simple shapes with a minimum number of curls. Besides, before starting work, you will need to prepare drawings, according to which it will be possible to make templates for cutting out parts. Drawings must necessarily contain the dimensions of the future product. To simplify the task of creating templates, you should draw a sketch of a napkin holder on paper. This can be done manually if you have experience in drawing, or you can print ready-made from the Internet.
Today, several models belong to the most popular models of napkin holders.


Dripping Napkin Holder ("Bloody")
Products in this design are considered to be quite spectacular. Most often, white is chosen for the background of napkin holders. The side walls of the product have an uneven edge, so if you put in red napkins, you can get the effect of bloody smudges.

"Ballerina"
A plywood napkin holder in the shape of a graceful girl is often referred not only to the Ballerina lineup, but also to the Dancer, Lady with a Fan, and Snow Maiden. The main feature of these napkin holders is the holder. It is positioned in such a way that lined napkins around the bottom of the “plywood lady” silhouette form a skirt. You can also make napkin holders in the shape of a girl with a dress. Ballerina napkin holders are designed for 10-30 napkins, they have an original style and give the interior of the room an airy, complete look.
For the manufacture of this model, minimal skills of working with a jigsaw are required, since its scheme is simple.


"Country chair"
Outwardly it resembles a real piece of furniture, only it has less functionality and small dimensions. This model can be placed on the everyday dining table.
Sawing parts from plywood is fast because the parts are simple in shape.

"Ship"
This type of napkin holder is usually chosen by people who like adventure. They are made of laser-cut plywood; instead of sails, napkins of any color are fixed on the stands.


No less interesting look in the interior of kitchens and holders of napkins "Bouquet", "Peacock", "Mouse" and "Doves". The only thing is that it is difficult to make them on your own, since complex circuits and the ability to work with the tool are required.


Varnishing
In order for do-it-yourself plywood napkin holders to have a beautiful look and to extend their service life, the surface of the product must be varnished. This is done with a wide, flat brush with a long synthetic bristle. It is advisable to apply varnish slowly so that streaks and noticeable scratches do not remain on the surface of the decor item. It is worth noting that it is necessary to varnish not only all visible parts, but also the entire product as a whole. To slightly muffle the shade of the napkin holder, it is recommended to use matte varnish, and for brightness - glossy.
Some novice masters use a sponge instead of a brush when applying varnish, but this is a gross mistake, since the sponge “follows” strongly. It can only be suitable for creating individual decorative effects.
In addition, it is worth noting that the varnish must be applied in several thin layers, and not one thick one.


What to use for decoration?
After the plywood napkin holder is ready, you can proceed to the most crucial moment - decorating it. To do this, you can burn out a beautiful ornament on the product using an electric burner (having previously drawn simple patterns with a simple pencil) or use the decoupage technique. Acrylic-painted napkin holders also look gorgeous.
The decoration with rhinestones and decorative stones is also considered interesting.


Acrylic paints
Most craftsmen use acrylic painting when decorating napkin holders. For to make this type of decorative coating, you must have brushes, lint-free rollers and spray cans. Plywood is first covered with a thin layer of paint (making a background for the future composition), moving the brush along the wood fibers. Then the product is covered with a primer, dried and the pattern you like is chosen. It can be applied through a stencil or with a brush, having previously drawn the contours with a pencil.
Ribbons with bows can be placed at the ends of the product. To give the napkin holder a more dramatic look, you can create highlights with gray paint. The inside of the product must be stained. As for the color design, you can choose any shades for plywood napkin holders, taking into account not only personal preferences, but also the design of the room, the season. For example, a green palette is recommended for products that will serve as a decoration for a festive New Year's table, for the spring period, pastel-colored napkin holders are appropriate, but in summer you can decorate products in juicy shades.


Decoupage
To use this decoration technique, you will need to prepare brushes, multi-colored paints (for the background coating), napkins with patterns and varnish. First of all, the workpiece is carefully sanded and wiped from dust, then you can proceed to its decoupage in the chosen style. The original solution is the design of the napkin holder in the Provence style. After priming the plywood surface, varnish-glue is applied, then a fragment of the decoupage card is applied. It must be smoothed with your fingers from the center to the edges. Then everything is re-coated with glue.
Once the glue dries, you can start decorating the background. With the help of small pieces of foam rubber, the lavender-colored paint is applied to the surface of the napkin holder with tamping movements. Without waiting for the paint to dry completely, you can immediately add other shades, while making sure that the color transitions are smooth. It is recommended to cover the edges of the product with darker tones. The result is a very stylish decor item.
Napkin holders with pictures printed on thin paper also look original.


Electric burner
For those who know how to use an electric burner, great opportunities open up for creating original decor on plywood. Thanks to this tool, you can decorate not only the main part of the napkin holder in the form of patterns consisting of fine lines, but also its edges. This decoration technique is ideal for those who draw poorly, but love pyrography. To create a beautiful ornament, it is enough to purchase ready-made stencils and patterns for wood burning in the store. On napkin holders, you can burn flowers, animals, hieroglyphs, as well as various inscriptions.


Varnish mixed with stain
Novice craftsmen can decorate napkin holders with varnish mixed with stain - as a result, spectacular products are obtained. Such a coating is applied to the finished product with a glue brush, while the surface should be pre-treated with sandpaper and degreased. This decoration can only be done on a perfectly smooth surface. Before applying the stain mixed with varnish, the plywood must be treated with a damp sponge. After the coating dries, you can see the color saturation, if it is insufficient, then another layer is applied.


You can find out more information on this issue in the video below.


