How to make a wire crown with your own hands?

Almost every girl dreams of becoming a snowflake or a princess as a child, having received a beautiful ball gown and a crown. And some would like to have a graceful tiara of the snow queen. Of course, not all little princesses, snow maidens and elven characters have chic precious crowns, but making it with your own hands is twice as pleasant and subject to even the youngest beauty. Let's see how easy it is to make a wire crown with your own hands.
Recommendations
Of course, for little princesses who have decided to make a crown for the New Year themselves, it is better to ask adults for help. All work should take place under their supervision. Especially those moments where you need to work with sharp tools and glue. And not every girl can twist a thick wire.
All the materials you need can be purchased at handicraft and sewing stores, and a glue gun is sold at any hardware store.


Tools and materials
For a magical craft, you will need the following inventory.
- Coarse thick wire for the base (about 0.8 mm).
- Smaller wire (approx. 0.3 mm).
- Old unnecessary bezel - it is desirable that it be unadorned, remove them as needed.
- Beads and beads.
- Glue gun and pliers.
- Scissors, satin ribbon and varnish.
- Ruler.


Execution technique
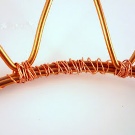
First you need to develop base for the crown. To do this, measure 50 cm of a large wire and cut it off, fold it 3 times and twist it. Then we form a circle and connect the two ends of the resulting wire. Let's put it aside for now. We measure another 24 cm of thick wire and twist it 2 times, we need 5 such parts, then we need to form "ears" for each of these parts, we do not connect the ends.We try on these details for a round base. For convenience, we make marks with varnish where they will be located. We fasten these parts to the base according to the marks.
You can fix them with hot glue for reliability.


After we have made the base of our crown, we need to decorate it. To do this, we need a thin wire on which we need to string one large bead. Then you should fix it at the top of the crown, “on the ears”. And, of course, do this with each crown tip. What follows is the best part about making a crown. We will decorate it with multi-colored beads and beads. Take a piece of thin wire of a suitable length and type the beads you like on it. Starting at the top, wrap the beaded wire around the entire corner. Do this manipulation with all corners, remembering to secure the end and the beginning of the wire.
After that, start decorating the frame in the same way. Then you can use various decorative flowers and beads and use glue to decorate the frame with them. If you made a small crown according to the instructions, and did not measure the diameter of the head to make it large, then take the bezel, wrap it with a satin ribbon, beads and beads of the same color scheme, fasten the ends at the base of the bezel. After that we arm ourselves with glue and fix the crown on the rim. To keep it more secure, we will fix it with a satin ribbon.


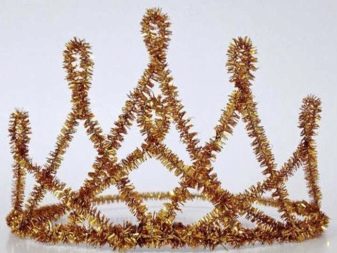
In a similar way, you can make a crown out of chenille wire, then it will look even more spectacular, but at the same time it will turn out to be much cheaper.... In this case, you will not need so many beads, because the wire itself is very beautiful. Instead of attaching the crown to the bezel, you can use an old hairpin, having previously cut a circle out of cardboard of the same diameter as the crown itself. And then attach the hairpin on one side of this circle, and the crown on the other.


There is a more complex step-by-step master class on making a crown - beaded tiaras. For her, you need to take an unnecessary bezel as a basis. The diadem itself consists of 15 elements. It is better to take rondel beads. A piece of wire with a diameter of 0.3 mm is fixed on the rim in the middle. Next, we string 15 beads on it, which can be alternated in size. We also fix the other end on the rim, you should get a kind of drop or arc. Next, we string 11 beads onto the wire, having first brought the wire to the center of the arc, we form an arc from this part.
The third element should already consist of 9 beads, because we fix the wire at the previous part, insert the wire at the base of the previous element and "borrow" two beads from it. Subsequent pieces on one side will shrink until 2 beads remain. At the end, we fix and introduce a new wire into the second element, repeat everything in a mirror image on the other side, starting with the number of beads of the second element. To create volume, we introduce a new piece of wire into the first part of 3 beads from the base, string 12 beads. We repeat in the same way on the other side. Such a diadem turns out to be very effective, especially if you used rondel beads, and it shimmers spectacularly in the light.


Let's make another chic crown, the basis for which can be either a twisted wire, forming a circle, or an old bezel... For it, we need a wire with a diameter of 0.6 mm and any beautiful beads. To begin with, let's make a lot of arches from thick wire, which seem to form waves. Then you can decorate this wire with a satin ribbon, wrap it, leaving about 3.5 cm from the ends of the resulting part. Then fix the workpiece with a thin wire (approx. 0.3 mm). The basis for the future crown is ready. For decoration we use all the same beads and beads of different sizes and shapes. Cast on a thin wire a few beads, beads, and then braid the entire base. The middle can be decorated with large pearls. So another wonderful crown is ready, which any girl can envy.


See below for a master class on making a tiara from beads.


