All about wire weaving

Wire weaving has been known to mankind for many centuries. It is easy to twist a simple ring or bracelet from this material, even children can cope with this. Even the ancient Egyptians created real masterpieces from wires of different origins. Now this type of handicraft will allow you to replenish the stock of jewelry with an unusual product.


What wire to weave?
Homemade things are always original. Weaving from wire requires a certain endurance, but a funny piece of jewelry can replenish your own jewelry box or become an excellent gift for loved ones. Weaving is usually made from soft wire. Products from copper and colored variations look beautiful.

Skillful needlewomen can make jewelry from silver and even gold wire. Then the product already belongs to the category of jewelry and is valued an order of magnitude higher. However, connoisseurs of beauty can easily create something unusual from a simple wire.


For needlework, it is better to use copper, brass, aluminum wire.
Galvanized iron material is also suitable. The easiest way to work is with copper, it is recommended for novice craftsmen without experience. This metal does not oxidize, so a piece of jewelry or decorative item will serve for many years.


Coarse wire can be combined with a variety of beads and stones. This allows you to make the appearance of the finished product more elegant and interesting.


It should be noted that not only jewelry can be weaved from wire. Hand-made items made from this material will decorate the interior of any home.


Weaving features
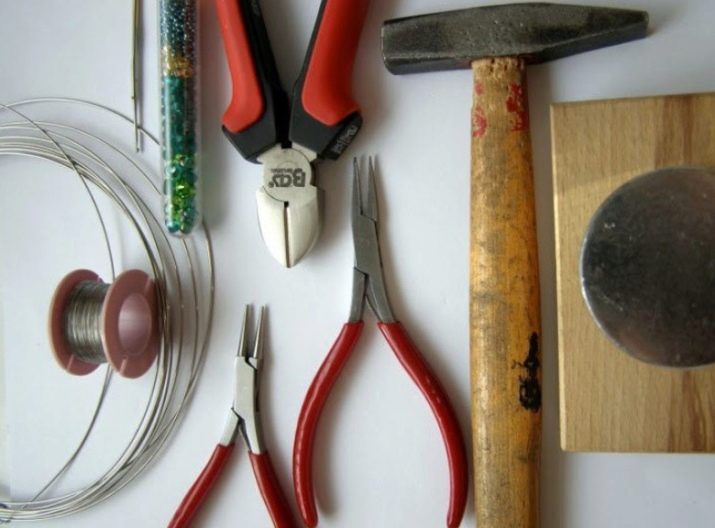
Working with wire cannot be called easy, even taking into account the existence of many devices for this type of needlework. To create a simple product, you need the following tools:
- side cutters;
- pliers and round nose pliers;
- anvil;
- device for winding springs;
- small hammer;
- Wig Jig (plate with holes and nozzles).
All of these items require utmost care and skill to use.

Wire crafts for children are simpler, but the result is less mesmerizing. Wire can be used to make jewelry and various interior decorations, such as trees. Homemade baskets look original, in which you can put fruits or sweets.


For the implementation of most products, experience is required, constant honing of skills. Trying to do something difficult the first time is not worth it: the result may not please.
It is recommended that you start with light products to gain experience and not destroy motivation.
Wire is very popular among craftswomen, as it allows you to create a wide variety of items for different purposes.

Views
There are not many popular weaving techniques. Each technique is designed for a specific set of products. A common type of weaving is Wire Wrap. The technique is intended for braiding various beads, stones and accessories with wire. It allows you to make original and interesting jewelry.
It is noteworthy that this method can be used to decorate an existing product, for example, eyeglass frames.

Also, the Viking Knit and chain mail techniques are considered quite easy to learn. At the same time, simplicity does not spoil the result. The products look attractive and interesting.


Weaving uses certain techniques to connect two, three, or more pieces of wire. Let's consider the main types of such techniques.
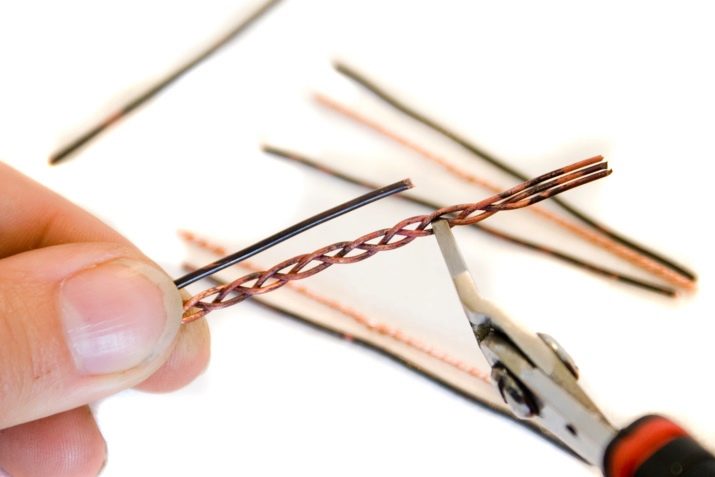
- In the form of a braid. A piece of wire must be bent, and then fasten the second part to the first at the fold. Many craftsmen attach the top to the wall with a nail to make it easier to work. Two wires can be connected together by twisting them in the same direction. The two bundles should be twisted in opposite directions. The result is a herringbone-like pattern.

- "Wicker track". It is best to use a medium gauge wire to create the pattern. One end must be bent so that a certain track width is obtained. At the end of the first row, the cord is bent again. The edge falls between the ends of the braid. Then weaving of the second row begins. Gradually, the track is woven to the desired size.

- "Round belt". Weaving is made from 4 ends. Each row ends with threading the last piece into the hole, which is formed when the initial one is folded. In this case, a new row begins on either side. The "belt" can be woven from any number of wires.

Jewelry making
Even the simplest weaving technique allows you to make an unusual product with your own hands. There is an opportunity to make key rings, crowns, models from intricate patterns and figures. Jewelry is usually made of wire braided beads. It looks original and is suitable for a variety of events. Simple patterns for beginners will allow you to weave your first product. It is recommended to start with something easy. Rings and pendants are quite simple to create.
The work does not take much time, so it can be easily done in one go.

Rings
It is with such products that it is recommended to start mastering this type of needlework. To create a ring, you should prepare the following materials and tools:
- copper wire;
- large bead;
- pliers and curved tool;
- a cylindrical object.

The latter should match the diameter of the finger. It is on its basis that weaving will be made. Now let's see what a step-by-step master class looks like.
- Take a piece of copper cord 15-20 cm in size.
- Put a bead or other decoration in the middle of the piece.
- Thread the wire onto the cylinder. There should be three turns.In this case, it is important that the ends of the wire stick out in different directions.
- Take the ponytail and pull the copper cord tightly. Make three windings around the bead. Each next turn should be located lower than the previous one.
- Make turns on each side of the ring. In this case, the wire must be pulled as tightly as possible.
- Flatten the tip of the copper material with pliers and press against the ring. It is important to place the end on the outside. Otherwise, the wire may injure your finger.
- Press the hinges as tightly as possible to each other.

Pendants
The product is created using the Wire Wrap technique. It is easy to learn, so it is suitable for craftsmen without experience. The following materials and tools should be prepared:
- copper wire with a cross section of 2 mm - 30 cm;
- the same wire, but with a cross section of 0.7 mm - 60 cm;
- small beads - 12 pcs.;
- pliers;
- hammer;
- ruler;
- round nose pliers.

The work does not take much time. It is necessary to act according to the following instructions.
- Take the thick wire by the tip with round-nose pliers.
- Spiral copper in 2-3 mm increments. The last turn should be 5 mm wide.
- Bend the end of the cord in the form of a loop.
- Flatten the spiral. To do this, knock on it with a hammer. It is important not to damage the coating on the material.
- Attach a thin wire to the loop.
- Make loops with beads in the center on the last row of the flattened spiral.
- Bite off the remainder of the cord and flatten the end with round nose pliers. Press firmly to the pendant from the outside.

Recommendations
There are a large number of schemes for the manufacture of wire products. Using the example of master classes, you can gain experience and hone your skills. Let's see what advice is usually given to beginners in this type of creativity.
- It is recommended to use metals that do not oxidize. So you don't have to patina. For reliability, the finished product can be varnished.
- The wire will be more malleable if heated over a fire. After that, rub it with regular baby cream and rinse with water.
- Not all craftsmen like patina. Finished products can be coated with gold, silver or bronze paint. Varnish must be applied on top.
- It is important to draw a diagram and sketch of the future product on paper even before weaving. Working with wire has a lot of nuances, it can be called filigree.
- It is important to be patient. Work requires perseverance and care.
- Sometimes you can get inspired by someone else's product. In this case, it is necessary to mentally divide it into details and draw a diagram. Thus, the work will go faster and easier. It is worth noting that only those masters who have already gained at least a little experience can do this.
- It is important to observe safety precautions while weaving. Gloves should be worn to protect your hands from injury. Safety glasses will allow you to protect yourself in cases where a piece of wire flies in an unexpected direction. Handle the tools carefully. Each of them carries a potential threat.
- Especially carefully calculate the length of the product. With tight weaving, the size doubles.


When working with wire, one should not rush, every step here requires attention and concentration.
Of course, the master always has his own views on a masterpiece, personal ideas and fantasies. Any decor can be combined with wire: from beads to buttons. This allows you to make a large number of jewelry in the form of bijouterie or interior gizmos. Beginners can master master classes and, for originality, supplement them with their own ideas.

In the next video, you will learn how to make a chain of wire with your own hands.


