Methods for making crafts "Turtle"
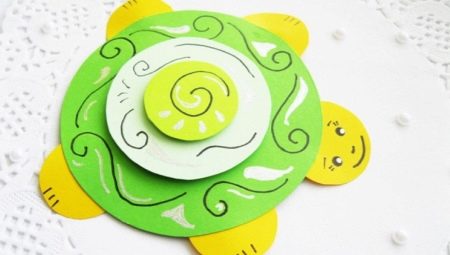
Children love to make crafts with their own hands: draw, sculpt something or make applications. Most often, animals are created, for example, cats or dogs, from plasticine, which is exactly what adults need. This is how love for animals and respect for nature are instilled from childhood. It is important to provide your child with all the necessary materials and to be there if you need help. Consider the creation of a turtle from plasticine and other interesting crafts.


How to make from paper?
A paper turtle can be made in a variety of ways: draw, print a template from the Internet and color it, collect origami. The latter option is suitable for older children, kids can simply pick up pencils and draw a turtle. She is subsequently cut out. The lesson is suitable for working with preschoolers.
To create crafts "Sea Turtle" you will need:
- white cardboard (or a regular A4 sheet of paper);
- scissors;
- stapler;
- felt-tip pens (pencils can be used instead);
- simple pencil.


Stages of work. The first step is to draw the outline of the turtle on the sheet. We take scissors, and carefully cut out. Where the tail begins, we make a small incision (somewhere to the middle of the shell). Using a simple pencil, draw out the outlines of the cells on the shell. Now we paint the turtle with felt-tip pens or pencils.


If you connect imagination, the turtle can acquire other colors that are atypical for it: purple, blue or pink. Remember the "Pink Elephant" rhyme. Does this happen in nature? Unlikely. But in fantasies, works and drawings it is quite.
When the turtle is completely painted, we take it by the cuts on both sides and fold it so that one part of the sheet lies slightly on the other.We fix the shell with a stapler. The craft is ready!


Made from natural materials
The autumn cone "Ellie's turtle" craft can be used in a kindergarten group or at home, which makes it possible to spend time with your child, creating a fairy-tale character. For such a bright turtle with a hat, you will want to choose the most prominent place in the house, you can put it in a closet under a glass or on a shelf - let it attract good luck and charge guests with positive emotions!
For the creative process we need:
- Pine cone;
- round cypress cone;
- rounded stack;
- cutting board;
- plasticine;
- wet wipes;
- scissors.


Stages of work. We take a neat opened cypress cone and wipe it with a napkin (to remove dust). Cut off 4 scales from a pine cone. We stick a plastic oval under the cone shell, and insert 2 limbs on each side.
We fix the craft on top of the scales with a small layer of plasticine. We make a small tail out of plasticine, attaching it under the shell.

We take brown plasticine and roll it into a ball. When the plasticine becomes soft, flatten the ball a little, making it more elongated. We attach the turtle's head to the bump, pressing it tightly. We take a rounded stack and push 2 eyes in the head.
Now the fun begins. Let's make bright eyes for the turtle. First, stick 2 circles of white plasticine (they should be flattened), then a layer of blue, after that we will make black small pupils. For an expressive look, add highlights to the eyes near the pupils at the top.


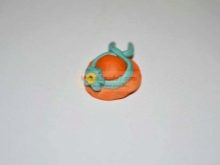
With the help of a toothpick, we will make a nose for the turtle, and we will form a smile from pink plasticine. Now we take orange plasticine (you can use any other, but orange is best, since this is the color of autumn), and sculpt a nice little hat. We wrap it with a blue plasticine tape, and make a bright flower on the side.
We put a hat on the turtle. Craft "Ellie the Turtle" is ready!
With your own hands you can create baby Ellie - such a cute and romantic turtle! She will definitely find a place of honor in your home and will cheer you up.


Plasticine products
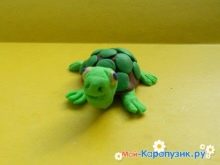
Making a plasticine turtle is a fun pastime for kids. Additionally, the shell can be decorated with rhinestones or beautiful flowers can be made on it. Since we are creating a fairy turtle, it can be anything.
To create a tropical turtle you will need:
- stack;
- plasticine - green, brown, white, blue.


Stages of work.
- We take green plasticine, and sculpt different parts from it. First, we roll a large ball (for the head), 2 small balls (for the front legs) and 2 more (for the hind legs). We also roll up a small ponytail.
- Roll 2 white pieces of plasticine into a ball for the eyes, and 2 small blue pieces for the pupils.
- Now we take brown plasticine. We will roll a large ball out of it, which will become the brightest composition in the craft. This will be the shell.
- To create cells, take green plasticine and roll many balls out of it.
- We sculpt from a brown circle a shell in the form of a plate with a small depression.
- Gently attach the green circles to it and flatten it slightly.
- Now we attach the head to the shell and stretch it out a little.
- With the help of a stack, we make the turtle's mouth and small cuts on the head. You can immediately do the nostrils with a toothpick. We attach the eyes to the head: first, white circles, and then blue pupils.
- We make a tail, attaching it tightly to the shell.
- Now we take the limbs and make cuts on them with a stack. We attach the elongated legs to the shell from the inside. The tropical turtle is ready!


More ideas
The easiest option for making a turtle for a small child is made of paper, but there are other ways that can brighten up a child's leisure time. For example, the shell can not be sculpted from plasticine, but natural materials can be used: a shell. And also materials such as walnut shells or stone can act as a shell. If you allow your child's fantasies to roam, his turtle craft can even be put on public display on social networks - let others be inspired!
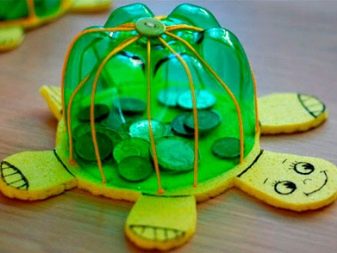
An interesting turtle can be made from a plastic bottle. To do this, cut off the bottom of the green bottle and place it on a turtle cut out of a foam napkin in advance. But the shell turns out to be not simple, but with a secret! Having made a slot in the napkin, you can throw coins if the craft is planned as a piggy bank. One of the most popular animals for sculpting is the turtle. These animals have inhabited our Earth since the time of the dinosaurs and can live for over 200 years.
Inspired by the cartoon characters "Lion and Turtle", "The Adventures of Pinocchio", "King of Turtles", many children will have an idea to repeat these images, and you can help them with this.

For information on how to make a paper turtle using the origami technique, see the next video.


