Do-it-yourself flowers
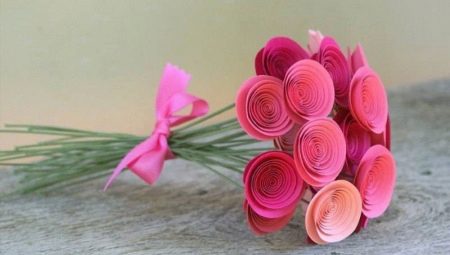
Beautiful and bright flowers can be made with your own hands from a variety of materials. There are a huge number of interesting master classes on modeling copies of paper, fabrics, as well as improvised materials. In today's article, we will find out how you can make elegant flowers with your own hands.


How to make from paper?
Very beautiful and original flowers of different varieties can be made independently from the most ordinary paper. Such crafts are done quite simply, but they turn out to be very effective, attract a lot of attention. You can make many interesting flower arrangements from colored paper. It can be chic growth, and options for a photo zone, and elegant flowers in a basket - there are many options.


Aster
To craft an attractive paper aster, you will need to prepare the following ingredients:
- several sheets of colored paper;
- scissors with well-sharpened blades;
- Ruler and pencil;
- glue.

Let's consider each of the stages of making a beautiful craft in the form of an aster.
- First, you will need to carefully cut out several squares of different sizes from a piece of colored paper. For example, the largest can be an element with a side of 13 cm, and the smallest one with a side of 6 cm. Each of the cut out squares will further serve as a petal layer.
- You can proceed to preparing the largest square element. It should first be folded in half. After that, you need to make another bend, but in the transverse direction.
- Further it is necessary fold the existing workpiece diagonally.
- Then another bend is made. In this case, the workpiece must be folded in half.
- Using scissors, the edges of the paper blank must trim gently to form a semicircle. The workpiece can be expanded.
- Between the petals, scissors will be needed cut through the lines... In this case, it is not necessary to reach the central point.
- Fingers will be needed form folds on each of the petals... Due to this, the flower will turn out to be more interesting and voluminous.
- It is necessary to make a few more similar blanks.... You will need to carry out the same operations with everyone.
- After that, you will need to move on to connecting the blanks with glue... For this purpose, overlay the smaller petal circle on top of the largest component. In a similar way, all the petals should be glued together.
- To shape the core of the flower, you need to cut off a strip with a width of about 2.5 cm. It is folded in half and lengthwise. After that, cuts are made with scissors on one edge. In this case, you do not need to reach the second edge.
- At the next stage, the prepared strip is twisted, periodically fixing it with glue. This will form the middle of the aster. It will need to be glued at the appropriate point. An elegant and lush flower is ready!


Lily
A very beautiful and graceful water lily can be formed from paper. For all creative works you will need:
- green cardboard sheet;
- one-sided blue sheet;
- yellow double-sided sheet;
- white sheet of A4 format;
- a sheet of a notebook in a cage;
- green felt-tip pen or marker;
- eraser and pencil;
- scissors and ruler;
- glue.

Let us analyze in stages how from the listed components it is necessary to correctly model a water lily.
- First, a notebook sheet is taken, on it you will need to draw the outline of a water lily leaf with dimensions of about 14x12.5 cm. It is possible to bypass this step and immediately sketch on the cardboard. If it was drawn on a notebook sheet, it will need to be transferred to a cardboard sheet.
- The workpiece is cut out.
- The cut part must be placed on the opposite side of the green sheet of cardboard. Here it should be circled and then cut out.
- Now you need to prepare a blue sheet... It is necessary to cut corners from it, turning the rectangular part into an oval. The sheet is fixed with glue, as shown in the photo.
- In the next step, you will need to carefully cut the wavy strips. In this case, from the center point of the sheet, you need to stop a couple of millimeters. You should not do too thin stripes, because this will cause many problems with their further curling.
- Received waves curl with scissor blades on the white side and with your fingers on the blue.
- Next, the leaf must be decorated with a natural pattern. To do this, first make a sketch with a pencil, after which it must be painted with a felt-tip pen or a green marker.
- Now we need to move on to making the lily itself... For this you need a white piece of paper. It is folded in half and then cut or ripped apart to form 2 equal rectangles.
- One of them must be folded in 2 times. Using a ruler and a pencil, draw a 5 cm long petal.
- Cut out the workpiece, remove the pencil residues with an eraser... It is necessary to unfold and bend the petals in the same direction.
- Next, you need to do more 5cm and 4cm components.
- All flowers glue together.
- For the middle of the lily, a miniature piece of yellow paper is taken, torn into small pieces. They are crumpled, giving the shape of balls, and then glued to the center of the flower. Now all that remains is to glue the finished lily to the previously made sheet.


Poppy
Poppy flowers turn out to be gorgeous if they are made from corrugated paper. To make such crafts, you will need:
- crepe or corrugated paper in red and green shades;
- black threads;
- wire;
- scissors;
- glue gun.

Consider the master class step by step.
- Cut off a wide strip of red paper. On a cardboard, you need to sketch the contours of a poppy flower, cut them out.
- The cut component must be attached to the crepe line. Petals should be cut along the line of the contours.
- Without starting to open and lay the petals, pull up their center to get a notch.
- Poppy stamens are formed from black threads. It is necessary to wind 20-25 turns of thread on the index and middle fingers. In the center, they are tied up or fixed with a thin wire piece. The formed bow is removed and the ends of the loops are cut off.
- The middle of the poppy is rolled up from the green segment, after which the ball is wrapped with a piece of black thread. Hot glue should be dripped onto the intersection of the turns.
- Next, the ball is glued to the bundle, evenly straightening the tips surrounded by the pestle... This will make the core.
- 6 petals are attached to the bottom of this part. Thus, 1 loaf will be formed.
Several such components can be made to make a beautiful poppy bouquet.


chamomile
You can also make a charming chamomile from corrugated paper.
- First, make the middle of the flower. A 7x7 cm square is cut out. The blank can be made of cotton wool, and then wrap it to give the shape of a pyramid. Then they tie it up.
- To the flat side apply a powder-flock of a bright yellow shade.
- To make petals, cut out a rectangle 8x18 cm... The middle is wrapped in it, after which the edges are folded back.
- Further, using small scissors cut through the petals. The original chamomile is ready.


Tulips
Paper tulips can be modeled from:
- bright colored double-sided sheets of paper;
- a long wooden skewer;
- scissors;
- PVA glue.

Let's take a look at the step-by-step instructions for making such flowers using the origami technique.
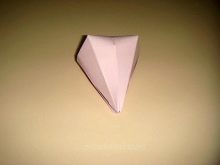
- A bright double-sided sheet of paper is taken, its corner is wrapped to the side opposite, the excess is cut off. You should get a diamond-shaped element. It is laid in a triangular piece again, then unfolded.
- Blank fold in halfto get a triangle.
- The corners are removed inside. The resulting part is exposed with the tip up.
- The lower corners must be bent to the upper - first on the left, then on the right.
- Turning the workpiece over, procedures are duplicated.
- The structure must be carefully opened. Due to this, the folds will be in the middle.
- A corner is placed at the bottom that is not cut out. And at the top should be the element in which there are a large number of corners.
- Next, fold the left and right corner elements to the center part, so that they overlap.
- The same must be done on the opposite side.
- The corners are placed one inside the other on all planes. The corner is cut from the bottom.
- Supporting the connecting areas with your fingers on 2 sides, blow air into the product.
- The craft will acquire volume, it will remain to bend the corners from above.
- The bud will be ready, it remains to cut the leaves out of green paper, and make a stalk from a skewer wrapped in the same material. All components are glued together with a PVA solution.




Cactus
An adorable cactus can be modeled from napkins. You will need:
- scissors;
- glue stick and PVA;
- small round jar or container;
- multi-colored napkins;
- stapler;
- decorative ribbon;
- miniature and long box.

This is how the cactus is made.
- First they decorate a flower pot, for this the jar is complemented with a decorative ribbon.
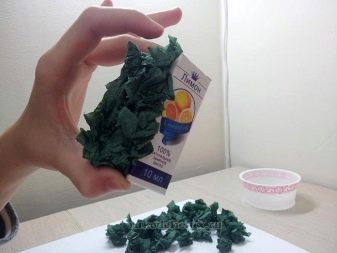
- Next, green napkins are taken, they are divided into 4 parts... Then all the miniature square elements are separated and each is crushed. This is how the base for the cactus is made.
- Now a box is taken, an adhesive solution (glue stick) is applied to it, and formed green lumps on all sides are fixed on top... You need to glue them heap, denser, leaving no gaps. At the same time, the top is not filled - here you need to place a paper flower.
- For a cactus flower, you need to take 2-3 bright napkins. They need to be connected with a stapler crosswise.Draw a circle, cut it out.
- The edges of the napkins are crumpled towards the center.
- The resulting lush flower must be glued to an empty area on top of the box.
- From dark napkins it will be possible arrange potting soil according to the same principle as the greens were made.
A brush and white paint can be used to mark cactus needles.



Sunflower
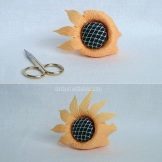
It is done in the same way as chamomile. The only difference is in the core. Here, to model it, you can use chubby domed sweets. For decor, not flock powder is also suitable, but a silvery mesh.
Elegant sunflowers can be placed in a wicker basket, supplemented with large green leaves cut from paper or fabric. It will turn out great!



Manufacturing from fabric
Spectacular flowers can be made from different fabrics, for example, chiffon, tulle, tulle, velvet, nylon, felt and so on. So, details from burlap can turn out to be very unusual. These homemade flowers can be crafted for a floor vase or other bases.
If you don't have a lot of free time, you can quickly make flowers from ruffles. For this you will need:
- fabric ruffles;
- scissors;
- needles and threads;
- iron (optional).
Let's look at the step-by-step instructions for beginners on modeling ruffle flowers.
- The fabric should be cut into strips of 30 cm and a width of 7-8 cm.
- The strips are folded lengthwise and in half, the folds are ironed.
- The workpieces must be swept with wide stitches.
- Next, the products are pulled into an accordion, gradually pulling the thread.
- The circle is closed by fastening 2 ends of the tape, as well as a couple of stitches.
- In the center of such flowers, you can glue or sew on beads or rhinestones.
These homemade buds are perfect for modeling lush and original compositions. They can be tinkered with a child.


Creation from improvised means
Creative flower crafts come from scrap materials, for example, cellophane bags, twine, egg trays, foil, old newspaper - there are a lot of life hacks.
Consider how you can make flowers from junk material using the example of specimens from egg trays.
You will need to prepare:
- cardboard egg tray;
- acrylic paints;
- brush;
- scissors;
- glue in the form of a pencil or silicone;
- leaf of a green tint.


Algorithm of actions.
- The container from under the chicken eggs is cut across in a pair of cells.
- Cut out a leaf from all the cells of the tray.
- In addition to the petals, you will need to cut small circles based on the number of flowers. Petals will stick to them. You will also need a few more small petals from the remains of the tray.
- Stamens will also be obtained from any leftovers. The top of the cells is suitable for the core. The edges should be folded by hand to give the flower a more natural look.
- All cut parts are glued together. 6 petals must be glued to a small circle in a circle, as in a real daffodil.
- Next, the middle and stamens are glued. After that, you need to wait until the glue solution is completely fixed and dry.
- The finished composition will need to be painted with acrylics. While the products are drying, you need to cut green leaves and grass out of paper.
- After that, all the ready-made components can be easily combined in one picture / applique.


Flowers from natural materials
If you want to make your own truly creative craft in the form of flowers, then you can use the materials bestowed by nature itself. So, gorgeous flowers are obtained from shells, stones, acorns, cones and even pumpkin seeds. Such things always turn out to be non-trivial, attract a lot of attention.


Let's figure out how you can make beautiful flowers from natural materials using the example of a bouquet of cones.
- First you need to collect and prepare large pine cones., wood skewers, universal adhesive, green scotch tape, any paint or gouache.
- The upper scales must be removed from the cones with scissors or pliers. These will be blanks for future flower buds. The middle of the cones can be further trimmed with scissors.
- Buds-cones should be covered with water-based paint or gouache. Any color will do. So, for the petals, you can use white, and for the middle, a yellow tint. Let the paint dry after application.
- Prepared buds from cones should be attached to the tops of wooden skewers... To do this, holes are made in the cones with an awl, the skewer is coated with glue, then inserted into the hole made.
- As soon as the adhesive is completely set and dry, the stems of the flowers from the cones should be wrapped with green tape or green tape.
- If you want to make zinnia flowers in this way, then the scales of the cones will need to be painted in brighter and more catchy colors, for example, pink, orange, purple.
- Ready-made flowers can be collected in an interesting bouquet for mom, grandmother or for home decoration... Original crafts can be placed in a table or floor vase of any type. Such decorations will fit into almost any interior.
To complement the bouquet, you can use fresh grass instead of the classic leaves.


For information on how to make flowers with your own hands, see the next video.


