We make envelopes for money with our own hands

Nowadays it is not customary to write paper letters, send congratulations by ground mail, and the generation of teenagers, in principle, does not know what it is like to get a letter from the mailbox. Perhaps that is why paper souvenirs, including envelopes for various purposes, have become increasingly popular. Today we are talking about souvenir money envelopes. Handmade, they are filled with warmth and positive energy.


Birthday Ideas
A self-made envelope for money, despite the wide selection in stores, will still remain an expensive memento. Many people keep such souvenirs for many years, in contrast to the standard products of printers. Even if you lack your own imagination, you can always turn to the Internet for ideas and do something special. Choose an option that is most suitable in spirit and meaning for a woman or man, sister or girlfriend, son, daughter.
Envelopes are made from a variety of materials - from a regular sheet of A4 paper to soft felt, suede, leatherette. A paper envelope can simultaneously act as a greeting card.
And the most interesting thing is that such envelopes can be sent by mail with a stamp and an address.


Simple
You can start with the simplest models made from A4 color office sheet. This envelope is quick to complete and serves as a great first experience. After the initial practice, you can begin to perform more complex designs.
On both sides of the colored sheet, you need to make a diagonal marking, stepping back from the edge of 7.3 cm.After the marking is done, the marked edges are cut off, and as a result, a diamond-shaped geometric figure is obtained.


The corners of the rhombus are bent to the center - first on the long sides, then on the short ones. Cover the short corners with the lower one and glue it.
The upper free corner will serve as a flap that closes the envelope. As you can see, such an envelope is really as simple as its implementation.


Another option for such an envelope is rectangular model with wavy edge... It would seem that it is a very insignificant detail - a small decorative element, but the envelope looks much more festive.
You can add a lace strip and stick it on a wavy edge, glue shiny figures or flowers cut from special paper, decorate with stickers, bows.


A simple envelope can be made with a button. The product will turn out to be not only functional, but also more original, since the buttons act as a decorative element. A similar model with only modified geometry also looks very good. And here is an envelope with a tab that secures the closed flap with a slot.
Any craft, even the simplest one, can be presented as a result of design art, making it thematic, adding original details.


And here is an envelope made of four identical circles.
- Each piece is bent in the center.
- Then the round blanks are stacked on top of each other, gluing the lower parts along the folds.
- After completing these operations, an envelope of the correct square shape is obtained.


Another similar envelope, but made from a single blank. The photo shows a step-by-step execution technology with ties for fixing with a bow.


In origami technique
Origami - the ancient Chinese art of folding paper figures, although it was really developed in Japan. It was the Japanese who reached unprecedented heights in origami. For a Russian person, especially if he is not engaged in the professional study of origami, it will seem surprising that this technique is associated with higher mathematics, such as Gaussian curvature, and many other areas. Real craftsmen put together amazing 3D models of the highest complexity:
- "Dollar carp";
- "Himeji Castle";
- "Kusudama Lily".


However, today we will talk about a very simple model available to any beginner - this is origami paper envelope... To do this, you just need a colored A4 sheet and scissors. The lower left corner is folded towards the upper cut.
The remaining extra field must be cut off, resulting in a square. The resulting figure is folded diagonally - first on one side, then on the other, to outline the middle.


After that, the square must be expanded and folded diagonally towards the center. Then fold it again along the middle line, resulting in a triangle.
Now the corners are connected by nesting the ends into each other. The envelope, made without glue, is ready, all you have to do is insert the bill and close the flap-cover.


With ribbon
The reader is offered a simple, but very nice origami envelope for banknotes. Depending on the color, it can be issued both in the male version and in the female version. Satin braid in two or three colors will only add a festive mood. Required materials for making an envelope:
- 2 types of colored paper;
- narrow satin ribbon-ribbon of 2-3 colors;
- ruler, pencil, matches, scissors, glue.
Do not pay attention to the presence of glue in the set, because the essence of origami is to create models without glue. In this particular case, the adhesive is only needed to glue the decorative elements. On the prepared sheet of paper, markings are made with the required envelope dimensions - in this version the envelope has a length and width of 20x40 cm. After that, the sheet of paper is folded with long cuts inward, then short ones, in the direction of the center.


After the done manipulations, the sides are folded back and folded in a triangle. Now you can make the envelope more varied - you can glue a piece of another paper, different from the main one, 20x30 cm in the center of the envelope. The protruding edges are glued inside the envelope.
The edges of the cut satin ribbons are treated with fire so that they do not crumble, and they are glued in the center of the finished envelope, leaving free ends for a bow. A beautiful and solemn envelope-bill is ready.


With bow
Sometimes you urgently need to make a small present, but there is nothing at hand. In this case, an easy origami envelope scheme with bow. Moreover, a sheet of paper must be necessarily square, but of any size. And, of course, colored ones - to create a festive mood. How to do it correctly step by step, they will show photographs in which the entire addition scheme is shown in detail and clearly. The result is a pretty cute envelope with a bow.


Wedding options
At a wedding banquet, it is customary to give not only gifts in the form of any material objects, but also a financial equivalent - money. To do this, you need a bill in the form of a beautifully designed envelope for money. Below is a master class on how to do gift envelope using scrapbooking technique.
To make it, you will need special materials:
- a base cut from thick paper according to a template, of which there are a lot on the net and in specialized stores;
- watercolor paper 9x19 cm, glue, stapler, piece of string 2-3 cm;
- sprays of three colors, white paint, multi-colored scrapbooking paper;
- overlay "Film", any stencil, stamps, smart chipboard, elements for decoration - stones, rhinestones, beads;
- a little sisal, metallized pendant, paper flower buds, ink pad, metal pendant in a suitable theme.


Stages of work step by step.
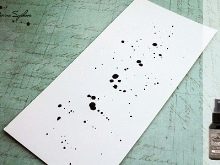
- The first thing to do is to sprinkle a blank of watercolor paper with drops of a dark spray, then a lighter one, and after the lightest tone. This can be done with a pipette, brush, or even a toothbrush. At the same time, it is important to maintain harmony in the combination of shades.
- After that, the paint must be allowed to dry well.
- Then, using a stencil, a drawing is applied to the dried base. There is a very important technique here - the more unevenly the paint is applied, the more interesting and textured the result looks. In this case, experiments with color saturation, the location of stencil patterns will help.
- The next step is stamping with ink. It is worth noting that rich tone stamps look great on both dark and light backgrounds.


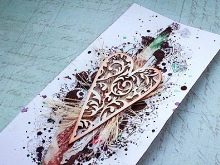
The main background is ready, it's time to decorate the surface. Now, multi-colored-contrast scrap paper is used - it must be torn in unequal strips, pieces, having done it deliberately carelessly. The resulting pieces are glued on top of each other, which makes the surface more textured and interesting.
After the parts and glue are dry, apply a white spray with acrylic paint, which will make the composition fresh and light. From the prepared sisal, you need to cut off a small piece, ruffle it and turn it into a bunch, which is attached with a stapler in the center. Sisal can be replaced or supplemented with a satin ribbon, lace braid.


Now we need to get busy chipboard - tinted it. For this, you can use gold, silver, bronze or any other paint. After the element has dried, it must be glued or fixed with a stapler over the sisal. A bow is made from a piece of twine and attached to the chipboard.
On top of the entire composition, different-sized flower buds are added. As a finishing touch, the “Film” overlay is glued on top and bottom of the composition, thereby emphasizing the vertical composition of the composition. It remains to arrange a few more details - to decorate the product with pebbles, a metal pendant, half-beads, a brooch and so on.The watercolor base of the wedding gift banknote is ready, it remains to glue it on the envelope, add an organza ribbon, as an imitation of a tie.
Such gift envelopes can be made of cardboard, felt, they can be presented separately or placed on top of another gift.


Animal envelopes
As a gift for a child you yourself can make a beautiful paper money envelope in the form of a cute animal - a girl a fox, a boy in the form of a mouse or a panda.
Mouse envelope
Master class on making homemade envelope in the form of a mouse - an exact diagram of the sequence of actions. A piece is cut from a colored A4 sheet to get a square. The square is folded diagonally and the middle is marked - the first time to mark the center, the second time the figure is left in the form of a triangle.
Next, the base of the resulting triangle is tucked in one and a half centimeters. The upper corner is bent and the fold line is emphasized with a fingernail or ruler. After that, the figure is turned around, and the triangle is folded again along the other diagonal.


The base of this triangle is tucked in by 2.5 centimeters. Unfold again, and raise the corner up along the marked fold.
Next, the corners are bent on both sides, and the corner in the center is hidden inward. The square is unfolded again, and the selected corners are folded inward, joining them with the cruciform lines. For fidelity, the corners can be glued together.
After that, a volumetric envelope bag is formed, while gluing all four corners. Fold inward and glue the side protruding parts, as well as one of the large right angles.


Chanterelle envelope for girls
For little princesses, you can prepare a fox envelope. Materials:
- sheets of paper of white, yellow, orange shades;
- black marker, scissors, glue stick or PVA.
A square must be cut out of an orange sheet - the basis of the product. To form the lower part, one of the corners is bent up, and its nearest sides at the bend are divided in half. After that, large corners are folded, directing them towards each other. Then fix all the already bent parts with glue. The remaining upper corner is folded up.


The finished envelope must be decorated with a fox's face: cut out two semicircular parts, glue them to the valve cover. Now you need to draw a nose, cut it out and glue it too. They act similarly with the eyes. Ears are cut out of orange paper and also glued.


Unusual crafts for men
By the end of the article, it is no longer worth repeating and talking about the uniqueness of hand-made envelopes.... It is pleasant to receive such a gift for everyone, including men, and it does not matter if the money is there or not. For example, a gift certificate for service in a barbershop or fitness club.
First option
Tools and materials for creating crafts:
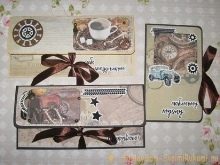
- two types of cardboard - black and yellow in marble texture;
- 3 sheets of scrap paper with masculine style measuring 20x20 cm and some scraps;
- various pictures, in this case a cup of coffee, a watch and a purse, cars and gears;
- carvings with congratulatory inscriptions and other male attributes, bronze brads and pendant watches;
- dark semi-pearls, chocolate-colored satin ribbon, drawing paper, ink pad, pencil glue, double-sided tape, ruler, special rounding punch, pencil, scissors and matches.


For us a black sheet of cardboard, markings are made for 70, 150, 70 mm, the sheet is drawn according to the markings and the excess is cut off.
- The resulting blank is folded in the form of an envelope.
- Make even rounded corners with a rounder, after which the operation is repeated with a "marble" sheet of cardboard.
- A blank for a postcard is made from the third sheet - its size is 95x160 mm when folded.
- It's the turn of the satin ribbon - it must be cut into 6 pieces and all the cuts must be cauterized so that they do not crumble.
- All tapes should be glued to the prepared bases with double-sided tape.


It's the turn of decorating.
- To decorate all the bases, three elements are cut out from scrap paper, at the same time rounding off part of the corners.
- With double-sided tape, the cut out parts are attached to the inner, back and outer sides of the blank envelopes, laying them out as desired.
- Pictures are sewn, die cuts are glued, all decorative elements are fixed as it is more convenient to do, pendants are inserted into brads and fixed in this way.
A prepared and tinted sheet of Whatman paper is inserted or pasted inside the envelope to apply a congratulatory inscription on it. As a final touch, half-beads are glued - and the gift envelope is ready.
These colors are not at all obligatory for execution - black can be replaced with red, yellow with noble terracotta or some other.


Second option
A male greeting envelope with money or iconic attributes is one of the best stylish gifts. This time, monetary symbols were used for decoration, so that the envelope would bring not only a one-time profit, but also become a kind of talisman that attracts finances.
Tools and materials to complete the idea:
- souvenir money with a face value of 1000 rubles;
- stylish wrapping paper that can be replaced with a beautiful picture from a glossy magazine, golden cardboard, blue lace;
- Chain, beads, flat or semicircular rhinestones, coins of various values;
- ruler, pencil, straight and curly scissors, glue gun, pliers, PVA glue, double-sided tape.


The work begins with cardboard, on which, from the seamy side, markings are made 8x8x3 cm from the edge.
- After that, three parallel lines are drawn and all unnecessary ones are cut off.
- On the two lines obtained, the folds are fixed using a ruler or a nail.
- Double-sided tape is glued to the edges of the envelope, with the help of which the halves of the blank are glued.
- The lower edge is folded over, stroking the sides.
- With curly scissors, pictures are cut out, after which they are glued to a bill envelope.
- Denominations are cut out of souvenir banknotes, rolled up in a cone, glued to an envelope, and coins are fixed on top with hot glue.
- Small pieces are cut from the blue lace and glued to the envelope, as a support for the chain.
- One edge of the chain is glued to the lace, and decorated with a pearl bead on top. The other end of the chain is pulled arbitrarily and treated in the same way.
Add the remaining decorative elements - and a stylish envelope for a man is ready. Quickly and efficiently.


