Making crafts "Tree"

A craft in the form of a tree can become a full-fledged interior decoration, especially if we are not talking about a paper structure, but about a full-fledged topiary. The existence of master classes of varying complexity allows a master with any experience to choose an idea to his taste.


Paper making
For kindergarten, the easiest way is to prepare a craft in the form of a paper tree. For example, to create a simple structure, you will need:
- brown cardboard;
- colored paper of pink, white, green and light green shades.


From the tools it is immediately worth preparing:
- scissors;
- glue stick;
- felt-tip pens.
The work begins with the fact that the outline of the child's pen is transferred to the cardboard - this will be the trunk of a tree.
At the bottom, you will have to leave a wide strip in order for the structure to have a base.

The outline of the hand is cut out along with the stripe. At the base, two cuts are created on the sides of the trunk: one at the top and one at the bottom. Leaves are cut from paper of green and light green shades, and fruit-hearts are cut from white and pink sheets. Alternately, they are glued to the tree: first, leaf blades, then hearts.

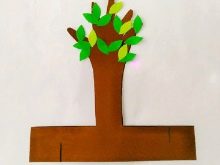
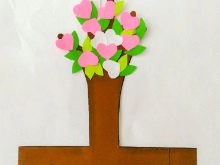
When the glue is dry, the wide strip will need to be folded over, joining the ends using cuts. If the tree tilts back under the weight of the crown, then in addition it will be possible to cut a small strip of cardboard and stick it on the back of the trunk.

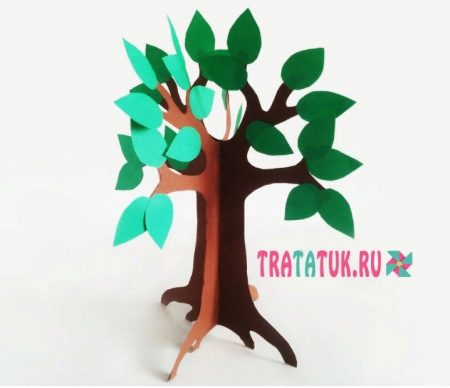
A beautiful volumetric work will turn out using 4 sheets of brown cardboard, a couple of sheets of green paper, a simple pencil, scissors and an adhesive pencil.

- It all starts with the fact that a brown leaf is folded in half, and one half of the tree is drawn on it with branches in the area of the roots and crown.When cutting out of it, you will get a barrel blank with absolutely symmetrical sides.

- Using it as a template, you will need to form three more blanks. Each folds exactly in the middle, after which they are alternately connected in the area of one of the bent halves, including branches with roots.

- When processing one bent half after another, it is necessary to collect all four blanks into one volumetric barrel.

- One sheet of any shape is drawn on green paper. The paper is folded twice like an accordion, which allows you to cut a large number of identical plates at a time. All of them are attached with glue on the branches of the tree, forming a lush crown.
Original do-it-yourself topiary
Topiary is a small potted tree made by hand. Home decoration is made in any shape and color, and the number and variety of materials used to decorate the crown is not limited by anything.
In fact, in order to learn how to create topiary, you need to remember the steps for the appearance of the base, and then you can simply experiment with decorating the crown.


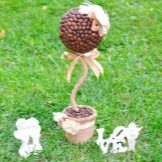

For example, the following are suitable for decorating trees:
- coffee beans;
- walnut shells;
- fir cones;
- straw;
- sisal;
- candies;
- fruits with berries;
- ribbons;
- craft paper;
- cotton pads.


The topiary itself is assembled from three main parts: a stand, usually in the form of a pots, a trunk and a crown.
- The basis for a tree is easiest to construct from a foam ball or a rounded figure created using the papier-mâché technique. A wad of newspapers wrapped in duct tape, or a synthetic winterizer tamped into a stocking and stitched with threads, is also suitable.

- The trunk of the structure must be durable and stable. Its role can be played by a wire wrapped with tape or threads, several bamboo skewers tied together, or an ordinary branch. The latter, by the way, will first have to be cleaned of bark, varnished and treated with wood stain. Even a popsicle stick can be used for a small topiary.

- An ordinary flower pot is most often chosen as a stand for the composition., but a wide flat stone, a small iron bucket, and a plastic yogurt cup will do. The container can be left in its original state or decorated using decoupage technique, decorated with lace or a ribbon. For a nautical-style topiary stand, you will need shells and multi-colored pebbles, and for a romantic composition - paper hearts.


What else can you make a tree out of?
As mentioned above, any materials can be used to decorate a homemade tree, especially when it comes to appliqués and topiary.


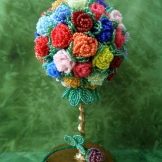
From beads
A thin and graceful tree made of beads can become a worthy decoration for any interior. For example, following the instructions step by step, you will be able to create a blooming sakura.
- First of all, pink beads are placed on a thin but strong wire.
- Next, the workpiece is folded into loops, each of which contains 5 beads - each flower should contain about 5 loops.
- Using the same algorithm, 3 yellow bead loops are twisted. By combining them with a pink blank, it will be possible to get a pink flower with a yellow center.
- Two wires of 7 green beaded loops, folded in half, will make sakura leaves. By screwing them, you will need to connect them to the bud.
- The empty ends of the wire are wrapped with tape, forming the stem of the twig.
- Several more wires are formed in the same way. The more their number, the more magnificent the crown will be.
- The twigs are alternately attached to one another to form a figurine of a thin tree. The trunk is wrapped with threads and placed on a stand - for example, in a pot filled with diluted alabaster.
- To decorate the stand, you can use pieces of moss, reindeer lichen or sisal.By the way, you can also fix the product on a stand with a plaster solution. For its preparation, PVA glue is combined with gypsum in a 1 to 1 ratio so that a moderately liquid consistency is obtained.


From millet
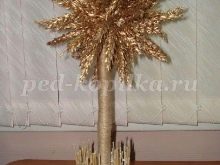
Grains of millet are ideal for creating an applique on the theme of "Harvesting tree". The groats are first painted with simple paints in green, yellow and orange, and then used to fill the contours of the drawn tree. Wheat ears, in turn, produce a very unusual volumetric composition. In addition to natural material, work requires:
- wooden stick;
- Styrofoam;
- scissors;
- thin rod;
- aerosol can of gold paint;
- iron can;
- leg-split;
- pencil;
- glue "Moment".

Using scissors, a base for the crown is cut out of foam. One edge of a wooden stick is shaved off. The trunk is wound with twine, and a ball is put on its tip.

An iron can is pasted over with the trunks of an ear with the tops cut off and rewound with a rope. The container is filled with a mixture of gypsum and water, and until the substance hardens, a stick is inserted into it. After a few hours, the structure will dry completely.


At this time, the foam ball is pierced with a rod, and spikelets coated with glue are inserted into the resulting holes. Finally, the top of the tree is treated with golden paint.


Wire
To create wood from wire, brass, copper and aluminum threads are usually used, the thickness of which ranges from 0.3 to 0.8 millimeters. The main tools are pliers and round nose pliers, a side cutter, tweezers and a glue gun.

The finished composition is placed in a seedling pot, which is filled with floral artificial moss. The process begins with the fact that a thin wire is cut into equal lengths, the length of which is 3-5 times the dimensions of the final product. Further, the metal threads are twisted by hand, with pliers and round-nose pliers, roots, trunk, leaves, buds and twigs are formed. A thicker thread is used to isolate roots, trunk and thick branches.


From rice
An unusual rice tree can become a bright spot in a laconic interior. In addition to rice, the following are involved in its production:
- food coloring;
- twine;
- a branch or 8 kebab skewers;
- small pot;
- plastic ball;
- coffee beans.

It is better to prepare PVA glue, hair dryer, hot glue and scissors from tools. First of all, rice grains are dyed in any shade you like using food coloring.

While it dries, you can do the base for the crown: for this, a hole is made in a plastic ball for a branch or skewers linked together. The tree trunk is wrapped with twine.

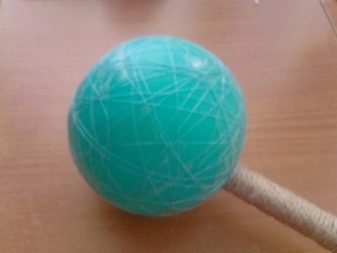
After rewinding the ball with threads for better fixation, it must be covered with a mixture of rice and PVA. It is most convenient to dry the surface with a hairdryer. Next, the finished tree is fixed in a pot and decorated with coffee beans. The soil can also be made from rice.

Cones
A cone tree is made according to a similar pattern. The foamy spherical base is covered with small, half-open bumps, keeping small gaps between them.
If this space turns out to be too spacious, then acorns, chestnuts or sisal balls can be used.
Natural elements are fixed to the crown with glue, but additionally it does not hurt to use gold or brown threads. To get the trunk, you need to put together about ten bamboo skewers and wrap them with thick thread, leaving open areas along the edges of the sticks. Next, the contents of the flower pot are filled with a mixture of alabaster and water or cement mortar. Having inserted a tree trunk inside, you will need to wait a couple of minutes until the soil grabs. The completely frozen mixture is decorated with needles or sisal, and the pot itself is wrapped with a ribbon

From fabric
A good craft for school on the theme of "Wood" is obtained using fabric. To create it, you will need a spherical blank made of expanded polystyrene, a wooden trunk, glue, "invisibility", clay pots and packing tapes.
- Ribbons for packaging of different colors are cut into small pieces, each of which is rolled up into a ring. Small rolls made by bending the tape several times at right angles will also work.
- Each workpiece is sequentially fixed on a round base with the help of "invisible". A trunk, for example, assembled from several sushi sticks, is wrapped with a satin ribbon, fixed in several places with superglue.
- A doughy mixture of alabaster and water is poured into the pots. A wooden trunk is inserted there, on which the crown is already put on.
- When the soil is dry, it can be decorated with fine gravel or glass stones. By the way, instead of ribbons for this tree, flowers from fabric or napkins can be used.

Monetary
It is customary to present a magic money tree at a wedding with the wishes of the newlyweds an abundant and happy life. Usually, artificial banknotes are used for it, but as a highlight, you can attach several real coins to the crown or stand: rare, old or even foreign. It is customary to completely cover the prepared spherical base with banknotes.
Previously, each of them is folded in half with a slight shift of the edges and fixed with double-sided tape.
You can also bend a bill like an accordion and form a "fan" out of it, or roll up a "bag", like the one in which seeds are sold. The number of paper blanks is determined depending on the size of the spherical base - usually 20-25 pieces. On a tree, they are fixed either on glue, or on double-sided tape, or on a thin wire. The trunk of the structure is formed from twigs or sticks for sushi, after which it is fixed inside the planter. The container on the reverse side should be tightened with self-adhesive paper, which depicts money, or just a beautiful cloth.
In order for the tree to stand evenly in the pot, alabaster will need to be poured inside. When the substance hardens, the surface of the soil will need to be decorated with coins, sawdust or decorative pebbles.

Pedigree
A do-it-yourself family tree becomes an excellent gift for close relatives. In addition, such a craft is often instructed to bring to school. The family tree is made out in several ways. For small children, an applique is more suitable: the trunk is drawn on paper, and the names of family members are indicated on sheets of paper, fruits or flowers made of colored paper. Adults will be much more interested in creating a topiary with photographs.

How to make a DIY tree craft, see the video below.


