DIY crafts for children 7 years old

Making crafts with children is an interesting and rewarding activity that helps develop imagination and fine motor skills. A 7-year-old child can make interesting figures, postcards and pictures from almost any available materials.


Paper ideas
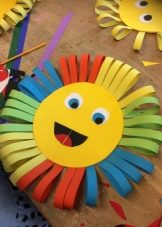
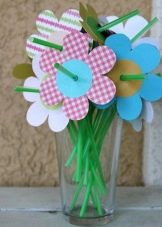
Making crafts from colored paper and cardboard is the simplest and most accessible type of children's creativity. Figures and appliques from these materials can be made for any theme.


Animals
From thick cardboard and double-sided colored paper, you can create a beautiful tiger figurine. To do this, a sheet of orange cardboard is cut into two pieces. Roll one of them into a neat cylinder and glue its edges. From the second half of the sheet, you need to cut out the paws, ears and tail of the future tiger. The edges of the legs are slightly bent and attached to the body of the animal. The same is done with the tail.
To decorate a tiger from white paper, you need to cut out individual parts that are attached to its ears, stomach and muzzle. A neat incision is made at the bottom of the ears. After that, the ears are attached to the base of the figurine. Stripes and other decorative details are drawn on its surface with an ordinary felt-tip pen.


Birds
A 7-year-old child can also make a figurine of a beautiful bird with his own hands. The original wall panel will be a wonderful decoration for both a children's room and a living room. Such a bird is made very simply. To begin with, you need to cut out the base of the body and two identical wings from thick cardboard.
Bird feathers are made from double-sided colored paper.
Their edges are decorated with neat even cuts. Such colored blanks are glued to the base of the body in even rows.

Another interesting craft that a child can do on their own is a bright rooster. The process of creating such a figurine consists of six steps.
- A rectangular sheet of yellow cardboard must be rolled up with a cone and held together with glue.
- Wings of the same size are cut from the same material. Their edges are glued to the base of the body.
- The rooster's body and wings are decorated with circles cut out of red paper.
- The beak and comb of the rooster are cut from the same material. These parts are attached to the crown of the bird, just like its eyes.
- Rooster legs are also made of red double-sided paper. Cut off two thin strips from the sheet and fold them like an accordion.
- The resulting strips are complemented with yellow or red paws and attached to the bottom of the cone.
The bird turns out to be bright and beautiful.

Flowers
To create beautiful graceful roses, double-sided colored paper is used. An even square must be cut out of it. You need to draw a volumetric spiral on the surface of the paper. It is cut out of paper with sharp scissors and twisted neatly. The edges of the spiral are held together with double-sided tape or glue. A bouquet of several of these flowers, collected together, will look beautiful.


Insects
One of the simplest colored paper and cardboard crafts is a ladybug. Such a figure is made in just a couple of minutes. To begin with, two black circles must be cut out of thick cardboard. One of them should be larger, the other a little smaller. The small circle neatly folds in half and is attached with the wider part to the large one.

Two even circles must also be cut out of red cardboard. They fold in half and are attached to the base with glue. The wings of a voluminous insect should be decorated with circles drawn with markers. The head of a ladybug is decorated with eyes cut out of colored paper and a thin mustache.


Small house
You can easily make a large dollhouse out of cardboard and colored paper. To create it, 5 boxes are used. Such a construction is done according to certain instructions.
- Four boxes of the same size need to be glued together. Neat windows can be cut in the side walls. Each of the boxes is pasted over with colored paper from the inside. The child can choose the color of the walls, floor and ceiling for the house himself.
- The roof of the building is made from a larger box. A large triangle is cut from its bottom. It needs to be attached to the back of the house. Two wide pieces are cut from the sides of the box. They are glued together and fixed on the side edges of the boxes. The roof is stable.
- Furniture for such a house can be molded from plasticine. or make from the same paper.

What to make of plasticine?
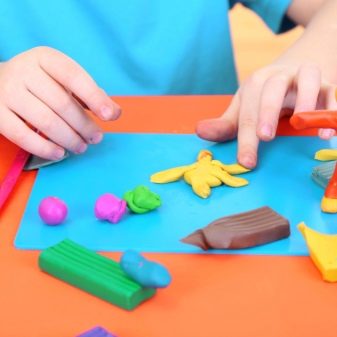
Modeling crafts from plasticine captivates both boys and girls. Children make many interesting figures and appliques from this soft and elastic material. A 7-year-old child should pay attention to the following ideas.

Cow
Creating an original figurine, decorated with a lot of details, is not as difficult as it seems at first glance. The product sculpting process consists of nine stages.
- A pear-shaped head must be fashioned from a piece of white plasticine.
- Cow horns should be made from a thin strip of yellow plasticine with pointed edges.
- They are attached to the top of the head. With the help of a toothpick, nostrils are drawn on the animal's face.
- The ears and bangs of the animal must be fashioned from black plasticine. These parts are also attached to the crown of the head.
- The eyes of a cow are molded from white and black plasticine and fixed on a purple base. This volumetric detail is also attached to the head of the animal.
- The body of a cow is molded from a large piece of plasticine, which is also given a pear-shaped shape. It is decorated with neat even spots of black color.
- The cow's head is attached to the body with half a toothpick.
- After that, you can start sculpting the legs. 4 thin flagella need to be fashioned from white plasticine, 4 short ones from black.
- The black pieces are folded in half and attached to the white pieces. The joints of the feet and hooves are gently smoothed out.The legs are then attached to the cow's body.
The figure turns out to be cute and unusual.

Pink owl
To create this cute bird, your child will need brown, pink, white and black plasticine.
- First, you need to mold a large ball from a piece of dark plasticine. It must be pulled up slightly.
- The paws of the bird are formed from 6 short white flagella.
- The base of the figurine is decorated with a pink belly and wings of the same color.
- Its base is complemented by large white eyes and a beak.
- From light brown plasticine, you need to mold two "leaves" and fix them over the eyes of the bird.
The finished product can be seated on a real branch or a workpiece molded from brown plasticine.


Salted dough options
Schoolchildren are also happy to make crafts from salt dough. The basis for work is prepared from 2 glasses of flour, a glass of fine salt and a glass of water. The dough is kneaded until soft and elastic. Figures made from this material are beautiful and unusual.


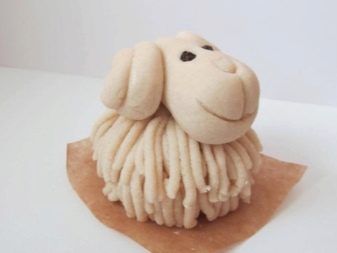
Lamb
This cute tough dough craft is very easy to make. The process of its creation consists of five stages.
- To begin with, you need to roll a large ball out of a piece of dough and flatten it slightly.
- The second ball is also formed from a piece of dough. It needs to be given a pear-shaped shape. With a stack or a knife on it, you need to mark the mouth, nose and eyes.
- The lower part of the head must be carefully moistened with water and attached to the body.
- Lamb wool is also made from dough. Pieces of the harvested material are passed through a garlic press. These long flagella are attached to the base of the body in even rows.
- The figurine is baked in the oven for 1-2 hours.
The finished craft can be painted in light colors. In order for the figurine to retain its attractiveness for a long time, it can be covered with 2-3 layers of varnish.

Hedgehog
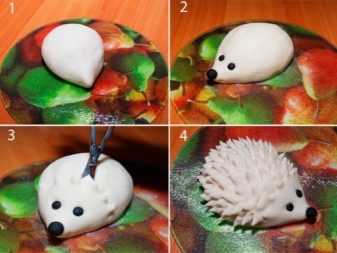
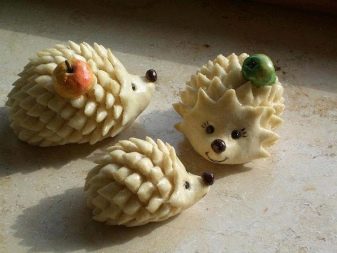
Another interesting craft is a cute hedgehog. To create it from the dough, you need to roll a ball and gently pull out its muzzle. The hedgehog's nose and eyes are molded from the remains of the dough.
They are moistened with water and attached to the head of the figurine.
After that, using nail scissors, needles must be formed on the hedgehog's body. The dough is neatly cut in rows. The edges of the needles are slightly softened with light finger touches. The finished product must be dried and colored as desired.
Products from scrap materials
A child with a good imagination can use improvised materials to create beautiful crafts.

Threads
A voluminous postcard made of colored yarn will be an excellent gift for a loved one. For this craft, you can use unnecessary leftover thread. The process of its creation consists of five stages.
- To begin with, you need to cut out a figure of the desired shape and size from thick green cardboard.
- Small bows must be formed from pink or purple thread. To do this, a piece of thread must be wound around a fork. After that, the bundle must be removed from it and carefully bandaged in the middle.
- The prepared bows are decorated with scraps of yellow thread and glued to the surface of the cardboard.
- The grass and flower stems are made from green yarn.
- The frame of the postcard can be decorated with small bows made of light threads.
The finished picture must be dried. If some parts of the postcard fall off from it, they must be fixed on the surface of the sheet more reliably.


Cones
To create this winter composition, the child will need cones, plasticine, cotton wool, tinsel, paint and glue.
- The first step is to paint the dried pine cones with acrylic or gouache. The base of the figurine should be black and the front of the figurine should be white.
- The bird's head and wings are molded from black plasticine.
- The same material is used to create the beak and eyes.
- Small fir cones are also painted white and decorated with pieces of tinsel.
- The base of the craft is decorated with cotton wool. All figures are attached to its surface with hot glue.
The craft turns out to be cute and uplifting.


Parents can keep the most beautiful and valuable children's crafts as a keepsake. So that they do not deteriorate over time, they need to be put in separate boxes. The condition of the crafts should be checked periodically.


Interesting craft ideas for children of 7 years old can be seen in the following video.


