Crafts for toddlers

It is very important to develop imagination and creativity in children from an early age, because thanks to this, imaginative thinking, the process of memorization, speech development, attentiveness and fine motor skills also develop.


Drawing, modeling or making appliques can captivate the baby for a long time. The main thing is to choose a craft that will be within the child's power and will not take much time. The article will discuss how to properly captivate the baby, and how to build a joint work with him, as well as how to interest children of several ages.


Simple paper products
Paper crafts for the smallest children up to one and a half years old are usually not very difficult. It is always very interesting for kids to play with paints and paper. The first joint drawings with the parents will bring a smile and joy to the child for a long time. The simplest is to paint with watercolors or gouache using your fingers or palm prints. In this case, mom and dad will have to show their imagination and finish the picture.
From the print of a child's palm, you can get a flower, a whole bouquet or a bird. With the finger drawing method, you can also make birds or animals, for example, a cat, dog or mouse.


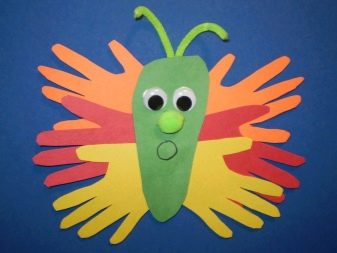
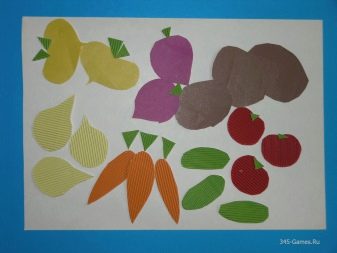
The applique is also perfect for creating crumbs. The outlined hand of a child is cut out of colored paper, and you can create a masterpiece, for example, a cockerel, a butterfly, a swan, a ladybug or a fish. Older children can create appliqués with a glue stick. Draw or download from the Internet and print drawings of a bear, car or cow. It will be interesting for children to cut out the details and stick them on the base of the picture.You can make it a little more difficult - ask the kid to color, cut and paste an object, for example, a turnip, an apple or other fruits and vegetables. For children's creativity, it is necessary to use scissors with rounded ends - ordinary scissors are traumatic and cannot be used even under the supervision of adults.


What to make of plasticine?
You can make a lot of interesting crafts from plasticine - these are both figures and whole paintings. Modeling develops not only hand motility, artistic taste and spatial imagination, but also hones the mind of the child.
Crafts such as a bun, a snowman and a caterpillar are very easy to perform. Let's consider the master classes of these crafts in more detail.
Gingerbread man
For crafts you will need: yellow plasticine for Kolobok's body, white and black plasticine for the eyes and red for the mouth.
We roll the yellow plasticine into a large ball - this is how we will form the body of the Kolobok. We make a very small ball for the nose and stick it on the body. Roll up small balls from white plasticine and flatten them a little - these will be eyes. Stick small black balls-pupils on the white eyes. Let's stick our eyes to the bun just above the nose. Roll out the red plasticine with a thin sausage for the mouth and attach it in the form of a smile. The gingerbread man is ready!


snowman
We roll three balls from white plasticine - large, smaller and even smaller. Let's arrange the balls from the largest to the smallest. We roll two medium-sized balls and attach them to the middle ball of the snowman, forming his hands. We make two balls from black plasticine - these are our future eyes, from a mass of orange or red we will make a small cone for a carrot nose. You can mold a bucket on the head of a snowman or take a lid from a cream or toothpaste.


Caterpillar
For a caterpillar you need: plasticine of different colors, matches without sulfur heads and a plastic knife.
We roll out a large ball from colored plasticine - this will be the head of a caterpillar, 4 small balls for the body and a couple of small balls for the tail. Using matches, we connect the balls to each other. We sculpt eyes from white and black plasticine, roll up a small red ball for the nose, and stick everything. We make the horns on the head of the caterpillar from matches with red plasticine balls at the tips. We make a smile with a plastic knife.


Interesting master classes on making something more complex, for example, a hedgehog, a flower in a pot or in a meadow, a kitten. These figurines use not only plasticine, but also other materials, such as spruce needles and wire. In addition, various shapes are also involved - triangles for a kitten's ears or an oval shape for a hedgehog's body, thin oval cakes for flower petals.


Consider a kitten sculpting master class in more detail. You will need yellow, pink, green, black and orange plasticine, matches, a knife for cutting plasticine. Roll up a thick yellow sausage for the kitten's torso and a ball for the head. Sculpt triangles for the ears and connect them to the head. From pink plasticine we make a small oval for the nose, green and black colors go for the eyes. We attach a nose, eyes to the head and stick in a wire for a mustache, make a mouth with a knife. With the help of a match, we connect the body and the head, we make a tail from a small yellow sausage and attach it to the body.
The legs will be made of matches with orange balls at the ends.


To create a picture from plasticine, you will need colored pencils or watercolors, plasticine of different colors. Invite your child to color a printed drawing drawn or downloaded from the Internet. Decide in advance which parts of the drawing should be made of plasticine. Ask the child to mold the selected parts from plasticine and stick them on the drawing. The picture is ready.


Using plasticine mass, materials at hand and imagination, you can mold and much more.
More ideas
DIY crafts for kids are not limited only to paper and plasticine.A child aged 2-3 years and 1 year older will be interested in making a craft from multi-colored cereals, toys filled with peas or beans. Drawings can not only be drawn, but also painted with glue and colored sand. Such creativity will appeal to very young children, especially if you apply glue, and they will need to pour sand. Chic children's crafts are made from autumn leaves, cones, acorns, spruce branches and everything that can be found in the park or in the forest.


Applications can be made not only from paper, but also using fabrics. A successful master class on the topic "Carlson Who Lives on the Roof" will serve as a good example. We need two pre-printed drawings of Carlson, various pieces of fabric, thick cardboard, scissors, glue and foil. We glue one drawing of Carlson onto the cardboard base, and cut out the shape along the contour. The second pattern is needed for sewing clothes: it will need to be cut and used to cut the fabric. We paint the face, hands and hair of Carlson pasted on cardboard, then glue his clothes. Cut the propeller out of foil and glue it as well. For the hair, you need to choose the thread of a floss that matches the color and carefully stick them. The resulting Carlson can be played like other toys.


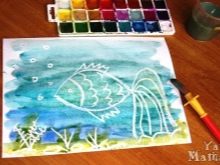
Paintings drawn with a wax pencil and painted with gouache look very interesting. To complete such a picture, mom or dad must first draw a drawing with a wax pencil on a clean sheet. Invite the children to paint the entire piece of paper in one color. The child will see that in the process of filling out the sheet of paper, a drawing appears. It is not necessary to draw something complex, you can draw a flower, a snowflake, a fish with algae, a jellyfish, a seashell or a smiley.
Such a picture can be framed and hung in the child's creative corner or in the nursery.


Joint creativity with children not only creates many positive memories, but also strengthens family ties. It is important to always praise the child, regardless of the "clumsy" of the craft, so you will develop in him a craving for creativity and confidence in his talent. Years later, all these postcards, appliques and figures will make you smile and cheer up.


For information on how to make origami for kids, see the next master class.


