What kind of crafts can you do for mom?

Mom is the most magical word in the world. From the first days of a baby's life, mom is always there, she supports, protects, cares, and most importantly, loves with all her heart. Mother's love has no boundaries, and every child feels it. Children, in turn, show reciprocal feelings. They delight mothers with their achievements, try to help them and support them in any situations. And when the time of the holiday comes, gifts are always given. Growing up children surprise mothers with gifts purchased in the store or custom-made by highly qualified craftsmen. And kids make presents with their own hands. There are much more options for creating crafts than it seems at first glance.


What can be done from plasticine?
Surely every mother has a box hidden in the closet on the far shelf, where the crafts that her children made with their own hands are kept. This is not about the applications compiled in the labor lesson, but about gifts.
It should be noted that in the modern world there is a wide variety of materials that are easy to use, from which you can create the most unique crafts, for example, plasticine. Its color palette is so limitless that it allows you to craft the most incredible crafts that will delight the eye. Well, for very young children, modeling is an excellent activity that allows them to develop fine motor skills and children's imagination.


The first thing that comes to mind when you start to come up with a gift for your beloved mother is flowers. It is just possible to create a unique festive bouquet from plasticine, which no one else will have.
The main thing is that the process of creating a presentation will be quick and easy.


For work, you will need plasticine of green, red and pink colors, a modeling board on which you can create a masterpiece, and a special knife that allows you to cut plasticine, usually it is included in the kit.
- First of all, you need to prepare the material itself for work. To make it more pliable, you need to knead a piece of plasticine in your hands. The material will accept heat from human hands, it will become softer and more comfortable to work with.
- You need to take a green piece of plasticine and roll out an elongated sausage on a modeling board, then divide it into 7-9 identical parts. These sausages will be flower stems. Their number should correspond to the number of flowers in the bouquet.
- Next, a piece of pink plasticine is taken, also rolled into a sausage, and divided into several parts. After that, each created sausage is slightly flattened, and then twisted into a spiral. The required number of buds is created in a similar way.
- You need to attach the created buds to the stems.
- After creating the base of the bouquet, you can supplement the stems with green plasticine leaves.
- It remains to make a bow. To do this, you need to roll a small ball, attach it to the central part of the bouquet. After that, roll out 2 sausages of the same length and bend them, attaching them to the central ball. Ribbons descending from the bow are created in a similar way.


Paper Gift Ideas
At every labor lesson in kindergarten and in elementary school, teachers invite children to make beautiful paper gifts for Mother's Day. Children, in turn, respond with great interest to the proposal and are ready to create any masterpieces, just to please the person closest to them. So, a rather interesting option will be the craft "Sun", in which you can use a portrait of your mother.


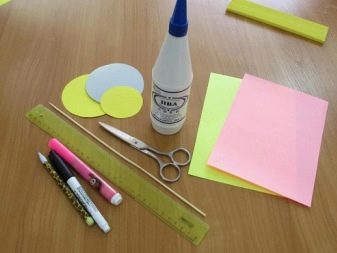
To work, you will need a minimum of materials: colored paper, pencils with felt-tip pens, a wooden stick, more precisely, a culinary skewer, scissors and a photo of your mother.
- At the initial stage of work, it is necessary to cut out 3 circles, 2 of which will have a large circle, and the third - a small one. Now you need to take a yellow sheet of colored paper, draw lines on it at a distance of 1 cm from each other.
- According to the drawn lines, it is necessary to fold the workpiece in the form of a fan.
- The ends of the fan must be cut at a 45 degree angle.
- According to a similar scheme, several more fans of different colors are harvested. After that, their ends are connected with glue.
- It is necessary to put a skewer into one of the accordions and fill this place with a small amount of glue, then hold it with your fingers for a few minutes so that the glue seizes.
- Now a small circle is taken, a photograph of mom is glued to it.
A prepared circle with a photograph on the back is coated with glue and attached to the central part of the sun.


Card
And now it is proposed to consider a master class on creating a voluminous postcard for mom. The main element of the craft composition will be a bouquet of flowers. What is noteworthy is that making such a postcard is as easy as shelling pears, even the smallest child can handle this work.

For work, you will need watercolor paper or decorative cardboard with an unusual background. For the flowers themselves, you will need plain colored paper. Well, for the main work, prepare a pencil, glue, scissors and beads as a decor.
- You need to take colored paper, fold it in half so that you get 7 halves.
- Next, you need to bend the harvested sheets diagonally, and then cut off the excess. Thus, you should get triangles.
- The prepared triangles must be placed in front of you so that the corner of the figure looks up.
- The triangle now folds in half.
- The created shape is also bent along the center line, after which a droplet is drawn on it with a pencil.It is cut out with scissors.
- The rest of the triangles are procured in a similar way.
- The cut out droplets will need to be expanded. Thus, it will be possible to see the basis for the flower.
- On each bud obtained, it is necessary to cut off 1 petal, and connect 2 adjacent ones with glue by overlapping each other.
- On each flower, you need to select 1 petal and paint over it with a pencil. Then the flowers are glued together along the painted petals.
- The lower part of the finished paper design of the bouquet is coated with glue and attached to the base of the postcard.
- After the glue mixture dries, you need to take 1 bead and fix it in the central part of each flower.


Flowers
Each mother will be pleased to receive a bunch of flowers as a gift from her child. And let it be made of paper, the main thing is that the kid made it with his own hands.
You will need to stock up on colored corrugated paper, glue and scissors.
- You need to take a sheet of green paper, fold it in half, measure with a ruler about 3-3.5 cm, then draw a horizontal line under the ruler along the marks.
- Above the already created line, you need to mark with a pencil vertical serifs at a distance of 1-1.5 cm from each other. Along these same lines, cuts are made so that the horizontal part remains intact.
- Next, a sheet of paper with cuts is unfolded, turned over to the back side, folded and glued with an indent of 1-1.5 cm from the whole edge.
- The workpiece is folded so that it turns out to be a vase.
- Next, corrugated paper is taken, cut out in the form of squares or rounds. The central part of the figures is pulled together and unwound so that the petals of the buds take on an arbitrary shape.
The prepared flowers are glued to the vase.


Application
The kid can try to create a bouquet of balloons. To work, he will need fabric tape, colored paper and cardboard for the base of the craft.
- First of all, you need to cut the ribbons to the same length. According to the idea of the applique, balls will be held on them. Each tape must be greased with adhesive and then glued to a cardboard base.
- You need to cut out the balloons. To do this, take colored paper, a pencil and a shape that allows you to create a circle outline. The cut circles are glued over the ribbons.
- It remains only to glue the bow, also made up of colored fabric tape.


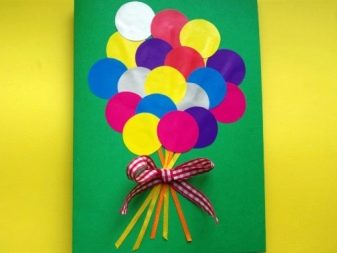
Beads, oracle and much more can be used as decor. You can add a frame to the applique or leave space for writing your wishes.
Cotton pads options
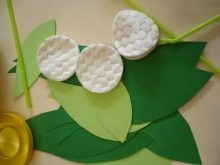
You can create a beautiful and unforgettable bouquet of calla lilies from the most ordinary cotton sponges. For work, you will need green paper, cotton swabs, green cocktail tubes, cotton pads themselves, yellow gouache, glue and cloth tape.
- You need to take cotton swabs, paint the tip yellow. Once dry, they are inserted into the cocktail tubes so that the yellow tip remains on the outside.
- The tubes are placed on cotton pads, which are twisted so that the yellow "stamen" remains on the surface. It is necessary to fix the bud with glue.
- The required number of colors is created in a similar way.
- After that, leaves are cut out of green paper.
- The sheet is placed from the bottom of the craft, its tip is coated with glue, and a fabric tape is wound on top and tied in the form of a bow.




Crafts from natural materials
Modern children in kindergartens and schools are offered to create crafts from natural materials. We are talking about leaves, cones, acorns, tree twigs and much more. Here is one of the master classes that will help you decorate your mom's photo with an extraordinary autumn outfit.


For work, you will need leaves from trees, wheat grains, pumpkin seeds, glue and beads.
- First of all, the frame and background of the intended applique are created. It is recommended to use a regular sheet of cardboard as a base.
- A photo of mom is glued to the cardboard. It is desirable that her face be presented in close-up.
- Further work involves decorating the photograph. The hair must be decorated with wheat grains, a crown of leaves must be glued onto the head.
- A yellow leaf from a tree is also glued to the lower part, and with the help of pumpkin seeds a necklace is created, on top of which beads are attached.
You can create a lot of unique gift crafts from natural materials.


These can be landscapes, still lifes. However, small children cannot afford to create such complex masterpieces. That is why simpler master classes have been developed for them. For example, a vase of flowers. Such a craft, made by the hands of a child, will seem to mom more valuable than a bouquet purchased in a store.


For work, you only need plasticine, glue, seeds, dry leaves, maple lionfish and dried flowers.
- On the cardboard, which is the base of the craft, you need to glue the silhouette of a vase. Glue the prepared seeds on top.
- Then twigs and leaves are glued.
- With the help of yellow or orange plasticine, it is necessary to prepare the middle of the flower. Further, petals are glued to it, the role of which is played by maple "wings".
- The last stage of work is to supplement the composition with other dried flowers.


Original felt gifts
You can congratulate mom on Mother's Day or on March 8 by making a unique felt craft. Both schoolchildren and kindergarten children will be able to cope with such work.
From felt, you can sew a beautiful needle cushion, which is useful in everyday life, or a simple keychain toy.


What is noteworthy is that you can choose any color of felt for making crafts. However, bright shades such as red or green look the most beautiful.
For sewing the needle bed, you will need to prepare the templates in advance, on the basis of which individual parts of the soft structure will be cut, and then stitched together. As a filling of the needle bar, cotton wool or a foam insert will do.


In general, a huge number of different gifts and souvenirs can be made from felt. But for novice craftsmen, it is proposed to consider one simple master class - a bird.
- First you need to make patterns for different elements of the bird's figure. The main thing is to remember that there should be 2 pieces of all the parts.
- The cut felt details are folded in half and neatly sewn together. Remember to leave a small hole where you need to insert the filler.
- Also, wings are cut out of felt and attached to the prepared pillow.
- A beak is made in a similar way and attached to the head.
- The bird's eyes are made of beads and sewn to the base of the toy.
- If this bird will complement a bouquet of flowers, you need to insert a wooden skewer into the lower part of the base. If it is a keychain, it is necessary to fix a metal chain with a ring on the upper side.

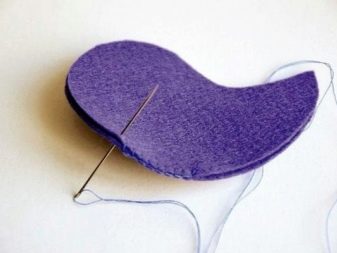


It is best to present such a bird in the form of a keychain. Mom can hang it on the car keys or the house.
Other products
There are a lot of reasons for giving gifts to mom. Kids every time try to please the person dearest to themselves for their birthday and other holidays with various drawings and crafts from plasticine and paper. Older children are already creating more complex products, which include knitting elements, macrame. The result is an unusual craft that can be hung on the wall or used as a nice little thing for the kitchen. For example, girls who can crochet can make a beautiful pencil holder. Children with more advanced knitting skills can delight their mother with their own hand-made potholders, kettle warmers and hot coasters.
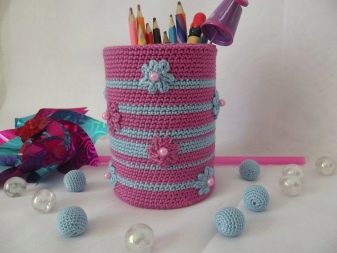

Surely all housewives are aware that knitted napkins and tablecloths are back in fashion today. A bath mat twisted from thick threads, as well as decorative vases made of twine, look quite unusual and very impressive. It remains only to show imagination, to come up with what can be done from such a familiar, but rather difficult material to work with.


It is recommended to use only natural products as a colorant, for example, instant coffee, turmeric, hibiscus or saffron. In addition to its pleasant color, the material acquires an unusual smell.
Today, voluminous crafts made of plywood are very popular. It is impossible for children to make such beauty on their own, because the process involves the use of sharp instruments. In addition to glue for fixing, you will need special equipment: a hammer, invisible nails. Small children will not be able to cope with such work, they will certainly get hurt. Well, if the kids help to create such an unusual masterpiece for an older brother or sister, then they will be able to learn the skills of working with plywood, and already at an older age they themselves will perform such miracles.

A simple option for creating plywood crafts is flat images. It can be animals, flowers, hearts. However, if there is a need to make a voluminous craft, you will need to prepare several separate parts from plywood, which are subsequently connected to each other. It should be noted right away that voluminous crafts consist of 3 or more elements, which must be identical in size to each other. For each detail, you will have to prepare an individual sketch and it is from it that the image will be cut out.
Only after all the structural elements have been cut out can the craft be connected.


The last stage of work involves decorating products. In this case, children can show imagination, for example, if it is a bouquet of flowers, the buds can be decorated with beads. And the vase - a knitted cover with a ribbon. If this is an image of an animal, an addition in the form of a scarf and a hat or a festive costume, sewn or knitted according to the size of the craft, will be quite appropriate.
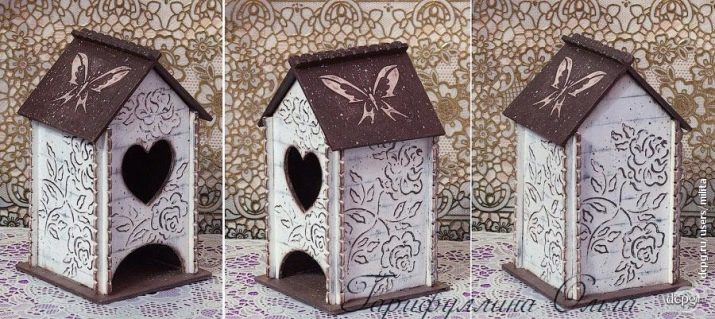
Today, you can find diagrams of crafts and techniques for making plywood structures on the Internet or when visiting master classes from specialists. But if you show your imagination, you will be able to create a unique and inimitable masterpiece with your own hands.
For more information on how else you can make a craft for your mom with your own hands, see the next video.


