Making a craft "House"
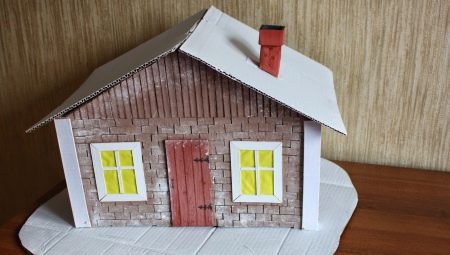
Many children love to make different houses with their own hands. For the manufacture of such crafts, both natural and improvised materials can be used, which are found in almost every home. In this article, we will learn how to correctly make different variations of the "House" craft.

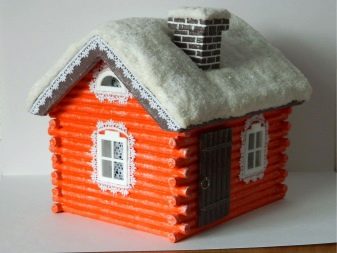
How to make from pumpkin?
Very beautiful and elegant houses are made from natural materials, fruits and vegetables. It is quite easy to work with such components, so children do not have unnecessary difficulties in the manufacture of original products. For a kindergarten, you can make a cool house from an ordinary pumpkin. If you treat the manufacture of this craft carefully and responsibly, you can get amazing results. So, in order to make a spectacular pumpkin house, you will need to find a number of important components:
- a neat tray or a beautiful napkin: these components will serve as the basis for the craft;
- large and beautiful pumpkin;
- leaves;
- grass and branches;
- cones;
- seeds;
- high-quality plasticine blocks;
- skewers or toothpicks;
- linen rope;
- a small candle (the size of this part should be such that it can later fit into the inside of the pumpkin-house);
additional decorative components.


Let's get acquainted with all the intricacies of making an original pumpkin house.
- You need to take a pumpkin. A small lower part is cut off so that the base is stable and does not roll over.
- Using a skewer or a toothpick on a pumpkin, you need to sketch the places where the cuts for windows and doors will be made according to the type of scheme.
- First, cut a hole for the door to the house. You don't need to touch the window yet. It is necessary to use only a well-sharpened and strong knife.You should work as carefully and accurately as possible.
- It is better to cut a more compact door first. It will be possible to expand it a little later. After that, you need to carefully pull out all the seeds and pulp from the inside of the pumpkin.
- It is advisable to remove as much of the inner filling from the pumpkin as possible. The less pulp there is, the more space there will be for arranging an attractive house.
- Now you can safely cut the window.
- The entrance to the elegant pumpkin house should be interestingly decorated by means of a frame made up of previously removed seeds.
- To attractively decorate the window, you should take a couple of twigs, as well as toothpicks.
- The sharp tip of the knife will need to make small indentations. Prepared twigs should be inserted crosswise into them.
- In the upper part above the window, you can make a kind of roof from fallen leaves. It will be possible to attach it to the pumpkin by means of plasticine pieces.
- From the inside, the cut-out window opening can be originally framed with a small curtain made of woven material, for example, organza. For these purposes, you need to take a woven shred, as well as a small piece of a toothpick.
- Using a toothpick, an impromptu curtain can be securely fixed in the inside of a homemade house.


A very beautiful and creative craft is ready! It can be made for schools, fairs and exhibitions. When the work is completed, it's time to move on to creating the small inhabitants of the dwelling.


Making from branches
The idea of \ u200b \ u200bmaking a pretty house from branches is of interest to most young craftsmen. The child can independently collect all the necessary natural material of a suitable color and thickness.


Let's get acquainted with a detailed step-by-step master class on modeling a house from branches, sticks and twigs.
- At the first stage, it is necessary to cut out the walls and roof of the future statue from thick cardboard. Already at this moment, windows and a door should be made. The cut components must be glued together using a glue gun.
- To make the cardboard structure more reliable and strong, it is advisable to glue masking tape at its corners. After that, the blank of the house must be fixed on a thick cardboard sheet.
- First, the prepared branches are pasted over the side walls of the blank cardboard structure. It is most convenient to use the same glue gun.
- Then the secateurs are taken. With this tool, twigs are cut in the central part, after which they can be glued to the door of a homemade house. In the same way it will turn out to make the handle of the door leaf. The latter can be attached directly to the house.
- It is necessary to glue the cardboard sheet at the top. This sheet should be folded in half. Thus, it will turn out to depict a roof with two slopes. Then you will need to cut off a branch of greater thickness at an angle. It should be glued under the guise of a pipe.
- Thin and dried twigs should be attached to the cardboard base.
- Next, a few pebbles are taken. Using hot glue, these materials can be used to make a small decorative well with a bucket on a chain for a village house.
- You can also complement the composition with an original decor in the form of two sticks, on which small clothes of the owners of the house are dried from branches. The result is the look of a cozy country house.
It can be supplemented with an impromptu vegetable garden.


More ideas
There are many more interesting ideas for creating a creative house. Crafts are made not only from twigs or pebbles, but also from many other materials, for example, from paper or tree bark. Below we will consider several fascinating master classes for assembling houses.


New Year's fabulous
It will be incredibly interesting for a child to make an elegant New Year's house that looks magical and fabulous.It will be quite simple to make it, but the result will definitely please the little master. The first step is to prepare a number of necessary components, from which a fabulous New Year's house will be assembled in the future:
- a variety of decorative ornaments (small bells, balls, tinsel and other similar attributes are suitable);
- white cardboard;
- stationery knife;
- paper;
- scissors;
- adhesive composition (PVA is suitable);
- glue stick;
- sequins;
- paint;
- ruler;
- you can use a latex primer if you wish.


Let's divide into separate stages the whole process of making a pretty New Year's house from a fairy tale.
- A very important and serious stage of work is the preparation of a template for the future house. You can draw up the scheme yourself, or you can use ready-made options.
- All the necessary components of the future design will need to be carefully cut out of paper. They should be glued with a glue stick to the cardboard base. Instead of glue, you can use double-sided tape at this stage.
- Next, the necessary components are cut out of the cardboard material. Windows, doors and all other remaining elements must be carefully cut out with a clerical knife.
- The finished parts will need to be folded along the bending lines. After that, the elements can be glued into a single composition.
- If it is planned to apply a primer to such a house, then this can be done at this stage. Thanks to the presence of a primer, the craft will be protected from possible deformations.
- After that, the fabulous house can be painted in attractive colors. Wait until the paint is completely dry. Next, you can start decorating a charming New Year's house.


How to decorate a New Year's house, each little master decides for himself. Such an interesting and attractive craft can be made bright and unusual, supplemented with artificial snow sprinkles, lots of sparkles and miniature garlands.
From the bark
You can make a charming house with your own hands from birch bark. Beautiful and neat crafts are obtained from birch bark, on which you do not have to work for a long time.


Find out the details of making a house from birch bark.
- First, you need to collect fresh birch bark in the forest. To make a neat house, this natural component will need to be cut into several thin strips. In this case, the white bark must be removed.
- The prepared natural elements will need to be placed in a small saucepan. It must be filled with water, then put on fire and boil.
- When the birch bark boils, cover the pan with a lid and turn off the heat. As soon as the liquid has cooled slightly, you will need to take each of the cut strips. They should be twisted at both ends to form a nice spiral. The materials need to be fixed in such an interesting position using a clothespin. The fixed components will need to be put back into the pan.
- At the next stage, the workpieces will need to be pulled out of the water. Wet components should dry completely and cool completely. Only after that it will be possible to safely remove the clothespins. From the blanks, you need to create a cube.
- To do this, a pair of blanks should be properly twisted and placed horizontally. Thus, it will turn out to form the floor and roof of the future house. The other two components should be positioned vertically. Thanks to the existing curls, the parts will attach well to each other.
- Next, you need to take one of the blanks for the roof. First, it is rolled out on one side, combined with the curls of the house. Further, in the same way, you should arrange the workpiece on the other side.
- A thread is taken. It is hung through the roof and fixed there with a stapler. At the same time, the upper part of the house is being formed. It is made more pointed.
- Then acrylic or tempera paints are taken. They need to beautifully paint the craft.The edge of the roof can be supplemented with a ridge made of birch bark.


The original and welcoming birch bark house is ready. It can be supplemented and decorated in a variety of ways.


From paper
The idea of \ u200b \ u200bmaking a house out of paper is very common, but it can be implemented in a variety of ways. Such crafts are often made based on ready-made schemes and templates. The child only has to choose the most beautiful template, print it on a printer, cut and glue it.
Often houses of this type are developed by designers of different levels. You can print templates not only on thin, but also on thicker paper. The finished volumetric and correctly folded structure should be painted in the colors you like, you can use a variety of decorations.


On chicken legs
A very original house on chicken legs can be assembled from:
- dried moss;
- well washed forest cones;
- dry leaves and berries;
- wooden clothespins;
- glue gun;
- plasticine mass.


Let's get acquainted with a master class on assembling a fabulous homemade product.
- The clothespins should be taken apart. Wooden parts are chosen from them. With the help of these parts, it will be possible to glue the hut using liquid nails.
- The assembled fairy-tale house is installed on a cardboard base, the area around is pasted over with dry moss.
- Berries, leaves, branches are glued to the roof of the hut. Several pieces of moss can also be fixed here.
- After being painted green, the cones will make an excellent imitation of Christmas trees. When these parts are dry, they should be glued to the base.
- Various forest animals are molded from plasticine: hedgehogs, chanterelles or bunnies. Ready-made figures stick around the house on chicken legs.


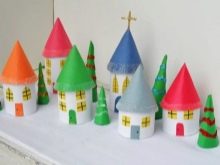
For the gnomes
To model a house for gnomes, you need to use:
- toilet paper rolls;
- sequins of different colors;
- white and colored paper;
- PVA glue and glue stick;
- black marker / felt-tip pen.
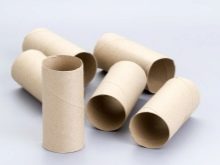


Let's learn about the peculiarities of manufacturing.
- One sleeve is cut into 2 halves. You also need to cut this element so that you get 1 short part and 1 longer one.
- Cut the paper into strips of 15 cm. Their width should be more impressive than the cylinders that they will wrap.
- Doors and windows are cut out of colored paper. On the latter, details are drawn with a marker or felt-tip pen. Door handles are also depicted.
- The finished windows and doors are glued to the 15 cm strips with a glue stick.
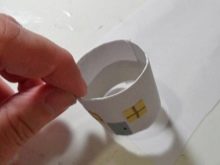
- The prepared cylindrical bases are wrapped in strips. Then they are glued. The excess paper is wrapped inside.
- Several cone-shaped parts with glued ends are made of colored paper. The finished cones are attached to the houses.
The gnome houses are ready.



From the can
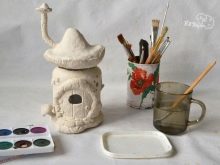
Great houses are made from a combination of cans and polymer clay.
- First, a glass jar is pasted over with foil cakes and flagella. These will be steps and sills.
- Foil is glued to the roof, giving it the shape of a hat.
- A roof pipe can be made from a wire base wrapped in foil.
- A cone-nozzle on the pipe is also made of foil.
- Next, proceed to sculpting. You need to start with the lower tiers of the craft. The clay is applied with a spatula.
- The surfaces are leveled with moistened fingers.
- The texture is stacked until the clay is completely dry.
- The bottom of the can is also covered with clay. The stability of the house is checked.
- The product will dry for a day, after which it can be decorated. On the walls of the house, imitation boards are made using stacks.
- Wooden surfaces are also imitated, after which the roof is molded, a pipe is formed.
- The finished structure of a cozy house, decorated in any way you like, can be painted with watercolors and acrylic paint.



For how to make a simple cardboard house with your own hands, see the next video.


