Options for crafts hedgehogs
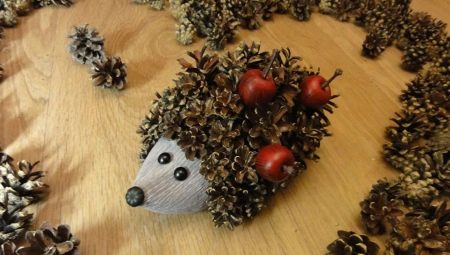
The hedgehog is an adorable forest dweller loved by many children. It is for this reason that young craftsmen love to make this animal from various materials so much. Very cute hedgehogs are made from cones, plasticine, seeds, clothespins, fruits, and so on. In today's article, we will find out what the different options for hedgehog crafts are.



How to make from cones?
A cute forest animal with many thorns on its back can be assembled from materials given by nature itself. Most often, children make hedgehogs using the most ordinary cones, previously collected in the park or in the forest.
From such natural ingredients, you can make very beautiful and original crafts that will surely delight the child.



With plasticine
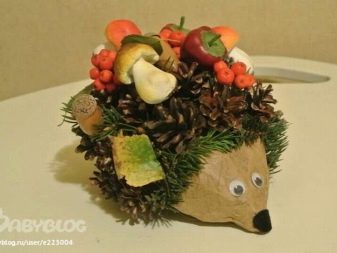
Natural material is often used to make cute fall-themed crafts. Spruce, pine or cedar cones will serve as an excellent basis for creating an animal. Va compartment with natural ingredients, you can use other materials, for example, plasticine mass. These components can make wonderful homemade products!


If you plan to make a cute hedgehog from a combination of different materials, then you should prepare the following positions for work:
- cones (1 cone is needed for 1 hedgehog, so the amount of these components will depend on how many animals the child wants to make);
- plasticine (it is recommended to prepare a quality product from a well-known company, it is advisable to use plasticine masses of different colors).
When everything is ready, the young master can proceed directly to modeling the forest animal.
- To design the animal's face, you will need to take brown plasticine. A piece of plastic material is rolled into a ball.
- The prepared plasticine ball is carefully glued to the cone blank in the area of its tail. Fingers give the muzzle a regular, slightly elongated shape.
- Next, you should take a black plasticine mass. Another small ball is rolled out of it. It is stuck in the area where the animal's nose should be.
- Take brown plasticine. 4 small sausages are rolled from it. These will be the legs of the future hedgehog. The finished parts are attached to the lower half of the base cone from 4 sides at once.
- You need to take white plasticine. Eyes are made of it. Roll a couple of snow-white balls. They take dark plasticine to roll it into small balls - pupils. All prepared plasticine parts are attached to the hedgehog's face.
- The next brown plasticine piece must be taken in order to prepare a neat little mouth from it. This detail should be attached under the muzzle.
In order for such a charming hand-made craft to acquire a more "autumn look", it can be additionally seated on autumn leaves, as well as decorated with apples and mushrooms molded from plasticine mass.


With salted dough
Gorgeous crafts are obtained by using a combination of cones and cooked dough. To make a hedgehog, a young master should stock up on:
- natural buds;
- salt dough;
- with forceps or pliers.
Let's analyze the whole process of modeling a nice forest dweller from cones and dough into stages.
- When preparing the test, it is allowed to add a small amount of gouache or dye to it. Due to such manipulations, the mixture will turn out to be tinted.
- To make the dough, you need to mix 1 glass of salt, a couple of glasses of flour, 250 g of pure water. For additional density, it is allowed to add 2 tsp into the dough. PVA glue.
- Using pliers, the scales are removed from the cones. The base-body of the hedgehog is formed from the dough.
- The most difficult stage will be the manufacture of needles from the previously selected scales. These components are inserted into the back of the workpiece in rows.
- Another small ball is rolled from the dough. It is stuck in the area of the hedgehog's nose.
- Then they wait until the dough is dry. As a rule, this takes from 5 to 6 days. It is permissible to act differently - dry the craft in the oven at 75 degrees for 1.5 hours (with the door open), and then at 120 degrees, closing the oven door.
- When the dough is completely seized, you should paint the eyes of the hedgehog, draw the nose and mouth. This will complete the interesting craft.


Paper making
Suitable creative work for toddlers is making a hedgehog out of plain paper. In this case, all processes will be as simple and easy as possible, but at the same time quite fun for a little master.
You can make a very beautiful applique from colored paper. If the child's age is only 3-4 years, then it is better to make such things under the supervision of parents. This is due to the fact that a small child will need to skillfully use scissors when making an applique. This must be monitored so that he does not get hurt.

The smallest craftsmen are advised to use pre-prepared stencils for making beautiful paper applications. With such additions at hand, the child will only have to glue the blanks on the background, and then add them with different decor or patterns.
If we are talking about older children (6-7 years old), then here all the work related to cutting out the necessary parts will fall on the shoulders of the youngest master, and not the parents or educator. The child will need to glue the self-cut elements to the selected background and supplement with different decorations, sketches with a marker or felt-tip pens. In this case, the fantasy of the master is not limited by anything, so the hedgehog can be absolutely anything.


How to make from cardboard?
From cardboard sheets, as well as from paper, you can make a very elegant and original animal. It can be an interesting panel made of palms, a small drawing made in the form of an applique, or a voluminous craft.
To make an attractive forest animal, you need to prepare several components:
- beige and brown cardboard;
- PVA glue;
- pencil and markers;
- scissors, compasses.
Let's consider step by step how to model a cardboard hedgehog.
- First, it is advisable to decide what size the hedgehog will have - small or large.
- Next, you need to take brown cardboard. 2 circles are drawn on it with a compass, and then cut in half. For one hedgehog, 3 semicircular parts will be enough.
- A cone is formed from each half, sealed at the edge.
- A ready-made cone is taken, small stripes are made on one of its halves to the middle of the conical part. Due to this, it will be possible to form thorns on top and on the lateral surfaces of the body. Do not touch the glued lower part.
The stripes should be bent in different directions to make the thorns more lush.


What else can you make a craft from?
The animal can be modeled from different elements and objects. There are many interesting ways to create a similar fall craft for school or kindergarten. For example, it can be a cute animal in the forest, in a clearing with mushrooms or on a stump. Consider what else you can make a beautiful craft from.
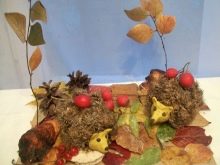


From clothespins
Useful for manufacturing:
- white cardboard sheet;
- clothespins made of wood;
- paints.
From these elements you can make a hedgehog according to this scheme.
- A future hedgehog is schematically sketched on a cardboard box. The workpiece is cut out.
- It is worth entrusting the child with fastening the clothespins on the prepared base. These details will play the role of needles.
The craft can be additionally decorated, and with it the needles-clothespins.

From seeds
For manufacturing, you will need:
- large seeds;
- food foil;
- plasticine mass, simple PVA glue;
- acorns;
- dry foliage, spruce twigs;
- dark green cardboard.
Let's analyze the step-by-step procedure for creating an original craft.
- The foil is rolled up into a couple of balls. One should be larger than the other. A big detail will play the role of the hedgehog's body. The small ball will become the face of the animal.
- Foil parts are connected together by wrapping a large piece of foil.
- The resulting workpiece is coated with plasticine mass. It is better to make the body brown or black, and the muzzle brown.
- Plasticine is used to mold eyes and a nose for a hedgehog. They stick to the face. Seeds are attached to the back and side surfaces. They must be fastened closely so that the plasticine background does not remain noticeable. From the combination of acorns and plasticine mass, charming mushrooms should be formed.
Dry foliage and spruce branches are carefully glued onto the cardboard base. You can attach a ready-made hedgehog to this "autumn" composition from above. On the sides, you can place decorations in the form of mushrooms made from acorns.


From pear and grapes
A very unusual and cute hedgehog can be made from fruits. For this you need:
- 1 pear;
- grapes - 300 g;
- 1 black currant (twig required).
You need to act in this order.
- A small cut is made from one end of the pear for stability.
- The skin is cut from the pear to form the hedgehog's face.
- Further, toothpicks should be inserted into the pear-body of the animal, and grapes should be strung on them. You need to fasten these parts in a row, moving to the right and left.
- Using shortened pieces of toothpicks, they prick black currants, after which the original craft will be ready.


Burdock
Craft from burdock spines will be made using threads and needles. You will also need a woven base. The hedgehog body can be sewn from felt, wool, or any other similar type of fabric. The main thing is that buries are well attached to it.The body should be filled with padding polyester or cotton wool. The prepared burdock spines should be attached to the finished hedgehog's body.
It will turn out to be a very original and beautiful craft. It is suitable for competitions and exhibitions held in 1st grade.


With apple
For children under the age of 3 years, an article in the form of a hedgehog with an apple is perfect. It can be a beautiful applique made from pre-cut parts. An original puzzle with the image of an animal with an apple will turn out to be a good solution.
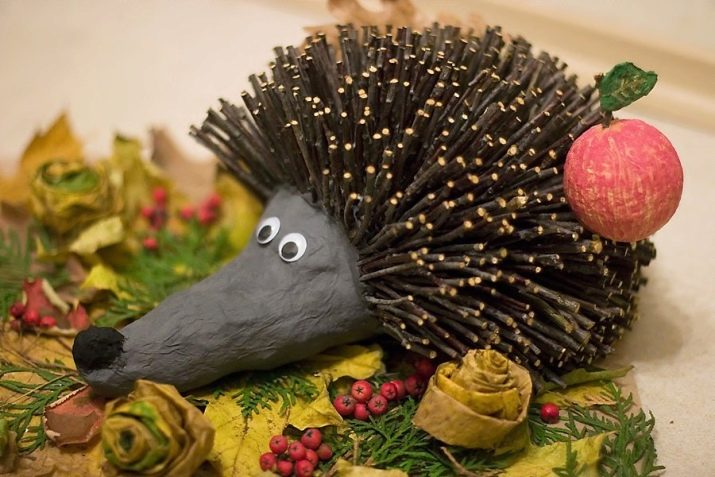
Natural or plasticine apples can be supplemented with other homemade hedgehogs. Usually, fruits are attached to improvised needles or placed next to the animal against the background of the overall composition. Such details look especially harmonious in autumn-themed homemade products.
A hedgehog can also be made from cut apple halves. The needles on its back can be formed from toothpicks or other wooden sticks. Eyes and a nose made of fixed red or black berries will look good.


From the leaves
Hedgehogs are made very easily from the autumn fallen leaves. To do this, it is enough to collect more yellow and red leaves in the park or in the forest. Also, for the manufacture of interesting crafts, a model of the future animal will come in handy. It can be drawn or printed on a printer. You should prepare scissors, glue, several small and multi-colored leaves.
First you need to cut out a pre-printed or drawn hedgehog. After that, you should proceed to creating needles for him. Maple leaves make very good needles.
It is recommended to glue them from top to bottom, in rows. The finished composition can be glued to a thick cardboard or paper sheet.


From lemon
You can make an unusual "lemon hedgehog" from 1 lemon, toothpicks and a handful of chokeberry.
- Lemon in its shape resembles the body of a hedgehog. The fruit must be washed and dried. Next, you need to carefully remove the top layer of the zest, thus leaving the pointed nose of the future animal.
- For the back of the hedgehog, needles should be prepared. To do this, you will need to carefully break the toothpicks into 2 halves. For crafts, 15-20 pieces will be enough.
- The prepared "needles" are stuck into the back of the future lemon hedgehog with a blunt end. This should be done at a distance of about 1.5-2 cm from each other. A checkerboard pattern will do. Since toothpicks have pointed ends, it is advisable for an adult to do this work.
- Further, the back of the hedgehog is decorated. Chokeberries are attached to the toothpicks-needles. They will pierce easily and look very bright.
- Rowan juice should be used to "brown" the cheeks on the hedgehog's face.
- At the next stage, the eyes are drawn up. They can be made from dried cloves, peppercorns, or a felt-tip pen.
- The final step is making a spout. Its role can be played by a cut half of the berry, fixed on a match or toothpick. This part is attached to the pointed part of the muzzle. The craft is ready!


For information on how to make a hedgehog craft, see the next video.


