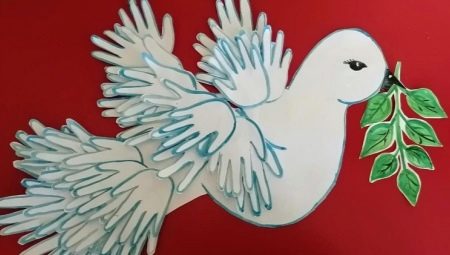
Peace Dove Crafts

The dove has long been considered a symbol of purity, serenity and peace. Due to the lack of a gallbladder, the bird was considered sacred. In the Bible, it was this bird that brought Noah the news of the end of the flood in the form of an olive branch. Today, pigeons are used as a talisman at significant events, promising peace and prosperity to people.
To express sincerity and a good attitude towards another person, you can present him with a gift - a craft in the form of a dove. Most people get acquainted with this type of creativity in kindergarten or school.


How to make a paper dove?
DIY crafts always attract the attention of creative people. "Dove of Peace" is an economical gift option that can be presented to a person as a sign of sympathy and wishes of happiness. It is not for nothing that on their wedding day, it is customary for young people to release a couple of pigeons into the sky. This custom helps to avoid quarrels and makes family life bright and long.
Doves of Peace can be made from different materials, the most affordable of which is plain white paper. DIY crafts in the form of a white dove can be divided into two categories: voluminous birds and appliques.


Application
Application is an affordable creativity option for young children that develops creative thinking and fine motor skills.
Dove of Peace stenciled
To create an applique you will need:
- black marker;
- white cardboard;
- simple pencil;
- scissors;
- glue.
Stages of creation.
- Print the template in the desired size.
- Cut with scissors and attach the template to the cardboard.
- The number of parts depends on the density of the cardboard. One or more cardboard pieces should be cut.
- Draw the necessary lines on the cardboard: eyes, feathers, wings.
- Glue a satin ribbon to the top of the applique, or place the ribbon between two glued pieces of cardboard. Another option is to place a wooden skewer at the bottom of the appliqué to make the pigeon comfortable to carry.
This is the simplest and fastest version of the application, which can be done in just half an hour, for example, when preparing for a holiday. It will not be difficult for children. There are more complex applications.


"Dove of Peace" with separate elements
To complete the application you will need:
- black marker;
- white cardboard;
- simple pencil;
- scissors;
- glue.
Stages of creating an applique.
- Print the dove template in the desired size and additional elements in the form of feathers.
- Cut and trace the template onto a piece of heavy paper or cardboard.
- Draw the eyes with a marker.
- Glue feathers in the area of the wings and tail.
- Bend the feathers up to make the composition look three-dimensional.
- The background of the applique can be painted in different colors or you can make an additional drawing in the form of the sun, olive branch and other elements. An interesting option is to make the background of the dove in the form of the flag of the country or the St.George ribbon. This application is suitable for the theme of May 1 and 9.
You can also use natural or artificial pigeon feathers or dried leaves to complete the tail and wings.


Volumetric
Bulky crafts in the form of a dove are more difficult to perform and require patience. Such pigeons are perfect for decorating a festive room, for example, a classroom, a nursery or an assembly hall at a school.
Volumetric "Dove of Peace" by template
To create crafts you will need:
- scissors;
- glue;
- A4 paper;
- plastic card or similar item.
Stages of creating a volumetric figure.
- Print a template for creating a shape.
- Cut along the contour and fold along the inner dashed lines.
- Having smeared the triangle shape in the area of the pigeon's tail with glue and gluing the parts together, you can plant the bird.
- With the help of scissors, each of the tail and wing feathers should be curled, moving from the base.
- The wings should be folded along the dotted lines using a plastic card or similar object.
- Fold the wings inward with a dotted line and glue them to the base in the area of the pigeon's back.
- Such spectacular crafts in the form of a flying dove of peace can be hung with threads in different parts of the room.


Volumetric pigeon in 10 minutes
To create a figure, you will need A4 paper, scissors and glue. On paper, you can print or draw the outline of the bird's head so that you can bend the sheet in half horizontally. Then, in the middle part, draw from 10 straight vertical lines at an equal distance from each other. You need to leave free space closer to the edge of the sheet on the sides and in the tail.
After that, bending the sheet in half, cuts should be made along these lines. The final stage is to roll the folded sheet inward so that the outer parts can be glued together. The result is a beautiful volumetric dove of peace made of white paper.


Volumetric "Dove of Peace" in the "origami" technique
Origami is a world-famous Japanese technique for creating paper figures. To make a dove figure, you will need a sheet of A4 thick paper in any color.
Manufacturing stages.
- Cut a square out of thick paper.
- Fold the sheet in half diagonally.
- Do the same on the second side.
- Place the vertex of the resulting triangle on the left side.
- Fold the top to the right so that the fold is two centimeters from the base. Do the same on the other side.
- The protruding part must be lifted and part of the pigeon's body must be grasped.
- To make a beak, you need to bend down the triangle on the right side.


Making from napkins
A beautiful postcard for congratulations on the holiday or an interesting volumetric figure of a dove can be made from ordinary napkins.In order for the product to hold better, you need to take cardboard or a sheet of thick paper as a basis.
Stages of creating crafts.
- On a dense basis, draw the contour of the bird.
- Cut white napkins into squares of 2-3 cm.
- Roll each of the cut square elements into tight balls.
- Grease the base with PVA glue and place balls from napkins on it.
- After the glue has dried, blue paint should be applied to the base, adding a small sketchy globe at the bottom.
The design of the composition can also be any: placement of additional, cut from colored cardboard, elements, beautiful patterns or sparkles.


More ideas
When making crafts for school or kindergarten, do not limit yourself to standard manufacturing materials. The bird is just a symbol that can be made in any shape, style and from any suitable material.
Pom-pom bird
An excellent version of the composition on the theme of the world will be the figure of a dove made of pompons, which will add volume to the bird.
Craft creation plan.
- Using the template, you should cut out each of the elements of the composition. Plain landscape sheets are best suited for this purpose, as the cardboard will look rough and thin sheets to be printed can tear.
- The details of the pigeon's head should be connected together, having previously greased with glue. The area of connection with the body should not be lubricated.
- Using white woolen threads for knitting, make a large pompom.
- Glue the pom pom to the paper pieces.
- You can add thread to attach the shape to a wall or ceiling.


Bird of Peace from cardboard disposable tableware
Even ordinary disposable plates are suitable for creating beautiful and spectacular figures.
- Draw outlines for the details of the construction, head, body and wings of the bird of the world.
- Cut parts along the contour.
- Attach the wings to the base using glue or double-sided tape.
- Draw the paws and beak of the bird with markers of different colors.
Finding the raised edges of the plates will give the figure a more natural look.

Dove composition from papier-mâché
Papier-mâché is a technique for making three-dimensional figures from ordinary soggy colored paper, which has won the sympathy of art lovers all over the world. Once upon a time, old newspapers were used to create papier-mâché figures. Today, with a huge variety of creative materials, papier-mâché figures create an even more impressive effect.
Required materials and tools for work:
- napkins of different colors;
- water;
- glue;
- a picture with a template;
- disposable plate;
- transparent plastic file or thick film;
- stirring stick.


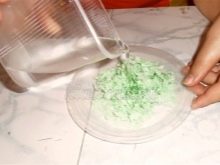
Stages of work. Tear napkins of the same color soaked in water into small pieces and put in a plate. It is important that napkins of different colors do not mix with each other. If possible, you can take several different plates or glasses for this purpose. Add a little liquid to the crushed napkins, then squeeze the excess water into a glass. Do not keep the napkins in the water for too long. Due to the low density of the material, they can become too soft.
Mix the mass with a small amount of PVA glue, so that the result is a gruel of a uniform consistency. Do not add too much glue to avoid fading the shades. Attach the template to a transparent file. You can use both a paper file and high-density floral film. The main thing is that the water does not fall directly on the paper template.


Put the mass on the template, evenly distributing it along the contour. It is important to make layers of the same height, otherwise the difference will be too noticeable. Lay out each of the elements of the composition along the contour. Make sure that the contours are even and clear, and that individual pieces do not stand out from the total mass.
Prepare a dense substrate, place the template cut along the contour on it. Glue the details of the composition to the template.Make a decoration of the composition in the form of ribbons, beads and other elements.


Beautiful volumetric applications can be made from any natural materials, for example, from cereals.
Take:
- semolina and corn grits;
- a sheet of colored paper in blue or light blue;
- blue and yellow markers;
- glue.
Work algorithm.
- Draw the sun and a dove flying towards it on a piece of paper.
- We put glue inside the drawings.
- We cover the sun with corn grits, the pigeon with semolina.
- We are waiting for a few minutes for the grains to adhere well to the base.
- We shake off all unnecessary things.
- Draw rays of the sun with a yellow felt-tip pen, with blue you can circle a dove.


For information on how to make a "dove of peace" using origami technique, see the next video.


