Options for making crafts "Caterpillar"
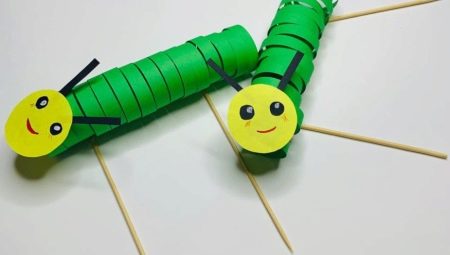
Crafts "Caterpillar" - one of the simplest options that can be made for children. It can be an autumn version of wild rose or other natural material for a kindergarten, an original table decoration made of apples and grapes, a figurine made of salted dough. The most interesting ideas for such crafts, available to create with your own hands, will allow everyone to immerse themselves in the atmosphere of creativity - from toddlers to schoolchildren.
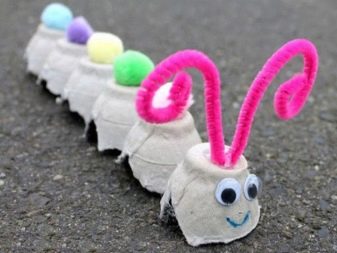
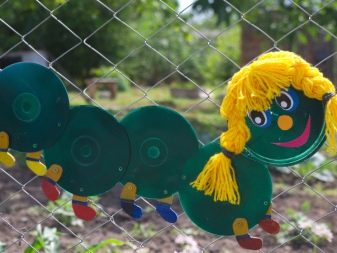


How to make from paper?
The younger the child, the simpler the materials they use in their work should be. The most elementary option is paper crafts, as well as simple applications from cotton pads, plasticine. Even a baby 3-4 years old can cope with their manufacture.


Application
The caterpillar applique made of simple geometric shapes is an excellent solution for joint creativity with children. For making crafts, ready-made mugs cut from paper of different colors or cotton sponges are useful - 5-8 pieces are enough, an A4 sheet as a base, a simple drawing pencil, glue. Gouache and a brush are also useful for painting white material. The procedure for making crafts will be as follows.
- Determine the center of the composition - the place where the caterpillar will be. You can draw circles on the sheet or draw a line that the child will adhere to.
- Mark the grass, the sun, and other details of the future work with a pencil.
- Glue the blanks for the body of the caterpillar on a sheet of paper. It is better to start with the head, slightly "running over" the edge of the next circle to the previous one. Dry.
- Use paints to add color to the resulting picture.If cotton pads were used to create the caterpillar figurine, they will also have to be covered with well-diluted gouache. The muzzle is formed with a thicker paint.
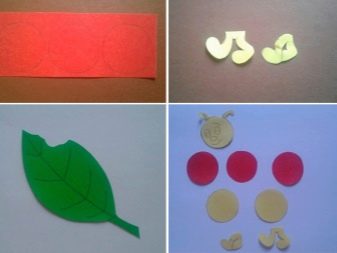

To complete the work, it is worth adding antennae and legs to the glued caterpillar. On the background, in addition to the grass and the sun, you can depict flowers or stick them in the form of an applique made of colored paper.


Volumetric craft
An interesting volumetric caterpillar made of colored paper and thick cardboard will appeal to older children. First, a template is made from a harder material to fit the body of the caterpillar. Then it is outlined on colored paper - it is worth taking sheets of different shades, shiny and matte. You can get the desired volume by increasing the number of body segments - there should be at least 15 of them. It is optimal if the workpiece is not perfectly round, but oval.


Crafts are made according to the following scheme.
- Bend the bottom edge of each workpiece by 5-10 mm.
- Connect all the blanks by gluing them with folds.
- Draw the face of the caterpillar in 1 detail. Stick on the horns.
It remains to dry the craft. Its great advantage can be considered a bright individuality - children can change colors, give the craft any desired features.


Ideas from natural materials
An autumn craft for a kindergarten may well look like a caterpillar. It is made from natural raw materials - round fruits, chestnuts, nuts. It will be interesting for children to experiment with making such a voluminous figurine from apples, grapes, rose hips or plums. You can also use fallen leaves when creating an Autumn Craft. The most interesting master classes should be studied and memorized by all parents.


Caterpillar from the gifts of nature
Having at hand clean apples without rumpled barrels, 6 ranetki or grapes, raw carrots and cabbage, it is quite easy to make a beautiful caterpillar out of them. As auxiliary components for this master class, you will have to prepare toothpicks, a knife, plasticine and a sculpting board.


The figure is made in the following order.
- Using toothpicks, connect the apples so that the body of the caterpillar is obtained. The largest fruit will become the head.
- Cut large carrots into rings 5-10 mm thick. These will be the legs. They are fixed horizontally, in pairs, in the lower part of the body. Fix with matches or toothpicks.
- Lay the cabbage leaf with the convex part facing up. Place a caterpillar figurine on it.
- Fix 3 grapes or grapes on toothpicks. Install the resulting horns on the head.


It remains to make the muzzle of a caterpillar from plasticine or beads. All decorative details can be fixed with pieces of toothpicks or simply glued. The finished figurine is decorated in different ways, but it is worth remembering that such a craft cannot be stored for a long time. After 1-2 days, it will become unusable. Caterpillars made from sweet purple onions are more suitable for long-term storage.
Legs and horns for them are made of chenille wire.


Caterpillar made of leaves
A bright autumn craft can easily be obtained from collected leaves. For the head, thick cardboard is useful, on which the features of the caterpillar's face will be drawn. It is better to take a colored one, to match the leaves or a little darker. It is better to take natural material with a diameter of the palm. Maple leaves will do - you will need quite a few of them, about the same size.


The procedure for converting natural raw materials into a caterpillar will be as follows.
- The thick needle is padded with waxed thread. A knot is tied.
- The thread is tightly, leaves are strung one after another. You can add volume to the craft by alternating them with inserts of large beads, but even without them, the craft will look great. When all the leaves are collected in a garland, the needle is not removed.
- The prepared head is attached to the body. The cardboard is pierced with a needle, then a bead spout is formed with the help of a thread, and fixed.
The finished craft can be supplemented with thread horns.


Junk options
Even materials that have already served their purpose can become the basis for the "Caterpillar" craft. You can make it yourself from cotton pads and napkins, from an old sock and toilet paper rolls. Each such work will have its own face with a bright personality.

From a sock
Children grow up quickly, and socks and tights that have become unnecessary are piled up in closets. But it is quite possible to make an original caterpillar toy out of them. In addition to old-fashioned textiles, you will need sewing accessories, padding, threads or ribbons for decoration, ready-made eyes.
The procedure for making a caterpillar from socks will be as follows.
- Fill the blank with packing evenly. If you are using a sock, you do not need to trim anything. It just needs to be filled with padding polyester, cotton wool, foam rubber, evenly distributing them.
- Pull the sock with threads, forming segments of the caterpillar's body. It is worth maintaining an equal distance between these areas. Decorate the banners with ribbons.
- Decorate the head of a caterpillar by sewing eyes, nose, mouth onto it.


You can always choose additional decor according to your taste. You can make the resulting figure a hairstyle from a thread pom-pom or fur, use other techniques to give individuality to the toy being made.


From napkins
A moving caterpillar can easily be made from the simplest materials. It is made from green colored paper, a cocktail tube, a skewer, a toothpick and 1 white napkin. A thermal gun is useful for connection. The procedure for making crafts is as follows.
- Make a sheet of green paper. On the reverse side, in the center, attach a skewer, press down, creating a relief.
- Wrap a paper napkin on the tube. Secure with glue. Then remove the base by gently squeezing the workpiece.
- Cut off 2 cm of plastic tubing. Put on a skewer.
- Paint the caterpillar with a black felt-tip pen. Glue her head to the end of the skewer. Fasten the tail on a piece of tubule.
- Glue the green plastic piece to the edge of the sheet.


Now, twitching a wooden skewer, you can make the caterpillar move.
From cotton pads
This material is used by analogy with colored paper - for applique work. A voluminous caterpillar can be made using a master class with autumn leaves, but replacing natural raw materials with colored cotton pads.


From plastic lids
Here the child will not be able to do without the help of adults. Holes are burned or drilled in the caps. Then the caterpillar is assembled onto the cord. Beads can be placed between the segments. The face is made out with plasticine.


From bushings
The sleeves left over from toilet paper or towels can be easily turned into a bright caterpillar. Usually, such crafts are made from colored sheets, but using recyclable materials, you can simultaneously give your child a lesson on the development of creative imagination. It is enough to divide the bushings into segments in the form of rings of the same size, paint and then glue them. The face is made out with felt-tip pens or paper applique, bent cardboard antennae will also be useful.


How to make from felt?
Soft felt is a great material for children's creativity. It will be interesting to make a caterpillar from it for children of different ages, with the help of adults or on their own. To create a craft, you should take cardboard templates in the form of circles of different diameters. It is worth stocking up on felt of different shades, mostly bright. You will also need a filler - soft or embossed, in the form of cereals, peas, husks.
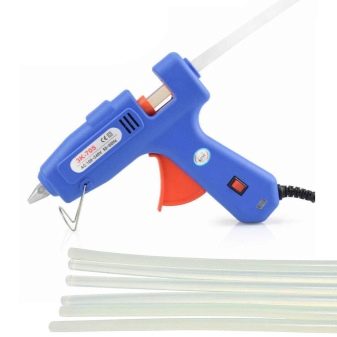
In the process of work, the master will come in handy with a thermo gun with rods, a Velcro fastener, an elastic band, threads and a needle, safety pins for chipping workpieces.

The procedure for making felt crafts will be as follows.
- Secure the templates with pins on the felt surface. You will need 2 parts for each size. It is also worth cutting out the legs, a pair per segment of the same color.
- Lay out all the blanks in a given sequence.Sew a soft piece of Velcro to the back of 1 segment. To the front in 2 parts - prickly, repeat the action for all felt circles.
- Sew the same parts with a seam outward, remembering to place the filler inside. The joining is done in a circle, you can use a neat hand-made overlock stitch, or you can use an overlock.
- Assemble the body of the caterpillar by simply fastening its parts together with Velcro.
- Fix the details of the legs with a bright elastic band. Attach to matching felt circles.


All that remains is to decorate the finished figurine. Details of the muzzle and "horns" are cut out of felt and attached with a thermal gun. You can also use felt flowers and other decorations.


Salted dough figure
Volumetric modeling is a favorite activity of children from younger to school age. And if you replace plasticine with salt dough, you can provide your child with unlimited scope for creativity. Even two-year-olds can roll several balls by connecting them in a line.

The procedure for making a craft caterpillar from salt dough will be as follows.
- Preparation of the workplace. It should be equipped with a stack, a sculpting board.
- Divide the dough mass into separate fragments, having previously rolled it into a sausage. Each subsequent piece should be slightly smaller than the previous one.
- Turn blanks into balls. Leave the largest one unchanged, slightly flatten the rest, turning them into volumetric disks.
- Place the spherical element on the board. This will be the head. Carefully attach the discs to it, observing proportionality - from larger to smaller diameter.
- From the remains of the dough, mold into miniature balls for decoration. Fix them on the surface of the body of the caterpillar in a line.
- Glue dough pieces on the head. It is better to make a smile, horns, eyes exactly voluminous, and not draw.
- Slightly bend the body of the insect, giving it a natural pose.
- Make a leaf-shaped stand for the caterpillar.


When made from plasticine, the figure is already quite brightly colored. If we are talking about salted dough, the craft will first have to dry well - naturally or with the help of the oven.
Then the figurine is painted with gouache and covered with transparent varnish.
How to make a paper caterpillar, see the next video.


