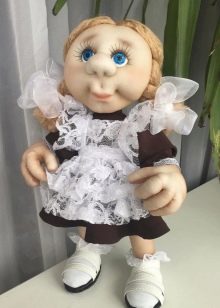
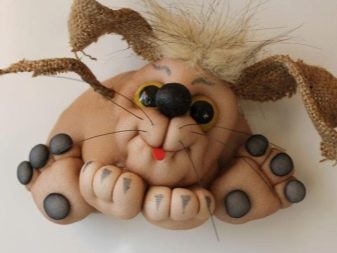
Nylon tights toys

Dolls and toy animals made of nylon look natural and original. They attract craftswomen with a specific manufacturing technique. Plastic raw materials allow them to make exclusive toys with expressive faces and muzzles.


Types of toys
Depending on the technology of creation, the appearance of the character from nylon, crafts are divided into several types.
- Egg-shaped or round tumblers are very easy to make. Any beginner can handle the craft. You can limit yourself to the conventional designation of hands and feet, without forming fingers.


- Popiki - these are toys, the creation of which provides for the separate production of each part of the body with subsequent fastening. Usually the head, buttocks, hands and feet are sewn directly to the clothing.


- Frame toys are very similar to real people. The manufacturing method involves the use of a wire or a plastic bottle as a rod, which must be wrapped with filler and wrapped with nylon cloth.


- Kettle warmers are a special type of dolls with which it is customary to maintain the temperature of the water. Usually the product is placed on a teapot.


The technique of creating toys from nylon allows you to make various animals. By the upcoming year 2022, the symbol of which is the Water Tiger, a predator can be made from nylon.

Material selection
The correct selection of material for crafts from nylon tights is of great importance.
Capron should contain no more than 3% latex, otherwise the doll's face will shine a lot.
The hands and feet are often made from socks. Choose matte socks without shine.
Raw materials should be subjected to special processing. Straightened things are placed for 7 minutes in boiling water with diluted activated carbon. When boiling, they are constantly stirred. Then the products are taken out and thoroughly rinsed in running water. After that, they are treated in a solution with a rinse aid, wrung out and dried. Such preparation helps to improve the quality of the material: strength and ductility.


Attention should be paid to the quality of the filler. Choose a loose and airy synthetic winterizer that does not stick, does not roll, and does not have a characteristic crunch. The resilient packing material should spring well and easily recover from compression. In this case, the doll's face, covered with nylon cloth, will keep its shape well, have excellent facial expressions and plasticity.

DIY instructions
Mastering the technique of making original toys from nylon is available even for beginners. In the process of work, no special equipment is involved. A simple and easy way to create crafts does not take much time.
Consider a master class for novice needlewomen step by step.
- First you need to shape your head. For this purpose, wrap the synthetic winterizer with a nylon cloth. Tighten the resulting ball with a thread, cut off the excess. The eye notch must be made with a needle and thread. Pull the thread alternately into both eye sockets. Then remove the needle from the back side, fasten the thread there. Eyelashes and eyes can be sewn on or glued on. The eyebrows need to be drawn. Shape the nose, chin, lips, cheeks with tighteners. Straighten the synthetic winterizer and fluff it with a large needle. All ties should be completed by removing the thread from the seamy side. Then you need to fix them. Use shadows of light brown color to highlight the eye, nasal, and lip lines. The pink tone is needed for coloring the cheeks. Use stitches and drawstrings to define the smile. Babe Yage, make wrinkles in the lower part of the face. Make your fairytale character look old by dipping nylon in a coffee solution and drying it. A wire frame is used to make the ears. The braces help define the desired shape of the auricle.

- The next step is gluing or sewing on the finished wig. It can be made with artificial hair, animal hair, or regular knitting threads. First, distribute the hair strands along the length. To avoid accidental sticking of hair, cover your head with cling film, gently wrap with gauze, fastening with stitches on your face. After that, apply glue to the lower back of the head and press the prepared bundles of hair onto it. Attach the next hairs in the same way a little higher. Gradually, row by row, bring the gluing to the frontal part. Place short hairs on the forehead for bangs.

- The body of the doll is made using a bottle frame or wire. First you need to cut out the body from the fabric according to a pre-made paper pattern. Then sew the details. Reinforcements must be placed in the workpiece before filling the body with padding. But the easiest way is to use a soft toy without additional reinforcement. Place a synthetic winterizer in the sewn product, sew up the hole. Fluff the filler before laying to give it airiness. You will get a stuffed doll.

- The shaping of the arms and legs most often occurs with the help of a wire frame. Wrap it with padding. Then pull the nylon fabric over the workpiece. Mark your fingers with ties and stitches. After that, cut off the excess elements, carefully tighten the loops. Use dark shadows to indicate wrinkles.


- The tailoring is carried out to the taste of the craftswoman. The color spectrum and decorative details should match the puppet character.

- The head is sewn to the finished craft last. When all the pieces are sewn and attached, it is necessary to mask the joining seams.After applying the finishing touches to the design, the toy is ready.


Next, see a master class on making a doll from nylon tights.


