Paper crafts without glue

Paper is considered the most suitable option for creating various beautiful and interesting crafts. Bright paper is most often used. This material allows you to make almost any decorative figurines with your own hands. Today we will talk about how to make some crafts from a paper base yourself without glue.
What to do without glue and scissors?
There is a wide variety of step-by-step complex and simple schemes that allow you to create paper products without scissors and glue, even for children. Let's analyze some of them separately.

Frog
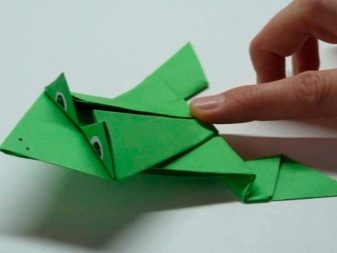
To make this figurine, you first need to take a green sheet. It is folded neatly diagonally, and then flipped in the opposite direction and folded horizontally and vertically.

The corners on the sides are bent and create a blank in the form of a triangle. On one side, the sides are bent to the central part. These will be the legs of the frog. Each of the legs must be turned away from the middle and divided into two equal parts.

After that, the triangular workpiece is turned upside down, the corners are bent to the upper corner. The sides are also folded upwards. The lower corners are turned upward to form the eyes. With the help of paints, the pupils and eyelashes are drawn.

A zipper fold is formed in the lower part near the hind legs. The larger the fold, the further the frog can jump.
In order for her to make a jump, you should press on the tail in the form of a fold.

Heart
To make such a craft, you first need to take a sheet of red paper. The square is folded vertically and horizontally. Then it is folded in half. The corners are folded up. However, they should not touch the fold line.


When the triangle is formed, it is turned upside down. The free edges are folded over the lateral parts and immediately unfolded back. This will produce crisp lines. Along them, you need to bend the corners into the inner part at once on all sides.


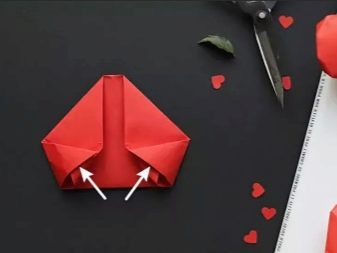

The sharp parts of the heart are slightly smoothed with your fingers. The product is turned over to the front, the hole is blown through, which remains near the pointed end.
The resulting heart can be attached to a gift box or simply hung on a rope and create a hanging decorative item.


Ship
In this case, you will need a rectangular sheet of paper. The material from the notebook may come up. It will need to be folded in half and wrap the corners towards the center. Then you need to raise the free edges and hide the corners. As a result, a triangle should form.
Next, the corners are again aligned with each other, after which a blank is made in the form of a square. It is taken by the upper corners, and then unfolded in all directions. The product will open, and the result will be a boat.
It is recommended to cover it with paraffin. In this case, it will not get wet when immersed in water.

Hare
To create such a product, you will need to take a sheet of colored paper and bend it along both diagonals. The lateral sections are bent in such a way that, as a result, a right-angled triangle is formed.
After that, you need to turn the triangular workpiece at a right angle downward. Next, it will be necessary to separate a small part from the near vertical side. The inner pockets of this part open and flatten the pockets a little.
On the left side, two small corners are gently bent, which will act as ears for a hare. The right side should be bent and flattened. These parts will become the front legs and muzzle for the craft.
The angle that remains from the triangular workpiece is folded back, inserted into the inner part and pulled out a small part. This element will become a hare's tail. At the end, you need to soften all the sharp corners and draw a muzzle with the help of felt-tip pens.


Pigeon
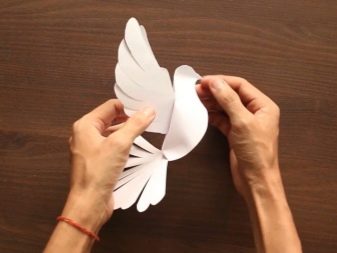
To make this craft, you need to take white paper. It is easier to pick up and print a ready-made template right away. It is cut from a paper base. All blanks are bent at the intermittent marks. Then small cuts are made along the continuous stripes located on the wing and tail. The tail is folded along the dotted lines. All elements are glued together with adhesive tape.


Doll
To create a paper doll, white paper is taken, an elongated ball is rolled out of it, this part will act as a head. It is carefully placed on a wire, which is then braided with paper material in several thin layers at once. Moreover, it is better to take a blue or pink base. The resulting item will become a dress for the doll.
After that, cut off two small strips of wire, they must be of the same size. They are braided with white material, and then bend a little. These blanks will become the doll's hands. These pieces are placed parallel to each other and connected.
In the same way, legs are formed from other pieces of wire (longer parts should be taken). They connect to the torso. Next, a colored napkin is taken, a small piece is carefully cut out of it, which is folded. It will become the doll's skirt. The finished part is placed in the central part of the vertical wire.

Christmas tree
To create a Christmas tree, you should take green paper. Two elements are cut out of it according to a ready-made template. The template should consist of 2 identical Christmas trees, which are interconnected by a piece in the form of a square.
The cut blanks are folded along the fold lines on a square product. After the crown of the Christmas tree is connected, for this a small hole is pierced through which the tape is passed. Everyone is tying it up.

Butterfly
In this case, you can take a sheet of almost any color.A simple blank "water butterfly" is folded from it, after which it is turned with its free side and the upper part is folded back so that it can go beyond the boundaries of the bottom.
Then the paper blank is turned over again so that the highlighted end is at the top, later it is folded down again. All sharp corners can also be bent or simply cut.

Lightweight white paper options
Now let's see what other interesting crafts can be made from plain white paper.

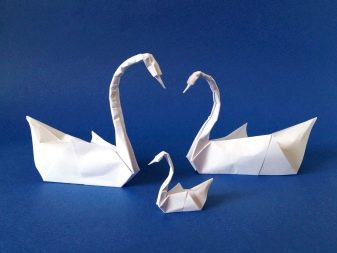
Swans
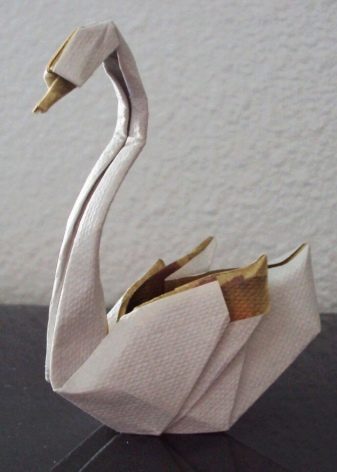
These figures can be easily made from both white A4 paper and napkins. In any case, the material is laid with an angle downward, the line in the central part stands out, for this you need to bend the sheet a little. After that, the workpiece is turned upside down and the corners are folded to the middle. After that, you need to bend the upper section so that the upper corner is in contact with the lower one, half of the newly created corner is folded up. This is how the swan's head should be formed. Further, to add volume, the workpiece is folded vertically. I also straighten the neck and head.


Crane
To make such a figurine, a square sheet of paper is taken, it is folded along both diagonals on all sides. Then the sheet is turned over and folded horizontally and vertically. The paper blank is bent into a square, while pulling the top three corners to the bottom, all this is carefully ironed by hand. From the open edge of the square workpiece, the ends are bent to the center, first from the right, and then from the left edge. All this turns over, on the other side they do the same. Later, the crown is carefully folded, first in one direction and then in the other direction. All this is also ironed. The upper part is fully unbendable, its top is pulled, while folding the edges from the sides. As a result, a small boat is formed. All this turns over again, the same actions are repeated on the other side. The movable section is bent to the center from one edge, and then from the other. The resulting legs are bent diagonally, with one part acting as the head, and the other as the bird's tail. The future tail is spread apart from the side and bent in the middle, the same is done with the head of the crane. For this element, you need to choose a certain height, the tip is bent in one direction, and then in the other. At the end, all the parts received are straightened.


More ideas
Let's analyze some other options for making paper crafts with our own hands without using glue and scissors.
Fox
Take a square sheet of orange paper. The lines of the diagonals are marked on it. The base folds in half into a triangle. The corners of the base are folded up to form a small rhombus in several layers. Then it will be necessary to bend the corner on one side and unfold it in such a way as to form a muzzle with the ears of a fox. Next, you need to draw the eyes and nose of the figure with the help of felt-tip pens. The tail is also folded.


Flower
A square sheet of paper of any color is folded in half in the horizontal direction, while the upper corners are folded so that an isosceles triangle is formed. The corners of the base are folded up. On the other hand, they do the same. As a result, a square should appear. The side corners are also folded towards the middle on all sides. The figurine is straightened and inflated a little to make it more voluminous. After that, petals are created and the bud is straightened from all sides. In order to make a stem for a flower, you need to take green square-shaped paper and mark the diagonal lines on it, the side corners are bent to them. All the actions taken are repeated from below. The elongated lower part at the end is bent upward, the resulting part will serve as a stem. The wide part can be folded into a sheet.


Clapperboard
To make a paper cracker, take a rectangular paper base.All four corners are wrapped to the central part, and then the material is folded in half to form a trapezoid blank. Its corners are folded down and bent in half one more time to form a three-dimensional triangle.
It will need to be grasped by the sharp end and shaken vigorously so that the air can completely escape from the figurine along with the traditional cotton.


Mouse
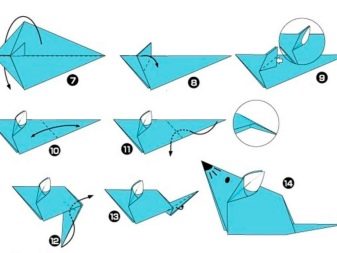
In this case, you need to take a sheet of gray or blue paper. Diagonals are marked on it. The lower and upper corners are bent to them, and later they are bent to the middle in both directions. The rhombus is straightened and its corner is folded down. In the opposite direction, you need to unscrew the corner of the base of the figure and bend the edges again. The workpiece is turned over, the protruding triangles are straightened, they should become the ears of the mouse. The long triangular figure folds twice into a machine tail, it should be tucked a little. At the end, a muzzle with a nose and eyes is drawn with felt-tip pens.

For information on how to make a dog out of A4 paper, see the next video.


