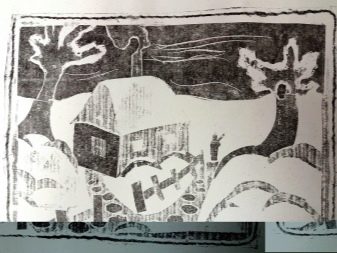
Cardboard engraving

Fine art can have many facets, each of which will be unique in its own way. In addition to the usual drawing with pencils, felt-tip pens and paints, there is another type of work - engraving. This art is quite ancient, but it entered our life relatively recently. The prints can be purchased at the store, or you can try to make them yourself. Understanding all the stages and features of the production of engraving will allow you to create such works at home.

Who invented?
For the first time, the technique of applying an image by cutting a pattern can be seen on wooden plates of the 6th century, which were created by masters in China.... This art form became known as woodcut and was used to create works on religious themes. In European countries, woodcut appeared already in the 15th century. In addition to religious and spiritual motives, masters began to make images of social phenomena.


With the development of technical progress and the advent of the printing press, the woodcutting technique was transformed into an embossing method. The first works on cardboard were simple but effective. The masters developed this direction, and over the years it was transformed into engraving, which has survived to this day.
The German masters Albrecht Durer and Hans Holbein the Younger are considered to be the founders of the technology of cutting a pattern on the surface. New technologies of this art were proposed by Thomas Buick in the 18th-19th centuries. Thanks to him, they began to use hard wood for work, the sawing of which was done across, and not along. Buick came up with tools with which it was convenient to create engraving, drawing a variety of lines in length and width.


In Soviet times such masters as Ostroumova-Lebedeva, Fomin, Masyutin, Favorsky were engaged in woodcutting.A new stage in the development of woodcarving was the technique of color woodcut - chiaroscuro.


This variety quickly lost its popularity in Europe, but in Japan it remained necessary and in demand for many years.
After wood, the craftsmen worked on metal, using copper plates for this, on which a drawing was cut with sharp tools, after which it was filled with paint, passed through a press, and the work was finished. After the metal, the drawing of the image on the stone began - lithography, which was invented by A. Senefelder in 1796. Images could be colored with one color or several.


The popularity of such art allowed creating a new version of creativity, where the drawing was applied to cardboard. Cardboard engraving is the process of alternating layers of paint and cutting out a design, which ultimately result in a beautiful, colorful and interesting object. Engravings were used to create book covers, illustrations, and today it is an opportunity to show imagination, your skill in the course of scraping off the top layer of paint and getting a finished picture.

How to do it yourself?
Now you can easily buy an engraving in a store and please yourself or your child with an interesting and useful activity. In addition to the finished version, you can try to make such a product yourself.
To make an engraving with your own hands, you need to have a certain supply of tools and materials.
-
Fileif not available, an awl or needle is used.
-
Cardboard... You can use different options that differ in texture and thickness, determining the best option for yourself. Professional engravings are made on cardboard sheets of at least 2 mm in thickness.
-
Cardboard for making an impression. Drawing paper works well, but you can use regular cardboard as well.
-
Rubber roller. Can be replaced with a spatula or bristle brush.
-
Tracing paper and carbon copy to transfer the image.
-
Dye... You can use oil or acrylic. For children's prints, you can take gouache.
-
Mascaraif necessary.
-
Plexiglass to complete the finished version of the engraving.


When working with needles, it is important to sharpen them well so that the lines are even, and the depth of the furrows is sufficient and approximately the same.
Cutting out excess parts from templates for painting should be carried out either with a clerical knife or with nail scissors, you can take a scalpel if you have the knack for working with it.

For implementation, use cardboard, prepared sketches, paints. To do everything right, you need to move in stages.
-
Think over a sketch of the future engraving.
-
Make a mirror copy of the sketch.
-
The drawing should be divided into segments, each of which has its own color. Each drawing is created on a separate sheet of cardboard or whatman paper.
-
All elements of the drawing are cut out, creating the template. To keep this template as long as possible, you need to glue it on one side with tape, and on the other, coat it with PVA glue, which will allow the paint to be absorbed not so actively.
-
On the cardboard, where the main work will be performed, it is necessary to scratch out the desired pattern with the help of a file, after which the process of painting it will begin.
-
When everything is ready, each sheet of ink is applied to a blank and an impression is created using a printing press. In the work, you can use printing ink or oil. If a printing press is not available, you can get by with improvised means. For better adhesion to the surface, the paint is diluted with drying oil before application.
-
Each sheet of the template with paint is applied to the workpiece in turn, the main thing is to wait for the previous layer of paint to dry.


To get a beautiful color work, it's important to apply the paints in the correct order. Immediately, the cardboard is painted over with paint of warm colors, then prints of other shades are applied.So that the engraving does not deteriorate and the paint does not flow, upon completion of the work, it is necessary to cover it with nitro varnish or another similar agent.
If this is the first time you create an engraving, you can try a simpler option, which will require wax pencils, paints, cardboard and a file. The background is completely sketched on the cardboard with a pencil, then a layer of paint is applied and kept until completely dry. The base can be either colored or plain.

To get an interesting version of the finished work, you can come up with a template according to which the removal of the top layer of paint will take place.
In addition, there is an alternative method of creating an engraving, which consists in drawing the desired pattern, cutting out its component parts, gluing them in a mirror form onto cardboard. The cardboard with the blank is painted over and applied to a blank sheet of cardboard. With the help of a professional or home-made press, an imprint of a picture is obtained that has a three-dimensional appearance. This is a simple type of engraving, but most suitable for creating with children.


In this technique, you can make a still life, a landscape, create a non-standard image that will meet the wishes of the creator.


Engraving decoration
To create the finished look of the engraving, it is worth taking care of the presence of a beautiful frame. There are various options for what kind of frame can be made for a cardboard canvas, but not everyone will look organic and neat. The main task of framing is to complete the image. If the frame draws more attention to itself than the work itself, then the choice was wrong.
One of the simplest but most effective ways to design an engraving is a seamless mat. To make such a frame, you need to take a sheet of white or colored cardboard, the size of which will be larger than the cardboard of the engraving. The main rule of the mat is that the structure should not have seams, therefore it is necessary to measure the required dimensions of the product and cut it out.

It will be optimal to create a frame where the height and width will be 3 cm, and the lower part is 2 cm larger.
The dimensions of such a frame can be different, the stock of fields can be either more or less, it all depends on the idea and desire of the creator himself. Passepartout involves gluing the frame not in front of the engraving, but behind it. It is this type of framing that is considered the most simple, laconic, but at the same time neat.
So that the image on the engraving does not deteriorate, it can be closed with plexiglass or covered with a special varnish. When working with varnish, it is important to make sure that the paint is completely dry, as some variants can take up to six months to dry. If you do not wait until it is completely dry, then oil stains may appear on the finished work.


