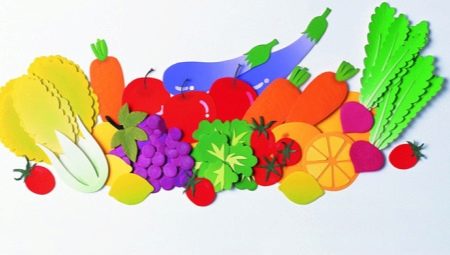
Making vegetables and fruits from paper

Making fruits and vegetables out of paper can be very attractive. It is necessary to carefully study the basic DIY crafts on the theme of "Autumn" for children of different ages. And also it is worth getting acquainted with the manufacture of voluminous fruit baskets from colored paper and other ideas.

Ideas for toddlers
Competently made paper vegetables help the development of creative, original thinking, the ability to navigate in space. At the same time, the imagination is stimulated. But in the youngest group, you should not chase after complex plots and the image of exotic fruits. It is much more correct to work out the already well-known, of course, canned vegetables.

Important: you should ask what the children themselves know about certain fruits in fresh and canned form, how they imagine them. Then it will be possible to understand what to expect.
It is quite possible to make it yourself cute carrots. The process is extremely simple. The paper should be cut into a long strip. Then it is connected in half and the green part is attached. An alternative way is to twist the material with a cone and paste over it with orange crepe paper.


Compositions on the theme "Autumn" are inconceivable without pumpkins. They are also made from paper strips. Such stripes will have to be glued crosswise, obtaining a relatively voluminous figure.

If you use round blanks of green paper, glued on top of each other in turn, you get a kind of cabbage head. You can take as a basis:
-
crumpled newspapers;
-
cones and bags;
-
foil;
-
even soft, non-thick cardboard (all this will just have to be pasted over with crepe paper).

Options for children 4-5 years old
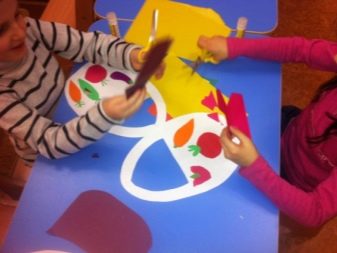
At this age, the difficulty of the task can be increased. Most often, they begin to practice skills by making "baskets of vegetables"... When some experience has already been gained, it is worth requiring the addition of patterns usually found on baskets. Useful to use ready-made template. As soon as the container is made, you can start preparing the fruits themselves; they are made so that you can clearly see where which product is located.
Children should first arrange the vegetables themselves. Only when they are finished, it is necessary to evaluate the result, make adjustments if necessary. And be sure to explain your decision, to illustrate the mistake. Then you will need to glue the necessary parts. The visual completeness of the still life is achieved by adding a small amount of detail next to the basket.


Educators and parents should strive to:
-
improve children's knowledge of fruits and vegetables, vitamins and their value;
-
build up cognitive abilities;
-
intensify creative skills;
-
develop food hygiene;
-
to create the skills of caring for your health.


All this subtly and unobtrusively happens just in the framework of the study of vegetables and fruits from paper. A great educational tact is required to solve such a problem.
If it is decided to make a pear, then the technique is as follows:
-
9 blanks are cut out according to the template;
-
8 of them are folded in two;
-
two folded parts are glued together, while the touch should be on only one side;
-
4 blanks are glued from the left and right sections;
-
a stalk is glued to the fruit;
-
make out the back side;
-
add a green leaf.


What should the older guys do?
In this case, the work is further complicated. An excellent solution is a combination of mosaic and applique. But another option to complicate the work would be to create a voluminous basket of colored paper. This lesson will allow you to form and consolidate the skill of cutting out the same type of silhouettes. Children will learn to convey the shape of objects as clearly as possible and create voluminous compositions.
The strips are sorted out depending on the color of the fruit that you want to form. All these strips are folded in three layers, in the manner of an accordion. Further, with an ordinary pencil, they draw outlines. Will remain:
-
cut along these contours;
-
fold all the parts in half;
-
grease one half with glue;
-
glue different parts in such a way that the second halves remain free;
-
glue the third silhouette from those halves.


You can also imitate a can of blanks. A small one is made from A5 sheet, a 3 liter can is imitated with A4 paper sheet. 1 cucumber takes 4 green rectangles. The same number of squares are allowed for each tomato. You just need to make sure that they are unambiguously yellow and red, not confused.
Further:
-
add details;
-
stick them to each other;
-
cut tomatoes and cucumbers sequentially;
-
put them in an imitation jar;
-
equip this jar with an elegant lid.


There is another easy way to create fruits and vegetables from paper. Additionally, you will need a simple stationery tape and aluminum foil. Subsequence:
-
take a newspaper;
-
crush it in such a way that there is a visual resemblance to a certain fruit;
-
fixing this entire structure with a retaining foil;
-
as needed, strengthen the fixation with adhesive tape;
-
tearing another newspaper into small pieces;
-
stick these pieces in several layers to get a more attractive shape (instead of special glue, they often use an aqueous solution of flour or starch);
-
when everything is completely dry, paste over the form with colored paper or cover it with acrylic paint, achieving the desired color effect.


Paper fruit can be obtained from the same paper plate. The round flat base allows you to draw the fruit in a cut, which looks catchy and unusual. If you cut the plates themselves into 4 parts, you get an imitation of slices. In some cases, the wedges are made from halves.
As it is easy to understand from what has been said, the scope for imagination is very large - and you just need to choose the option that suits you.

The paper accordion fruit also does not represent any complex thing in reality. Stages:
-
cutting out a fruit pattern;
-
tracing the paper to which this template was attached;
-
cutting out at least 10 blanks;
-
folding them in two;
-
gluing parts with an adhesive pencil;
-
drawing seeds and other small characteristic details.

For information on how to make a corrugated paper pear, see the video.


