Crafts from cement and concrete

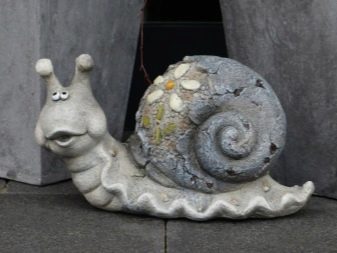
Hand-made crafts for the garden and summer cottages made of cement and concrete make it possible to give a bright personality to the design of the territory. Having considered the most interesting ideas, you can try to repeat the author's plan step by step using one of the detailed master classes. From them you can find out: what can be easily done from cement and rags, other improvised materials right in your yard.

How to prepare the solution?
The first thing to take care of when starting to make your own concrete crafts is to create a basis for them. In order to properly dilute the cement mortar, it is enough to follow important recommendations.
- Use brand material not lower than M400. The gypsum base is combined with special moisture-proof components.
- Only purified water is suitable for making. You can use boiled or drinking. Hard water will reduce the strength and elasticity of the finished concrete.
- For the manufacture of heavy structures, it is necessary to erect a foundation or use a substrate. For complex products, the preliminary construction of the reinforcing cage is required.
- Sand is added to the cement to harden the mortar. Gypsum compositions are mixed with cement or glue.
- The consistency of a cement-based mortar should resemble sour cream. Gypsum mixes are always more dense. Here the consistency should be denser. It is worth adding 5 parts of cement per 1 gypsum to them, supplementing the composition with a binder in the form of PVA glue (1 tbsp. L.).

In order for the finished products to retain their attractive appearance for a long time, they are coated with varnishes and paints to protect them from the effects of atmospheric factors.
How to make pots and vases for the garden?
Concrete mortar is an inexhaustible source of inspiration for those who love to decorate their garden with their own hands. Original flowerpots or pots for summer cottages - light and massive, beautiful and unusual will decorate the garden with themselves, replace standard plastic options, while being quite inexpensive. At home, you can fill in both the simplest and complex forms. It remains only to choose one of the options for crafts, and then bring the idea to life.
- A cache-pot made of rags and concrete. It is best obtained from burlap, terry towel, woolen scarf. It is enough to soak a piece of fabric in cement and then hang it to dry on a round or square base. The dangling ends are draped with picturesque folds. The finished base is painted on the outside with an aerosol in a silver, gold or solid bright color.


- Beautiful country pots made of shoes. Stands for flowers on the terrace made of old shoes are an excellent solution for making at home. As a basis, you can take things that are already definitely unusable. The manufacturing process is simple. It is enough to immerse the boots or boots in the solution for a short time, and then let them dry. In the finished form, you can plant low plants, turning them into a flower bed.


- The original hanging planter. A bathing cap is used as a form for it. The best version is with fluted ornaments, as it will be imprinted on the surface. The filled base is suspended temporarily or stretched inside the bowl to provide support. You can also achieve an unusual effect by simply covering the cavity with a semicircular or cylindrical container with a pimpled protective film. To create a depression, simply press a Styrofoam bowl or ball into the interior. After the solution has dried, it is removed.
The finished product can be marked on a veranda or terrace, fixed on a pergola, balcony.


A very original type of garden decoration is a caterpillar stand for plants.
This version of concrete and cement products is simple to perform, but looks impressive. The order of work on the manufacture of the caterpillar stand will help in the implementation of the idea.
- Spread polyethylene on the work surface.
- Place 2 piles of dry cement at some distance from each other.
- Place a strip of solution of any length on top of them. It is kneaded from 2 parts of sand, 1 cement, add water and 1 tbsp. l. liquid soap. Width should be 170-180 mm, height about 5-7 cm.
- With a round bowl about 150 mm in diameter, make circles on the surface of the mortar. It is not necessary to push to the end - the elements must have connections, like segments of the body of caterpillars.
- Cut out the embossed product with a construction trowel. The connections must be saved.
- In some of the resulting circles, plastic bottles are installed. With their help, recesses for planting flowers will be formed.
- Smooth out the shapes, giving them a domed look.
- Dry the cement blank, remove the bottles.


In order to make the workpiece more similar to a caterpillar, you can supplement the figure with balls molded from cement. Paws and eyes are formed from them. After the figurine is completely dry, it is covered with white soil, and then painted in the desired color, making the balls contrasting. Then it remains only to fill the formed holes with earth, and then plant plants in them. The caterpillar can be placed anywhere in the garden.


Step-by-step workshops on creating figurines
When deciding to create a garden decor with your own hands, you should not deny yourself the opportunity to experiment properly. Making garden figurines out of concrete is no more difficult than making similar plaster figurines.
The simplest models can be easily made using the most common materials.


Ryaba chicken
The figurine of the beloved heroine of a children's fairy tale will easily decorate a walking area or a playground for kids. Let's consider the procedure for creating crafts in more detail.
- A solution is made from a mixture of sand and concrete in equal parts. Loaded into a nylon stocking. It is pulled in 2 places, suspended until dry. The volumes should be such that the body of the chicken is obtained.
- The workpiece is released from the mold. The upper part is covered with modeling and modeling paste, which air-hardens in 24-48 hours. It is made from kaolin, calcium carbonate, water and cellulose.
- A lump the size of the head of a future chicken rolls down from the foil. Covered with paste, installed vertically. It is fixed with the same composition, at the same time the neck is formed.
- The future tail is bent from the wire. Wrapped in foil, covered with modeling paste. 2 and 3 are made of the same part, smaller, fixed.
- Wings are glued to the base on the sides. They are embossed with a stack.
- A wire frame is installed in the head for the nose, eyes, comb. Complemented with a beak and other details.
The craft is dried and painted with acrylic paints, varnish. Ryaba chicken is ready.
For more information on how to make a Ryaba chicken out of cement, see the next video.
cat
A garden figurine in the shape of a charming cat is an excellent choice for decorating the local area. It is necessary to prepare a dense mortar on a cement-sand base in a ratio of 1 to 2. As additives, 1 tbsp are used. l. PVA glue and liquid detergent for cleaning dishes. In a separate bowl, the cement is mixed with the water at the same time. A cotton towel is moistened in it.


Consider the further manufacturing process step by step.
- The fabric base is placed over an inverted bucket.
- Layers of mortar are manually applied on top of the cement towel.
- Once they are thick enough, sculpt a figurine.
- In the area of the lugs, a wire curved with a triangle is inserted.
- The eyes are made in the form of balls. You can place a translucent glass pebble in them. You can fix it with PVA glue.
- Form a relief muzzle with bow cheeks. Using a toothpick or skewer, give it a relief by drawing dots and antennae.
- The figurine is left to dry for 24 hours.
- Remove the workpiece from the bucket. Fill the interior with a cloth soaked in a mixture of cement and water.
- Fill the hole in the bottom with a thick cement-sand mortar.


It remains to paint the figure, having previously cleaned the concrete by hand, primed it. It is better to use acrylic compounds. The finished figurine is varnished.
ladybug
The shape for it is a half of a ball, an old bowler hat or a sturdy semicircular bowl. It is better to make several options for crafts of different sizes at once. The outflow of the product and filling it with concrete, you need to dry it properly. The surface of garden ladybugs is colored red and black. The design of the insect's face is done with white paint. You can also use a mosaic finish


Frog
To create such a figurine, a fairly thick and elastic cement mortar is needed, suitable for sculpting. It is prepared from the following components:
- 2 parts of sand;
- 1 - cement;
- 1 st. l. PVA glue and dishwashing liquid.
Then you need to fill the balloon with water, bandage it. Moisten a gauze cloth in a cement mortar. Wrap a ball with it, let it harden. Make 2 bulging eyes from half-hardened cement. Give them a relief with a stack or a spatula, draw a smiling mouth. The frog figurine is ready to decorate the garden.


Mushrooms
This type of figurine is one of the most popular. For the manufacture of crafts, a strong nylon stocking and rope are enough. The surface of the makeshift tank is briefly dipped in a slurry. Then pour it inside about half. Tighten with a rope.
Then the filling of the stocking continues. It is necessary to pour the leg of the mushroom, making it narrower. Tighten the stocking again, dry.As soon as the mushroom is ready, it is first covered with white paint, and then brighter, in the area of the cap.


Other
Eternal classics - garden gnomes - are made by analogy with mushrooms. The work process is quite simple.
- Moisten the prepared stocking with a solution on the outside.
- Fill it with a denser and dry mass by about 1/3 part.
- At the bottom, pull off 1 part of the stocking, forming a bump. Bandage. Make 2 side by side. Then, a little higher, the third, placing it between the first two.
- Tie the stocking where the solution level ends.
- Fill in the rest. It is necessary to fill in no more than 1/2 of the inner space of the stocking. Drag, cut off excess.
- Form a gnome. The lower "bumps" formed at stage 1 are the legs. You need to seat the gnome on them. The middle protruding element is the nose, and above it is the cap, which should be shaped like a truffle or a cone.


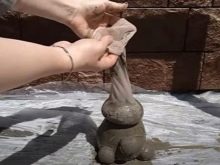

The final shape is hand-shaped.
Then the gnome is dried, during this period the surface of the stocking is lubricated several times with a gypsum-cement mixture that slows down drying. The finished figures are painted white, the hat is made bright.


The most interesting ideas for the interior
Crafts made of cement and concrete for a home may well fit harmoniously into a loft-style interior or into a minimalist aesthetics. This material makes a wonderful imitation of a fabric pillow, an original succulent flower pot or a candlestick. Most of these crafts are made with minimal time and effort. Among the most popular ideas for such creativity, there are several.
- Original pots for low-growing plants. They are made in the form of palms. The concrete is poured into a pair of durable latex gloves and the bell is tied. The finished filling is placed in a bowl with "palms" up, pressed with a glass bowl. After the concrete has hardened, it remains only to remove the plant stands from the gloves.


- Stylish candlesticks. They are made by pouring cement mortar over silicone baking dishes. To make a hollow for a candle, it is enough to place an egg or a container filled with water from a kinder egg, which usually contains a toy, in the thickening concrete. By choosing different silicone molds, you can make products in the shape of a flower, snowflake, or heart.


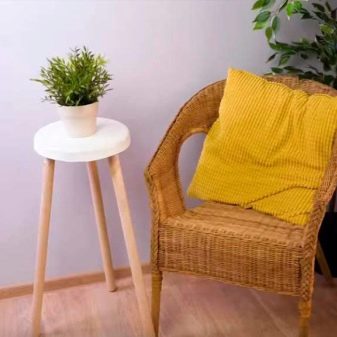
- Mini table. For it, you need a shape to fit the future countertop. You can make it from a round or square bowl, a container for developing photographs. A solution is poured into the finished container, wooden legs are placed inside, fix them with adhesive tape along the sides. Once the craft is dry, you can use it for its intended purpose.

- Candlestick-imitation of a fabric pillow. For him, it is enough to use a zip-bag with concrete poured inside. The clasp is closed, a depression is formed on top by setting a candle. After the solution has solidified, the bag is simply removed. Externally, the candlestick looks like a soft mini pillow.


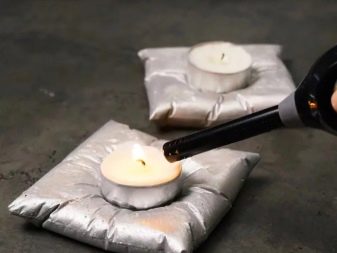
Cement in the interior is not a superfluous detail. It can easily become a bright accent in the setting of a country house or a fashionable loft.
Concrete products will provide the interior with a more modern look, emphasize the excellent taste of the decorator or owner.
Unusual options for crafts from cement
With a concrete solution and a little imagination at hand, you can easily create original decorative products for your home and garden.
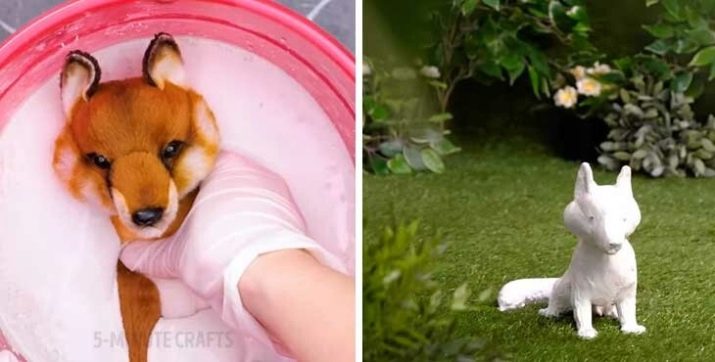
- A figurine made of children's toys. From the collection of unnecessary plush animals, you can easily replace the annoying garden gnomes. For work, you will need a ready-made gypsum or cement mortar, paint for decoration. The toy is immersed in the mixture for a few seconds, then dried. It can be colored as you wish, supplemented with a stand or pedestal.
- Shoe brushes. It is enough to fill the square or rounded shape with cement. Lay 2 brushes parallel to the surface of the hardening solution with the bristles facing up.When the solution hardens, you get a rug that allows you to quickly and effectively remove even the most stubborn dirt from shoes.


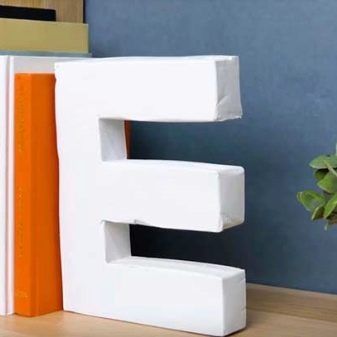
- Original letters for the garden. Forms for them are made of cardboard or plastic, connected with adhesive tape. It is important that they are completely moisture resistant. After that, cement mortar is poured inside, dried. From ready-made letters, you can make decor for stairs or railings.

- Figurines in the form of legs and arms. They are molded into molds from latex gloves and rubber boots. The resulting figurines are dug into the ground so that it seems that the keen gardener "headlong" plunged into his occupation.


This is only a small part of the original crafts based on cement or concrete mortar. This list can be easily expanded by coming up with your own design solutions.
For more information on what else can be made of cement and concrete, see the next video.


