Crafts from kinder

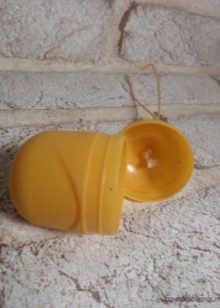
Every little child knows what a kinder surprise is. The dessert is loved by children all over the world precisely because a toy is hidden inside the chocolate egg. The guys collect them, and the plastic container is most often thrown away. Nevertheless, incredibly interesting and useful crafts can be created from this material.


How to make minions?
You can craft your favorite minions. Not a single kid will refuse such an undertaking. After all, you can play with them later!
For work you will need:
- container for kinder eggs (1 piece or more);
- thin wire;
- empty blister from pills;
- plasticine;
- dark beads;
- marker;
- glue with a brush.


From above in the container you need to make holes and push a thin wire through them. She will be the hair of the future minion. Cut out two eyelet cells from a transparent blister, place a bead or a piece of plasticine in them. Glue the eyes to the capsule. You can do without a blister. Just make the eyes and glasses entirely from plasticine. Draw a mouth with a marker.
Blind the clothes of the minion from plasticine or paint with paint. It is very convenient to work with blue duct tape. The surface of the plastic material adheres perfectly to its sticky base.
If the household has a piece of denim, you can even sew a cute jumpsuit. Put on a toy, and fix the plasticine limbs on the body.


Making animals
There are many ways to create toys from Kinder capsules. All that remains is to choose the right one and view the photo with step-by-step performance of the work. Or just focus on the picture. For simple crafts and tasks for kindergarten pupils, toys from a container and plasticine are suitable.It will also be interesting for children to use felt, curly scissors, colored soft wire, beads, rhinestones, buttons and more in their work.
A popular toy from the orange capsule is the cat. It is sculpted with pleasure by kids and older children. Materials are required at least, and the joy of crafts is maximum! Prepare a photo of the finished craft, and invite your child to repeat the idea. Or make your kitten unlike any of the existing ones. The cat can sit or stand on its paws, be of a completely unthinkable color, with or without a mustache, with a bow, smooth or fluffy. Only the young creator of beauty decides!


Children also love to sculpt hedgehogs. Here, the process can be complicated by adding wire. There is a special fluffy wire for crafts. It is convenient and entertaining to create crafts with it. In the plastic "body" of the hedgehog, you need to make small holes with a needle heated on a fire. Pull pieces of wire through them. The needles are ready! It remains to plant plasticine apples on them. Or stick miniature felt mushrooms. It will turn out to be a wonderful autumn craft for kindergarten.
Thus, you can make a chicken, a dragon, a fish, a bear cub, a dog, a penguin. Absolutely any real or fabulous animal, character. And also with the help of colored paper, the capsule turns into any bird or animal in two counts. The same hand-made chickens in different techniques are especially popular at Easter.
If you have the skills, you can tie the hollow kinder surprises with threads. Even aliens are created this way. The scope for imagination is endless here!


DIY Christmas toys
It is unusual to dress up a Christmas tree, even for a child, if you use homemade ones instead of standard decorations. It is easy and fun to make them from containers from a kinder surprise.
Owls
The work is painstaking, requiring the participation of adults. Consists of several stages.
- Make a suspension. Prepare a piece of thin cord, bend it in half, tie the ends in a knot to make a loop. Pierce the capsule on one side with a hot nail. Insert the loop from the inside into the hole and pull it out. You can put any little things inside for sound: coffee beans, beads, cereals. Close the container, fix the halves with glue.


- Pape over the case with threads. Using hot glue, glue the container with threads, moving from the top with a loop. The color and texture of the thread can be selected arbitrarily. In our case, this is twine and light terry thread.


- The basis for the peephole. The thread is twisted in a spiral and glued to the owl's head. For a light base, twine is used here, and a terry one is glued to the twine body.

- Attach a twig with paws to the base. For a perch, a dry twig or wooden skewer is suitable. Wrap a twine around it in three turns at some distance from each other, forming legs. Then glue the element with paws to the base.


- Small parts. Owl's wings are different. On one there are several loops, and on top of a twine spiral, and on the second - a twine spiral, and around in the shape of a wing there is a fluffy thread. For the tail, you need to glue several loops of twine, adjust the twisted spiral on top. For each eyelet, you will need two identical short lengths of twine. Fold them in half, fixing with a drop of glue at the fold. Then stick the ears to the head. Glue a twine spiral on the tummy, glue a half of a pearl bead in the middle, or you can do without it.


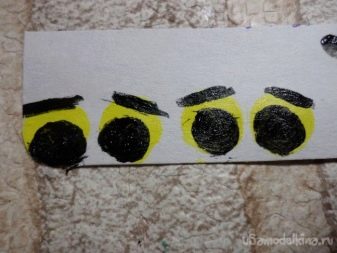
- Draw the eyes. Draw two yellow circles on cardboard, or cut them out of colored paper. Make black pupils in them, then eyelids. Now glue the eyes of the owls. It remains to make white highlights on the pupils with a toothpick. Stick on the coffee beans-beaks.


- Hat. Cut out an elongated triangle from any red fabric, sew it on one side and turn it inside out. We roll up a small ball of white threads and glue it to the end of the cap.Glue a white fluffy thread or something similar along the edge of the cap. Make a hole in the hat, closer to the edge, and stretch the loop. Glue the cap a little to one side. For another owl, you can glue 1-2 bows.


- Finishing. To varnish the eyes, beak and twig with any varnish. Crafts-owls are ready, you can hang them on the Christmas tree! It is easy to make all kinds of garlands from capsules of kinder surprises, even LED ones. And on the eve of the New Year, crafts in the form of snowmen are also very relevant.


snowman
For this you will need:
- white painted kinder hull;
- felt and pompom on a hat;
- marker;
- plasticine for the nose, orange;
- thread with a needle or a heat gun.
Take a half from a snowman, turn it open side up and glue the fabric. It is necessary to form the material in the form of a hat and glue a pompom on top. This item is sold in bulk in the hardware or handicraft department. The eyes and mouth are drawn with a marker. Carrot nose is made from plasticine. You can make a whole string of snowmen by collecting a garland from them.


More ideas
Fly agaric
To create a mushroom you will need:
- body from kinder;
- red paper with a velvet texture;
- cut of lace;
- PVA glue, "Moment";
- scissors;
- green ribbon;
- stapler;
- round sequins;
- sequins-flowers.


How to do:
- cut a circle 7 cm in diameter from velvet paper;
- cut out a small sector from it;
- glue its edges overlapping, forming a mushroom cap;
- glue lace on its inner side;
- glue the hat on the egg;
- make a bow from a ribbon, fasten it with a stapler;
- glue the bow from the bottom of the fungus, forming the grass;
- glue "flowers" of sequins on it;
- glue round silver or white sequins on the mushroom cap;
- you can plant a decorative ladybug on top.
Other types of mushrooms can be made according to this principle. At the same time, tell interesting information for a preschooler, which of them are edible and which are poisonous. Mushrooms are useful for crafts on the theme "Autumn". And they will perfectly complement the composition with maple leaves, hedgehog and other forest inhabitants.


Bees
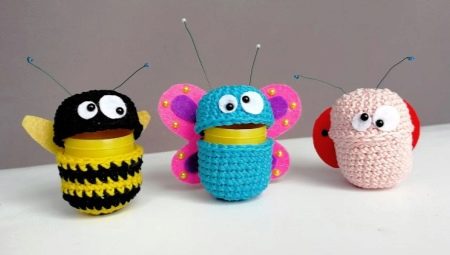
You can make a whole beehive out of kinders with your own hands, with which it will be very exciting for the baby to play. To do this, you need a cardboard sleeve, paints and some accessories. Strips can be made from terry chenille wire, black thread, thin scotch tape, or drawn.
Glue the eyes to the kinder egg using plasticine, glue or also draw them. Make the wings from paper, stationery, folder, or wire. To make a honeycomb, the sleeve must be cut into identical rings. Place 5 pieces in the center, then a row of 4 pieces. top and bottom, and then of three - glue PVA (fasten with a stapler), then paint it yellow.
And also honeycombs are easy to make from halves of kinders. They just need to be connected together in any suitable way.


Tea-set
Not everyone has tiny tea sets among their toys. Invite your child to have a tea party with their favorite little toys.
Materials:
- capsules from kinder surprises;
- quilling strips;
- glue, scissors;
- cocktail tube;
- thick cardboard.
Progress:
- twist blanks for decorating dishes from paper strips;
- decorate capsules by attaching strip-shaped cup handles;
- arrange a samovar.
It will be even easier and more practical to make a service from containers from kinders and plasticine. You can take any photo example as a sample. But it is better to try to create unique serving items with your child. This is a very useful activity for motor skills and the development of creativity.


For information on how to make chickens from kinders with your own hands, see the next video.


