Variety of Maple Leaf Crafts

With the arrival of autumn, in the midst of leaf fall, children often receive creative assignments at school and kindergarten. Maple leaves are beautiful on their own, and if you supplement them with other natural materials, you get wonderful crafts.


Features of working with material
In autumn, trees give our eyes joy, impressing with the beauty of autumn colors. Especially wonderful are the carved leaves torn from maples by the wind. Their color scheme is striking in its variety: yellow, green, red, burgundy and multicolored. It is possible to make many intricate crafts from such natural material, equally interesting to children of different ages.


As volumetric details, you can use what nature gives in abundance in the autumn season: chestnuts, acorns, seeds of various plants. Even the peel of chestnuts is used. It is noteworthy that children's crafts can be completely assembled from natural gifts or create a combined composition:
- decorate individual details in the figure with maple leaves (hair, mane, feathers, crown of trees);
- use maple leaves as a base and supplement with details of different origins (plasticine, felt, cardboard, colored paper).


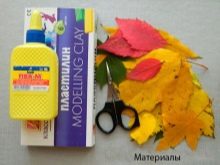
For applications, you need to prepare the following materials:
- paper, cardboard;
- scissors;
- PVA glue;
- colored markers;
- decor for decoration.


The most popular fall crafts made from maple leaves are animals, birds, bouquets and holiday decorations. Having learned from adults several options for applications, the child will be able to come up with ideas for creativity himself. It will take a little imagination or ready-made samples.But in order for the results of the efforts to amuse the eye for a long time, the collected leaves must be processed properly.


There are proven options for keeping maple leaves beautiful.
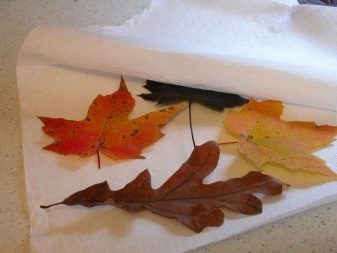
Press drying
A well-known method for a long time, which is simple and does not require any preparatory work or special devices. Pressed leaves are suitable for making appliqués:
- place maple leaves between the pages of thick book editions;
- put any load on top of the book;
- pick up the blanks after 1-2 weeks.


Drying with an iron
Quick method to dry maple leaves quickly:
- lay foliage on top of cardboard;
- put an ordinary piece of paper on top;
- iron with a not too hot iron;
- remove the paper and leave the blanks from the leaves to dry for at least an hour.


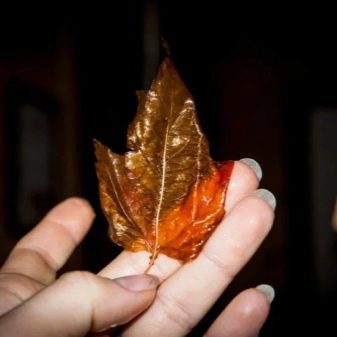
Paraffin treatment
This technique allows you to keep the leaves fresh, give them brightness and glossy shine:
- divide the candle into small pieces;
- melt paraffin in a water bath (in a microwave oven);
- lower the sheet into the molten paraffin, it should evenly cover the surface (it is more convenient to manipulate by adjusting the fork);
- lay on top of the towel until dry.


Preservation in glue solution
Prevents dry leaves from falling into pieces:
- dilute the glue with water (1 to 4, respectively);
- dip the leaves in the solution;
- lay out on a flat surface to dry out.


Soaking in glycerin
An excellent solution for blanks of leaves for future volumetric applications:
- stir glycerin in water (in a ratio of 1: 2).
- pour the solution into a polyethylene bag with a zip fastener;
- put leaves there and level;
- zip the package tightly;
- leave to lie in a dark place for a period of 10 to 14 days;
- take out the leaves and air dry by spreading them out on paper.


Skeletonizing
An unusual way of harvesting fallen leaves to create flat compositions:
- take fresh maple leaves;
- prepare a solution of 12 tsp. soda and 1 liter of water;
- boil;
- dip maple leaves into it and boil for about 20 minutes;
- rinse them under cold water;
- using an old toothbrush, scrape off the softened greens from the leaf;
- rinse again;
- press dry for 48 hours.


How to make an autumn bouquet?
The carved maple leaves are beautiful on their own. Therefore, even a simple bouquet of an armful of dried leaves will look spectacular and festive in a vase. You can place whole maple branches with leaves in a vase. This ikebana looks especially wonderful in a transparent vase.
With some effort, you can easily complement the interior with more complex leaf compositions.


Maple roses
- the maple leaf is folded across, facing out;
- by the next step, it is twisted into a tube and fixed with a thread;
- the next sheet is also folded across;
- they need to wrap the prepared bud by combining the cuttings of the leaves;
- subsequent leaves are wound in the same way, slightly shifting them down and tying the cuttings with thread;
- the rose must be fixed on a twig, which is then wrapped in decorative paper.
Just a few maple "flowers" - and a nice autumn bouquet is ready.


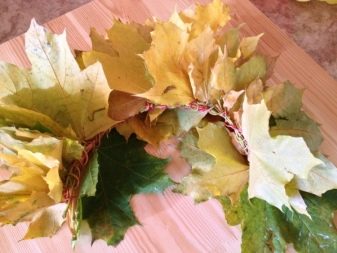
Making a wreath
Maple leaf wreaths are often used to decorate a home on Halloween. But autumn-themed wreaths are relevant this season and not on holidays. You can revive the interior with a wreath of leaves, which is done in an elementary simple and quick way, if you act step by step. This activity is especially fascinating for children.
You will need the following materials and tools:
- maple leaves;
- wire;
- threads to match;
- PVA glue;
- flexible branches (willow, birch);
- acorns, rose hips, rowan, physalis;
- large beads and ribbons.


How to make a wreath:
- from several branches, fasten the ring with a wire;
- attach dry or fresh leaves to the branches with threads or glue;
- in between, you can glue acorns, any fruits;
- wrap the wreath with ribbons with beads.


By connecting imagination, you can decorate the wreath with beads or other natural materials:
- dwarf pumpkins;
- cones;
- dried flowers;
- spikelets;
- bird feathers;
- sprigs of needles.


Or you can try to weave a wreath of maple leaves in the same way as dandelions and any wildflowers are made. Such a wreath will not only decorate the interior, but also be suitable as a head decoration for a holiday or for an autumn photo shoot.
Diadem
How to weave a wreath of leaves.
- Fresh leaves should be rinsed and lightly dried on a towel.
- Cut off the thickening of the stem on each leaf.
- The first leaf is bent so that the fold line is parallel to the “tail”.
- Sew the previous one with the stalk of the second leaflet.
- Fold the second leaf as described in paragraph 3.
- With the next leaf, repeat steps from 1 to 5 p.


Thus, it is worth collecting the blank in the form of a tape and trying it on, wrapping it around the head. If everything fits in size, then the stalk of the latter must be pierced through the first and second leaves. In a similar way, another 2-3 deciduous strips are collected and connected to each other. To ensure that the jewelry does not fall apart, it is additionally recommended to tie it with threads to match the color of the leaves.
The finished wreath will be effectively complemented by chestnuts, artificial, fresh or dried berries, colored ribbons, braid.


Animals and Birds
Very often in kindergarten and at school they are asked to prepare crafts of animals and birds. Such applications are not so difficult to perform even for preschoolers. They are simple, but they look very expressive and allow you to spend time with benefit.


a lion
It is very interesting for children to make different animals, so a lion with a fiery orange mane will certainly captivate them. School-age children can draw an animal's face on their own, and kids need to prepare a blank.
In addition to her, you will need:
- a few yellow maple leaves;
- black marker;
- small chestnut;
- glue;
- pine twig;
- scissors;
- orange cardboard 1 sheet.
Glue the face of a predatory beast to the cardboard. Glue leaves around it, imitating an animal's mane. Outline the lion's nose and glue a chestnut on this place. Make a mustache from pine needles. Leave the finished craft to dry.


Hedgehog
From maple leaves it is easy to make an entertaining craft - a hedgehog. Fresh or dried leaves will serve as a prickly coat. A hedgehog can be made in many ways.
Application:
- draw a hedgehog on colored cardboard;
- on the body of the animal with the help of PVA glue, glue the leaves, starting along the contour, moving towards the middle;
- glue the leaves, preferably a little overlap.
Colored paper will be needed to create the sun, flowers. With them, the work will turn out more beautiful and will have a finished look.


Owl
To make it you will need:
- a few dark leaves;
- any colored paper;
- cardboard;
- twig;
- glue.
Draw a silhouette of an owl on cardboard and cut along the contour. For feathers, you can cut leaves or use a maple leaf as a base, and oak or willow leaves will be feathers. They are glued in rows onto a cardboard bird blank. For the ears and paws of an owl, you will also need smaller leaves (oak, birch). Make the eyes from pieces of colored paper, like the beak of a bird. Then glue them onto the owl's head. Glue the figure itself on a tree branch, fix it all on a sheet of cardboard or a panel.


Peacock
A simple but very funny craft that even kids can make. To do this, you just need:
- glue;
- leaves;
- preparation for the body of a bird.
Print a template in the form of a peacock's head and neck on a thick paper sheet. The sheet must be bent in half. Cut out the part with the bird's head along the contour. Fan the dried leaves over the entire half of the sheet.
When the maple leaves completely cover the leaf, the peacock's head must be bent towards the leaves.


What else can you do?
Crown
A handmade autumn crown made of dried or fresh maple leaves will delight your child. Creating appliques and collages from natural materials helps to develop creative thinking in children. Such an unusual decoration will come in handy for an autumn matinee as a headdress for a baby. It won't take much time to make the craft.
- You will need beautiful maple leaves of the same size.
- Cut off the thick ends at the petioles.
- Bend the first leaf inward by a third parallel to the petiole.
- Bend the second leaf in the same way and "stitch" it with the handle of the previous leaf.
- Repeat the process with the rest of the leaves, until the tape reaches the required length.
- Collapse the ring, securing it with the first handle, stitching the leaf of the last sheet.
- Decorate the crown with rowan berries.


Plate
Maple leaves are great for making a decorative plate. Their shape and size are perfect for this unusual craft. For the plate you will need:
- leaves;
- balloon;
- glue.


How to do it?
- Inflate the balloon.
- Place it in a bowl for stability.
- Lubricate the surface of the ball with glue.
- Trim the petioles, leaving only the leaves.
- Lubricate the PVA maple blanks and attach them to the ball.
- Each subsequent row is overlapped.
- Paste over the entire top (1/2 ball).
- At the base of the plate, you need to stick a couple more layers of leaves so that the future product is stable. Leave to dry, and then carefully deflate the ball and remove it.


Vase
An autumn bouquet looks spectacular in a vase. Maple leaves are good for this because of their natural beauty. The foliage has a rich color range, which makes it easy to find the right shade for any composition. For the base of a maple leaf vase you will need:
- smooth glass containers (plastic bottle);
- flour, water for paste;
- thin paper, PVA;
- leaves, decor.


Boil liquid paste. Apply a thin layer of warm paste to the surface of the container. Wrap the vase with tissue paper, gently pressing it. Grease the paper with a layer of paste. Paste over the vase with dry leaves without tails. Cover them with a layer of PVA glue. Decorate with rose hips, rowan berries or other decor. Leave to dry for at least a day. Carefully remove the paper with leaves from the base.
To add strength and gloss, spray the craft with strong hold hairspray.


The sun
- roll maple leaves;
- pierce all the tubes in the middle and string them on two wires;
- connect their ends to form a ring;
- tie a ribbon to the sun and hang the craft from it.


Preschoolers can easily make a sun themselves from a yellow or orange maple leaf. A dried flat leaf is glued to cardboard and painted as desired. You can add a smile and ruddy cheeks to the autumn sun. Or decorate it with surprised eyebrows and eyelashes, glue a bow, rays of colored paper. You can even paint the leaf in a bright golden hue with gouache.
You can make eyes for the sun out of blue paper and glue the blanks on a natural base. Or choose rhinestones for this purpose, ready-made eyes with rotating pupils. It is very convenient, but it looks funny and unusual. You can find them in any store that sells sewing accessories.


There you can also buy satin ribbons for rays and dilute the picture with materials of different textures. From such ribbons, a rainbow will beautifully turn out, which will be very useful on a panel near the sun. Homemade options for such crafts are creative and help to unleash the potential of children's imagination. Adults can only provide guidance and subtle prompts.

Wood
For work you will need:
- a sheet of white cardboard;
- dry leaves;
- the paint is black or brown;
- pencil;
- PVA.
Chop the leaves. Every kid will be happy to perform this process. Draw the trunk of the future tree on cardboard.You can help your child with this. Paint the barrel with natural colors. When the applied paint is dry, it's time to start the next steps. Apply a thick layer of PVA to part of the trunk and twigs. Sprinkle crushed leaves on the greased areas. Wait for the glue to dry.


Plasticine tree and foliage
This craft is even easier to make. You just need to roll up flagella of different sizes and attach "decorations" -styles.
Variant of tree applique.
- Draw the trunk on paper.
- Glue a crown made of real leaves. Below you can draw any forest animals. Let your child decorate the craft as they see fit.


Helping the little master in this creative process, adults themselves will get great pleasure.
It will be useful for the kid to knead the plasticine with his fingers, working out motor skills and all the important points located on the fingers.
Caterpillar
Master class on assembling an autumn garland in the form of a maple leaf caterpillar.
- You will need a large needle and thick thread. Thread the needle and tie a large knot at the end.
- To plant the leaves on a thread, trying to collect them more densely, so that the finished craft is more magnificent.
- Draw or print the muzzle of an insect, then paint.
- Sew it to the body with the same thread, making a puncture in the area of the nose.


With chestnuts
Spider
- You will need a couple of chestnuts of different sizes (large for the body, small for the head).
- Between themselves they need to be connected with plasticine.
- Make 8 legs from thin twigs.
- Stick large plasticine eyes on the "head".
- Cover the spider with a maple leaf.


With cones
Cones are a wonderful natural material for creating crafts. They go well with vibrant leaves and can be the basis for many interesting ideas.
Swan
- To mold the neck and head of the bird from plasticine and attach to the cone.
- Using plasticine, attach “wings” made of leaves on the sides of the cone-body.
- For the tail, you need a small leaf.


Turkey
The base-body of the turkey will be a cone, on which the tail of leaves is glued behind with plasticine. For the legs, you will need plasticine. From it the beak and eyes of the bird are made, the crest on the head is formed.


With rowan
Bright berries and carved maple leaves look festive and elegant together. Crafts from rowan berries, maple leaves and chestnuts are made extremely simple.
- It is laid out from the leaves of the Firebird along the drawn contour.
- The head is made from chestnut. Decorations are made of plasticine and berries.


Panel with rowan
Grease a beautiful large maple leaf with glue. Put rowan berries on it, like a mosaic. Allow to dry.


The music of wind
Various gifts of nature are suitable for this craft.
- Fasten two branches crosswise.
- String on a thin but strong rope, alternating between rowan fruits and leaves.
- You will need 7-8 such tapes, at the end of each there should be a berry.
- Attach the garlands to the twigs.
Now you can hang.


Butterfly
You will need a fir cone and plasticine. The head of a butterfly is formed from it, and the bump will be the body. Two large maple leaves are attached to the cone as wings. Below are the smaller wing-leaves. Plasticine antennae and eyes are formed on the head.


With oak leaves
The combination of maple and oak leaves in wreaths, bouquets, garlands and topiary looks spectacular.


Watch
The basis of the watch is a large autumn maple leaf. It can be of any color. For arrows, use thin twigs or plasticine. For numbers on a natural scoreboard, you can use seeds, make them from plasticine, or even draw with a marker. This option is even more modern and will add realism to the craft.
If you fantasize a little, even an old chime or cuckoo clock can be easily obtained. For work, it is enough to have in front of you an illustrative example of a watch model. Further, the sense of taste and imagination themselves will tell you how to act.


Umbrella
If you collect fresh autumn leaves and attach them to an old umbrella, you get a wonderful props for a photo shoot or a themed matinee in kindergarten or school. On a fine day, you can take the umbrella for a walk, grabbing glue. Collecting crafts with children in nature is an ideal pastime.
For applique umbrella, dried leaves of different colors can be glued onto the umbrella template. A cane is formed from a cord or wire wrapped in a velvet thread or a piece of yarn for knitting. The size of the applique is selected individually. The template is drawn by hand. A small child can be helped at this stage of the work, while older children can easily cope on their own.


bug
This is one of the easiest options for autumn crafts and the development of children's creativity. Several beetles can be made. Then the panel will turn out to be more colorful and complete.
To work, you need very little:
- 2 identical pressed leaves of different colors;
- one smaller leaf for the head;
- maple seeds - legs and antennae;
- glue, scissors, cardboard.
Glue the torso of a large leaf onto the base, then the legs, the head-leaf. Now place the tendrils-seeds. One of the leaves must be cut lengthwise and the wings must be glued. Now the beetle needs to be glued onto the cardboard.


All these crafts are done quite simply. They will be a wonderful autumn decor for a school classroom, kindergarten or home interior.
Because they give a pleasant atmosphere and mood!
See below for more details.


