Crafts from cereals and seeds
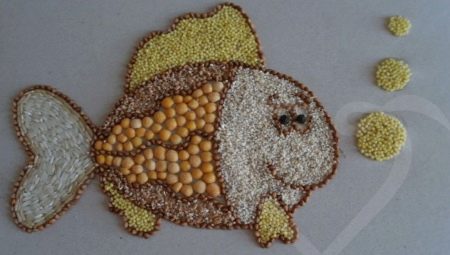
You can make original and beautiful crafts from different components. So, it can be very exciting to independently make various things from cereals and seeds. There are many workshops that involve the use of such materials. In this article, we will consider what interesting crafts you can create from cereals and seeds.


Easy options for kindergarten
Preschool kids can make many different original crafts using all possible materials with their own hands. Little craftsmen learn to make interesting applications and bright pictures from cereals and seeds.
It is advisable for children of kindergarten age to begin their acquaintance with creativity with the simplest and most understandable master classes.


After that, the baby can take on more complex tasks in order to get bright and aesthetic results.
bear
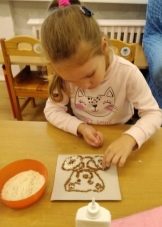
Preschoolers really like to make cute appliques with the image of various animals with their own hands. For example, it can be an adorable bear. Consider what components will be needed to create such a beautiful craft:
- a cardboard sheet on which the outline of the future bear will be drawn;
- PVA glue or glue stick;
- buckwheat groats (if the bear is brown) or rice groats (for a polar bear);
- stack;
- brush and paints;
- clean cloth.


Let's analyze a step-by-step master class on modeling an original applique.
- You need to put a cardboard base with a painted bear on the work surface or start preparing a stencil... You can not draw, but print the outlines of the future drawing on a printer, and then transfer it to a cardboard base through carbon paper.
- Now, inside the outlines of the drawn bear, you will need to apply a layer of glue. In this case, it is better to use the composition of PVA. When applying it, it is important to try not to go beyond the contours, otherwise the craft will turn out to be sloppy.
- When the glue is applied to the base, it will be necessary to deal with the design of the fur... For this, buckwheat or rice groats must be poured over the glue layer.
- All excess grains will need to be gently shaken off... If there are unfilled areas in the contours, they will need to be additionally covered with cereals.
- As soon as the glue layer of the applique dries up, the child can proceed to the background design.... With the help of brushes and paints, the kid will be able to draw absolutely any landscape, be it a forest or snowy mountains: it all depends on the child's imagination.



Hedgehog
Little craftsmen aged 3 to 4 years old can make with their own hands another spectacular applique, which depicts a cute hedgehog. Let's consider step by step how you can make such an interesting composition on the theme "Autumn" for a kindergarten.
- First you will need to prepare a paper base, on which a picture with a hedgehog has already been drawn or printed. The image should be uncolored with only black or gray (pencil) outlines.
- If the drawing is present on plain A4 paper, it can be glued to cardboard, so that the base is denser and stronger.
- Next you will need prepare buckwheat, rice, as well as black sunflower seeds in sufficient quantities.
- Inside the outline of the drawing it is necessary to apply a layer of PVA glue, as in the above master class.
- Hedgehog's feet should be issued with buckwheat, tummy area can be painted over with rice.
- Beautiful and spectacular thorns are created using black seeds. These components must be fastened as close to each other as possible so that no voids remain.
- Now you will need to take a simple and colored pencils... With their help, it is necessary to arrange the background behind the back of the autumn forest dweller, as well as the grass under his paws.
- You can make a beautiful craft additionally decorate with small plasticine mushrooms, berries, yellow leaves. The latter can be easily stuck to the seed needles.
- The resulting autumn composition of rice and sunflower seeds should be placed in an attractive frame.


Still life
The little master will be able to make a very bright and original applique from pumpkin and pea seeds, as well as a small amount of buckwheat. The listed components look inconspicuous, but completely change their appearance after painting.
- To create an interesting applique from the above components, you need to take a thick sheet of light cardboard. On it, you can draw the simplest outlines of an apple, banana and pomegranate in the background. A preschool child can easily cope with such a task.
- Now, within the contour, it is necessary to apply liquid PVA glue. After that, you can move on to the interior design of the painted fruits.
- The apple and banana should be completely laid with pumpkin seeds, but peas can be used to decorate the pomegranate. The apple should have a "tail" with a green leaf. The "tail" can be decorated with a small amount of buckwheat, and pumpkin seeds should be glued to the leaf.
- But that is not all... To make the craft look more original and bright, you need to paint all the glued and dried seeds / cereals.
- The seeds inside the banana must be painted with yellow gouache, and inside the apple - red... The filling of the pomegranate should also be repainted in red. The apple leaf should be painted with green gouache.

On this, an interesting craft will be ready!
Of course, a young master can add something of his own to the composition, resort to additional decorations and decorations.


School ideas
There are many interesting ideas for creating school crafts using cereals, seeds, pasta and other similar ingredients.
Cheburashka
For example, the well-known character of Cheburashka can turn out to be very original and unusual, if you make it from cereals in combination with used tea leaves.
- First, an image of a famous character is drawn or printed on a sheet of cardboard.... You can also draw it on paper, and then glue it to a denser material.
- As in the cases discussed above, it is necessary to walk over the workpiece with PVA glue. This applies to those areas where the fur should be. These are practically all surfaces, with the exception of the muzzle and chest.
- Dry tea leaves will need to be poured over the glue layer. When the glue dries, the drawing will definitely need to be turned over so that all excess residues crumble.
- Next, the Cheburashka breast is filled with buckwheat... The muzzle should be decorated in the same way, but with the help of rice.
- Now you need to take the peas. From them it will turn out to make eyes for the animal. These components can also be sculpted from plasticine: all options will do.
- Mouth can be made from long grain rice or a small piece of red colored paper.
- At the end of all work the picture can be paintedto make it look more original and bright.
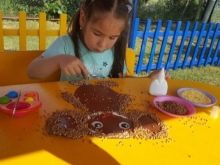

Owl
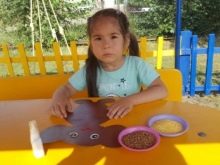
Students in grades 1-2 can create stunning owl appliques using seeds and cereals.
- As in the master classes discussed above, you first need to prepare a drawing template with the contours of the future owl.
- The template is cut out and glued to the cardboard.
- After that, you need to move on to the most critical stages of work.... On the template processed with glue, you will need to glue the cereal. Buckwheat can be used to decorate the head and part of the wings of an owl. But the tips of the wings and the belly of the bird should be pasted over with watermelon seeds.
- Suitable for breast decoration bright yellow small millet.
- A playful crest will look interesting on the bird's head.made from 3 large dark seeds.
- To make the owl's beak, legs and eyes stand out better, they can be painted with a felt-tip pen or a thin layer of plasticine.
- Such a creative craft, made up of different cereals, can be supplemented with other details. For example, a child can draw a beautiful landscape, tree or pond around an owl: there are a lot of design options.


By a similar principle, you can make pictures with many other animals, insects and birds. For example, a child will be interested in making compositions that include a squirrel, chicken, butterfly, dog, and so on. You can use a wide variety of cereals and in different combinations.


Crafts for home
From cereals and seeds, you can make not only children's applications, but also useful decorative items for the home. Consider how you can make such designs.
Topiary
Instead of standard plants in your home interior, you can use a decoration such as a topiary. To model it, you will need:
- a pack of green split peas;
- foam ball;
- PVA glue, glue gun;
- a pack of dry moss;
- clay pot;
- wooden stick or skewer;
- brush;
- green paint;
- stationery knife.


The original topiary is made as follows.
- First, the ball-shaped part must be painted with green paint and a brush. Then this component is removed to dry.
- You should take a skewer made of wood, and then use it to make a hole for the trunk of the topiary.
- Then you need to gradually glue the peas to the finished ball... To do this, cover the base with glue in small areas, and then sprinkle it with peas. Thus, it is necessary to arrange the entire ball. It should dry completely overnight.
- After drying, the remaining voids should be filled with peas.... Next, the trunk is fixed. To do this, glue is dripped onto the tip of the skewer and the skewer is sent into the hole made.
- The selected pot should be filled with special floristic foam. The barrel is stuck into it. At the final stage, the surface that protrudes above the pot should be supplemented with moss.


Magnet frame
To model such a homemade craft, you will need:
- different types of cereals;
- cardboard sheet;
- pencil and ruler;
- scissors;
- glue gun;
- a pair of magnets.


Let's analyze a step-by-step master class.
- It is necessary to take a sheet of thick cardboard. A frame is drawn on it. After it is carefully cut out.
- The cut part will need paste over with cereals or seeds at your discretion. You can combine several different materials at once if you want.
- On the back of the blank frame you will need glue a few small magnets.


Wreath
You can make a chic and very unusual decorative wreath from cereals. To create it come in handy:
- chipped green peas;
- 2 straw wreaths with a diameter of at least 20 cm;
- PVA glue;
- brush;
- foil;
- twine or tape;
- baking sheet.


We will find out what should be the course of work on modeling such a decor.
- First, you will need to cover the baking sheet with a foil sheet. Then peas are poured there.
- In the next step, the glue solution will need to be applied to a small area on the inner cavity of the straw wreath.... The most convenient way to do this is to use a brush. Then sprinkle peas on fresh glue and wait until everything is dry.
- In the same way it will be necessary complete the entire internal component of the wreath.
- The glue must be applied to a small area on the outside. Next, the workpiece must be rolled in a baking sheet with peas. You will need to wait until everything is dry.
- In a similar way, it will be necessary cover all parts of the wreath with peas.
- To the finished product tie the twine, so that in the future it can be hung on the wall or on the door.


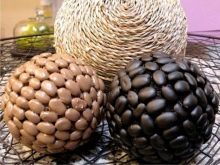
Decorative ball
It is possible to make a wonderful decorative ball from beans. To simulate it, you will need:
- foam ball;
- beans;
- brush;
- liquid PVA glue;
- paints.


Step-by-step manufacturing instructions will consist of the following steps.
- First you have to paint half of the styrofoam ball in any color you like. It can be either a dark or a light shade.
- After that, the workpiece must be set aside and not touched, so that the paint on it can dry completely.
- Now you can move on to painting the second half of the styrofoam ball. It should also be allowed to dry 100%.
- In the next step, you will need to apply an adhesive solution to one part of the ball.... On top of the glue layer, it will be necessary to fix the rump. After that, you will need to wait until the workpiece is completely seized and dry.
- By analogy follows arrange the entire surface of the foam base with cereals.
- If you want the craft to look brighter, more intense, attract more attention, the groats glued to its surface can be additionally painted in any color you like. It is recommended to use acrylic paint for this purpose.


Napkin rings
Using seeds or various cereals, you can make very beautiful and neat volumetric rings for napkins with your own hands without unnecessary difficulties. To do this, you will need to prepare the following components:
- different types of cereals (selected at will);
- a sleeve left over from a roll of toilet paper;
- liquid PVA adhesive composition;
- brush;
- sharp stationery knife;
- paints of different colors (gouache is ideal).

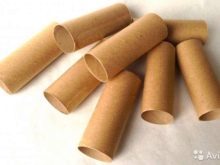

Let's get acquainted with the step-by-step instructions for self-modeling of a beautiful decorative napkin ring.
- At the first stage, the sleeve that remained from the toilet paper will be needed cut very carefully to make 3 separate pieces.
- The prepared parts of the sleeve will need to be painted using a brush and paints. The color can be absolutely any. So, fixed cereals or seeds will stand out very well against a black background.
- Further, on painted and dried bases, you will need to apply a thick layer of liquid PVA adhesive composition... At first, it is enough to treat only a small area in this way. Then it is covered with cereals and must be allowed to dry completely and gain a foothold.
- Further, all the free and painted space of the used sleeve will need to be decorated with the selected cereals according to the same scheme.... It is not recommended to apply too large a layer of glue, as it will begin to drain and ruin the appearance of the craft.
- Having completed the design of the entire surface of the sleeve by means of selected cereals and seeds, it will be possible to turn to other additional decorations if desired... For example, products can be supplemented with glued coffee beans or painted in other bright colors.

Very often, to create crafts, you need to paint the cereals. You will learn how to do this correctly by watching the following video.


