Crafts from the palms

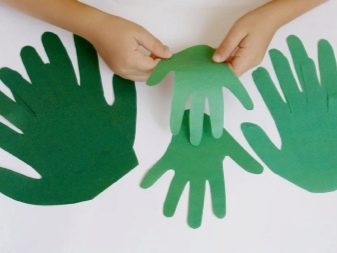
Making handicrafts from children's handprints is a very exciting experience. It will be useful for the versatile development of the baby and, moreover, will leave fond memories for a long time.

How to make an autumn tree?
Funny trees on the theme "Autumn" can be made using the applique technique. Getting the job done is not difficult at all.
- First, circle your baby's palm on a colored sheet. The color can be chosen arbitrary or in accordance with the autumn theme: red, orange and yellow. Carefully cut out the workpiece.
- Cut the barrel out of brown paper and glue it to the cardboard base.
- Secure your palms so that the impromptu "leaves" are placed with your fingers up.
- If you wish, you can additionally decorate the tree with juicy fruits.


Making flowers
With your own hands, you can make a pretty elegant bouquet of delicate daisies. It can be a good gift for mothers and grandmothers for their birthday and any other holiday. The work on creating such an application is a simple but very exciting exercise.
The process of creating a bouquet includes several steps.
- To make one chamomile, six blanks are needed, so it is better to fold white paper in several layers in order to cut out several children's palms at once.
- A yellow napkin is folded into a square and the core of a future flower is formed from it.
- The next portion of the outlines of the palms is prepared from green paper - they will act as leaves. You will also need a thin stem.
- The stalks and leaves are glued to the cardboard base, and then white palms are placed around the circle. Each flower needs about 6 elements.
- After that, it remains only to fix the napkin cores on top of the petals. A cute bouquet of delicate garden daisies is ready.


In the same technique, you can make a bell. As the flower itself, handprints cut along the contour of blue and blue paper are used. Additionally, you need to prepare textured leaves and flower stalks.
A blue palm is attached to a white cardboard sheet, and then a blue palm is fixed with a slight offset. The bell petals should be lowered, so the workpiece is glued with your fingers down. Next, a green blank of peduncles is placed on top, a stem is drawn and two carved leaves are attached below.


Christmas crafts
Many simple handcrafts can be prepared for the New Year. The easiest way is to make a Christmas tree.
For this applique, you will need green paper of various shades - so the Christmas tree will look more voluminous, lush and elegant.


The work is not difficult.
- To begin with, several outlines of children's palms are cut out of green paper.
- The blanks are glued to the paper base, moving from bottom to top. At the same time, the number of elements in each row should be reduced so that the outlines of the tree resemble a triangle.
- The palms do not have to be glued completely. If the paper is double-sided, you can leave your fingers loose and twist them slightly over the pencil. This craft will look fluffier.
- The picture is ready. If you wish, you can decorate it with elegant balls and stars made of colored paper in red, blue and yellow shades.


White palms glued together in a large circle can become a working material for creating snowman. And if you fold the blanks in several layers, then the applique will turn out to be fluffier. To make the main elements of the New Year's image, you will need colored paper of brown, black and orange colors - from them you will make a bucket, eyes and a carrot nose. It is best to place such a snowman in a picture with a beautiful winter landscape.


How to make a butterfly?
A kid who actively learns the world around him can be offered to build butterfly made of palms.

Here is a step-by-step master class.
- Place the child's palm on the colored sheets of paper, carefully circle and cut with scissors along the contour. To work, you need a couple of blanks of different shades.
- The body of the insect is cut out in the form of an oval, the head is made round.
- Beige or yellow cardboard is used as a base.
- Next, you just need to assemble the butterfly and place all the elements in the same order in which they will look in finished form. Two wings are attached in the upper part of the butterfly's body with the fingers up, the other pair is placed at the bottom. The upper and lower wings should be in contact with each other with the wrists. Please note that the body of the insect must be glued on top of the junction of the wings, otherwise the craft will turn out to be sloppy.
- Then they attach the head and form small thin antennae.
- To make the craft brighter and more colorful, it is decorated with a sculpting mass, paints, multi-colored figures fixed on the wings of ribbons and dried flowers.


More ideas
Many handicrafts can be made from carved children's palms for kindergarten and school. For work, you will also need cardboard, glue stick, scissors and colored paper of various shades.
Animals
You can do a lot with handprints different animals. The sea inhabitants are very spectacular - octopus... To do this, you will need the outline of two children's palms, cut from paper in saturated colors. As a background, you need to take a blue sheet of cardboard and draw shells, algae or pebbles on it.
The outlines of the palms are glued with the fingers down - these will be the octopuses. All that remains for the baby is just to draw their eyes and mouth. Even very young craftsmen can cope with such a craft.

In the same technique, you can make a cute hedgehog.
- A children's pen is outlined on black cardboard (you can use white chalk to make the outlines clear). In total, you need four parts - they are placed on the substrate in the form of a fan. If you use the outlines of the palms of several children, and the elements differ in size, then you need to place them in such a way that the silhouette resembles a back with needles. The blanks are glued to each other.
- A drop-shaped body of an animal is cut out of dark cardboard. It is glued to a needle-like back and painted on a pointed muzzle with a mouth with acrylic paints. Eyes are made of thin white paper, fixed in the required place and the pupils are drawn with felt-tip pens.
- You can decorate a hedgehog with a leaf or an apple cut out of paper. If you have some brown felt, make an image of a boletus mushroom out of it and attach it on sharp needles.
- All you have to do is cut out the black legs and fasten them at the bottom of the calf.
Birds


If you circle your palm on white paper and then carefully cut it out, you can make a beautiful bear. To make the picture realistic, it is advisable to place the figure on a blue cardboard and glue the cotton wool fur. Do not forget to draw a funny face for the little animal.

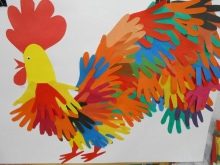
Children's palms give room for imagination, birds are especially beautiful from them. You can make an owl, stork, cockerel, or crow.


From the palms, you can assemble a charming craft in the form of a yellow chicken.
- To do this, draw an egg-shaped template on white paper, cut it out and stick it on bright yellow cardboard. Then they circle and cut out - you get an oval blank.
- Several squares measuring 1.5x1.5 or 2x2 cm are cut out of golden corrugated paper, this depends on the age of the child and his ability to handle scissors. Each square is crushed.
- The prepared cardboard base is abundantly greased with PVA glue and prepared balls are glued to it. This will be the body of the chicken.
- But for the wings, you just need children's palms. They are glued to the resulting egg-shaped blank on the sides.
- A triangular beak is formed from dark pink paper.
- To create a peephole, prepare two white circles and two more black circles, a little smaller in diameter. Dark blanks are attached on top of light ones to make proteins and pupils. The prepared elements of the face are glued in the upper part of the chick.


Having at your disposal several shades of colored paper, you can make a peacock.
- Prepare some outlines of the palms. The more there are, the brighter and more voluminous the bird's tail will come out.
- A cardboard base is formed for the head, neck and body. After that, multi-colored palms are glued behind the calf in the form of a fan, it is advisable to place them in tiers.
- A small tuft is cut out of yellow paper on the head, as well as paws with spurs, a beak is formed from red paper.
- The eyes are prepared round or oval so that the black workpiece of a smaller diameter is located on top of the white one.
- If desired, the bird can be decorated with ribbons or glitter, and the body can be decorated with dots or small flowers.

Another bird that can be made from handprints is arctic penguin. The technology of its creation in stages is not particularly difficult.
- Snowdrifts are glued to a blue cardboard base, they are cut out of snow-white paper in waves.
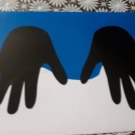
- Next, you need to outline the child's palm on black paper, cut it along the silhouette and stick it on the snowdrifts. The fingers should be pointing down.
- In the middle of the palm, you need to glue a cotton pad - this will be the penguin's belly.
- After that, the eyes and the red beak are fixed on top.


It is advisable to make a couple of penguins and decorate one with a bow. For more color, you can additionally decorate the background with sparkles and stars. If you want to create a New Year theme, then glue a small Christmas tree and snowflakes.

A dove of peace can be made using a similar technology. To do this, take a thick sheet of paper and circle the child's palm with outstretched fingers.
- A scarlet beak is drawn on the upper phalanx of the thumb and cut out.
- Using a hole punch, they make out a branch of a pale green color and attach it to its beak.
- On the back, you can attach a wooden stick.


If you wish, you can make several of these birds and put them in a vase, tied with a ribbon near the base.
To create a swan, you need white children's handprints, the thumb needs to be taken as far as possible from the rest. The blank is glued onto thick blue cardboard so that the thumb is pointing up - it will act as the neck of this amazing bird. To make the head of a swan from white paper, an ellipse is formed, a triangular beak and black eyes are glued to it. To make the picture more atmospheric, the background is complemented by the sun and a cloud.
The application is ready.


Smeshariki
Probably, there are few guys who would be indifferent to funny and funny Smeshariki. If desired, they can be easily and simply made from children's palms - this will require a lot of blanks. Their total number directly depends on the size of the figure and the volume that you want to give it. For example, if you make Crochet on a landscape sheet, you will need one number of palms, and if you create an applique on a Whatman paper, you will have to prepare at least 3-4 times more of them.
- To make Smesharik, a circle is formed on a cardboard base - for this you can use a compass or a plate.
- The figure is pasted over with palms in a circle, while they should be directed from the center to the edges, then Smesharik will turn out fluffy.
- The craft is pasted over from the outer edge to the center. When all the blanks are in place, let the painting dry, and then draw in the eyes, legs and handles with a felt-tip pen. In this technique, you can create any Smesharik, only the color of the paper used differs.

The sun
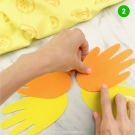
And, of course, together with the baby, you can always make a cheerful summer sun. To do this, you need 3-5 yellow prints of children's handprints, it is advisable to spread your fingers as wide as possible. Repeat the same steps on an orange piece of paper.
After that, a circle with a diameter of 7-10 cm is formed from a yellow sheet of paper. A circle of the same size is prepared from a cardboard base. Prepared palms are glued along the contour of the cardboard blank, yellow and orange elements must be alternated. A yellow circle is glued in the center, a cheerful face is depicted on it with the help of markers or felt-tip pens.
Such a craft is often created collectively.

How to make flowers from palms.


