Crafts "Bird" from leaves

Often, school or kindergarten is required to make a craft for an exhibition on the theme "Autumn". It is not difficult to make such an autumn craft from natural materials. To do this, you may need ordinary leaves, as well as a little imagination and effort. Below we will tell you in detail how you can make a craft in the form of a particular bird with your own hands together with a child.
How to make an owl?
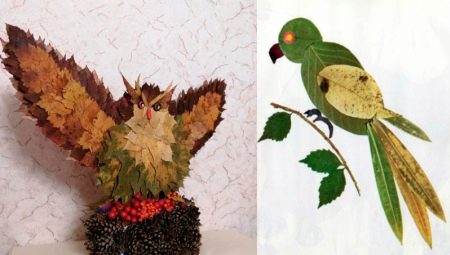
Making a voluminous owl out of leaves with your own hands is a task, at first glance, not difficult, but rather painstaking. The child is unlikely to be able to make it on his own, so he will have to turn to his parents for help.

To create such an owl-shaped craft, you will need the following materials:
- foliage of different colors and sizes;
- cardboard paper;
- colored paper;
- simple pencil;
- scissors;
- hot glue (glue gun).

It is worth considering that when working with a hot glue gun, you must follow the safety rules so as not to accidentally ruin the device and not get burned.
The work should be done step by step.
- First of all, you need to make a template. To do this, you need to take cardboard paper and draw the contours of an owl on it, and then cut it out. What your template will be depends only on your desire. For example, you can make a small owl in a sitting position, or you can slightly increase its size and make its wings open.


- After that, you can start gluing the base with foliage. Before that, for your convenience, the foliage should be sorted by color and size, in addition, the legs should be cut off from the leaves.

- Now you can start glueing the leaves with hot glue. For the first row of "feathers" it is recommended to select leaves of dark colors with sharp edges, the rest of the rows can be made from lighter leaves. At the same time, keep in mind that when making plumage for an owl, you need to try to choose leaves of approximately the same color so that the craft ultimately looks beautiful.


- Having made the wings for the owl, you can start gluing the foliage of the bird's breast. To do this, you need to pick up small light leaves with a carved edge. In the same way, we glue the back side of the template with leaves.

- Almost ready! It remains only to make eyes and a beak for an owl out of colored paper. For stability, the lower part of the craft can be decorated with a rowan bunch or branch.


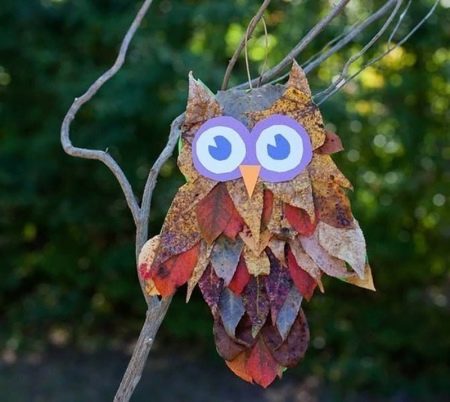
If you want to make a simpler craft in the form of an owl, then there is an option to make an ordinary applique from the same materials. It will not take much time, the child will be able to cope with it on his own.

For work, you will need colored paper, leaves, a simple pencil, a sheet of cardboard.
With a simple pencil we outline the contours of the owl on cardboard, after which we paste over the drawing with foliage of different colors and sizes. Cut out the beak and eyes of the bird from paper. Ready! If desired, such an applique can be diversified by painting something on it with the help of watercolors or felt-tip pens.

Peacock making
From ordinary foliage, you can also make a bird like a peacock with your own hands. This is a fairly simple task.
For crafts, you only need dry leaves of different trees, glue, scissors, a sheet of thick paper or cardboard.

Having prepared all the necessary materials, you can get to work.
- First of all, we prepare the leaves by cutting off their "legs" with scissors. After that, we lay out the prepared leaves on cardboard, forming a peacock, and we begin to glue them one by one to the cardboard.
- The craft is ready! If desired, it can be diversified by painting grass or other details with paint or felt-tip pens.

There is another option for making a peacock from autumn leaves. For such a craft, you will need, directly, the leaves themselves, paper, a simple pencil, glue, paints and the so-called helicopters from ash or maple.
- To begin with, draw the peacock itself on paper. In most detail, you need to draw his body, head and legs, but you just need to outline the tail. The stage of drawing a bird is perhaps the most difficult in the craft.
- How your peacock will look on appliqué depends only on your desire and imagination. You can draw it with a fluffy tail and a folded one. In addition, he can be positioned in any position, for example, with his head up or turned sideways. To make the craft more interesting and original, connect your imagination.
- Having painted the peacock with paints, felt-tip pen or colored pencils, you can start working with foliage. We cut off the legs of the leaves and lay them out on cardboard, forming a peacock's tail, after which we alternately glue them to the cardboard.
- Now we make a crest from the lionfish. From the remaining foliage, you can make a green meadow. The craft is ready!


Crafts of fairy birds
To create crafts on the autumn theme, you can choose the beautiful Firebird as inspiration. A child is unlikely to be able to make such a craft on his own, with a high probability he will need help from adults.

You will need the following materials:
- unnecessary newspapers;
- a sheet of cardboard;
- colored paper;
- masking tape;
- hot glue, glue gun;
- felt-tip pen;
- the foliage of the trees is yellow.

Now let's look at the step-by-step instructions for creating a voluminous Firebird.
- First of all, you need to make the basis for the Firebird. To do this, you need to fold unnecessary newspapers in such a way as to form the body and head of a bird from them. After that, the newspapers must be fixed with scotch tape. Now we cut out the base for the bird's tail from cardboard paper and glue it to the body.
- Having created the basis for the Firebird, you can start working with the leaves. We cut off their legs, after which we glue the base with leaves, fixing them with hot glue.
- With a felt-tip pen, draw the eyes of a bird in the form of two dots, and cut out the legs from colored paper. If desired, decorate the craft with berries and branches. Autumn Firebird from natural materials is ready!

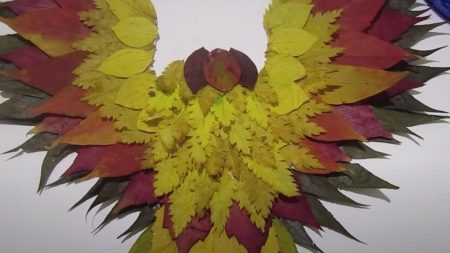
There is also an easier option for creating a fabulous bird from natural materials. To do this, you need a simple pencil, scissors, a sheet of cardboard paper, red and yellow leaves, and glue.

- First, draw the outlines of the Firebird. Here you can let your imagination run wild. Your fabulous bird can be depicted as you please, for example, in flight with its magnificent wings spread, or, on the contrary, in a sitting position with folded wings.
- Now we cut off the legs from the leaves and place them on the cardboard, forming the bird's tail and its body. Please note that in order for the craft to turn out beautiful, the leaves must be correctly combined in color.
- Now, one by one, glue the leaves to the cardboard sheet.
- The craft is almost ready! It remains only to decorate it. This can be done using the same natural materials, watercolors, crayons and felt-tip pens.
Instead of the Firebird, according to any of the proposed schemes, you can make a fabulous Phoenix. True, you need red leaves.


More ideas
There are many other bird craft ideas out there from natural materials that are great for fall-themed exhibitions that are often held in elementary school or kindergarten.

For example, it will be very easy to do it with dry maple leaves, glue, colored paper, cardboard and scissors for funny chicks.
- Cut off the legs of the maple leaves and glue them to the cardboard. Please note that this must be done carefully, otherwise the dry leaf may accidentally crumble, which will spoil the craft.
- From colored paper we cut out two legs for chicks, beaks and eyes. We arrange them in the right way and glue them. The craft is ready!
Similarly, you can make other chicks, for example, from linden leaves and twigs.


Besides, There are many options for making fall foliage crafts in the shape of other birds. These are parrots with bright plumage, and roosters, and a hen in a nest, and other very different breeds of birds.
Thus, from ordinary leaves you can make a variety of compositions, it remains only to turn on the imagination and plunge headlong into the creative process.


An illustrative workshop on making a bird from leaves can be found in the following video.


