Burlap crafts

Nowadays, decorative products made of burlap are gaining more and more popularity. They add a touch of originality to the interior, combining the roughness of "rural" fabric and the tenderness of additional decor in the form of lace, beads and other decorative elements. A large number of interesting crafts can be made from burlap yourself. To do this, we have prepared for you several simple master classes on creating beautiful products from this material, which can also be used as a gift.
Burlap itself is a durable fabric that is rough to the touch. It differs in uniform color and pronounced texture. This material is widely used in needlework. Toys, paintings, jewelry, handicrafts are made of it, various objects are decorated with it - pots with flowers, boxes, lamps, vases and more.

Making a box
You can make an original jewelry box from burlap. To do this, you will need the following materials:
-
burlap in two colors - plain and bleached;
-
jute of two colors - dyed in manganese solution and bleached;
-
sheets of cardboard - thin and dense;
-
thermal gun;
-
Tacky Glue glue;
-
stones for decoration;
-
awl;
-
gypsy needle.


Let's consider all the stages of work.
-
We take thin cardboard, cut out a strip 15 cm long and 2-3 cm wide from it... On the reverse side, we apply glue from a heat gun, and fix a piece of natural burlap.
-
Cut off the extra edges, leaving 1 cm on each side. We carefully fix the side pieces of burlap on the cardboard with a heat gun, which are located along the length of the cardboard. Cut off the remains of the burlap, which are located on the narrow side.
-
On the side where the edges of the fabric were fixed, glue a rectangular piece of bleached burlap, cut along the length of the cardboard... We wrap the workpiece with the light side inward, and fix its edges on the thermal gun. Outwardly, the figure should look like a flower petal.
-
We make 5 more of the same blanks according to the same principle. In total, there should be 6 of them.
-
Now we connect them with each other using a thermal gun. You should get a fan.
-
Next, cut out a circle from thick cardboard, with a diameter of 12-15 cm... We cut it in half.
-
Apply Tacky Glue to one of the halves, and glue a piece of natural burlap on top.
-
Along the contour cut off excess fabric.
-
On the other side fix a piece of light-colored burlap with glue.
-
We do second half of cardboard in the same way.
-
Now connect a rectangular workpiece and one of the semicircles so that they are perpendicular to each other. From the side it resembles a bench with a high back.
-
Bleached jute weave a pigtail and glue it along the rim of the glued blank of the box. We also attach our fan-shaped blank there.
-
The middle of the fan we close it with a prepared piece of cardboard and burlap.
-
With an awl make holes in the lid and base of the box, we connect them with jute thread.
-
Decorate jewelry box with homemade jute thread flowers. A beautiful box is ready!
For a detailed master class, see the video.
What accessories can you make?
Burlap serves as a material for the manufacture of many accessories - all kinds of ornaments, decorative bags for gifts, vases, photo frames, candlesticks, panels, toys.
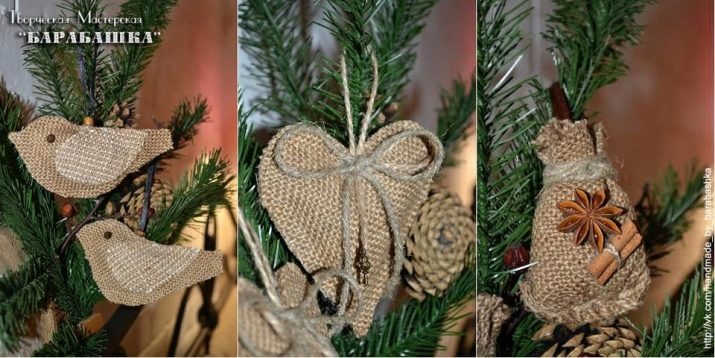
For example, Christmas tree decorations can be easily made from this material. We suggest that you familiarize yourself with a simple master class that will help you create original eco-decorations for the Christmas tree, and more.


To do this, you will need the following materials and tools:
-
sackcloth;
-
scissors;
-
glue gun;
-
jute or any other decorative thread;
-
acrylic paints;
-
cotton wool or synthetic winterizer;
-
brush;
-
pencil;
-
decorative elements - sequins, glitter and more;
-
scissors;
-
cardboard.

The work includes several steps.
-
Draw and cut templates of our toys on cardboard - a heart and a star.
-
Glue to ready-made templates burlap on both sides. To make the toys voluminous, you need to put a little cotton wool or padding polyester on both sides between the cardboard and the fabric.
-
On the front side apply any pattern with a glue gun and quickly, until the glue is dry, cover it with sparkles of different colors or glitter.
-
Acrylic paint carefully draw a snowflake in the center of the star... Decorate the heart with a scattering of peas.
-
Remove excess threadssticking out at the edges of toys to make the toys look neat.
-
From above a little push the edges of the burlap, and glue there a colored or jute thread on which you can hang the product.
If desired, toys can be decorated with lace, rhinestones, beads.


More ideas
In addition to stylish accessories, burlap is actively used for making crafts. A large number of works for the autumn exhibition can be made from this particular fabric, as well as from jute and twine.
We offer a master class of interesting crafts from burlap for beginners, which will help you make a beautiful figurine of a brownie with your own hands. To do this, you will need the following materials:
-
a piece of burlap;
-
jute twine;
-
synthetic winterizer;
-
color-matched threads;
-
needle;
-
corrugated cardboard;
-
artificial eyes;
-
scissors;
-
thermal gun;
-
decor (optional).

We begin to tinker with a brownie.
-
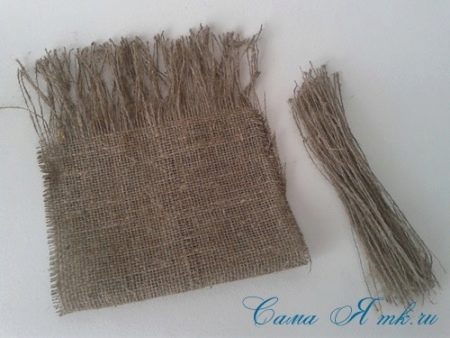
We take burlap, and cut out a rectangular piece of the required size from it.

- We pull the threads that are located horizontally - from them we will later make a beard for our brownie. The number of strands pulled out depends on how long you want the fringe to be.

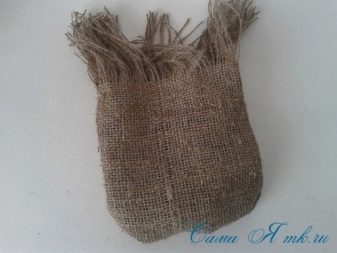
- Fold the workpiece in half, sew the sides, rounding the bottom corners.

- We turn out the product. Draw a simple thread at the base of the fringe.


- We fill the bag with padding polyester, tighten the thread by pulling one end. We fix it.


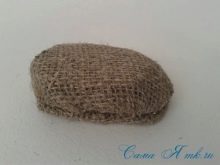
- We make boots from corrugated cardboard by cutting out an even number of identical oval-shaped blanks. We leave separately on a single workpiece. Then we wrap all 4 blanks with a piece of burlap.


- We put single and multi-layer blanks on top of each other and glue them together.


- To hide the seam, we glue a piece of twine on it, woven into a thin braid. We glue the bows on the toes of the boots. We fix the boots at the bottom of the bag.


- We make a beard from the threads that were previously pulled out of the fabric, fixing the entire bundle with one thread in the center.

- Then we begin to wind the thread with which we tie the bundle in a circle, forming the nose.

- We attach the beard to our product using a thermal gun.

- We glue the artificial eyes.


Our cute brownie is ready! If desired, it can be decorated with various decorative elements.


