Crafts from ice cream sticks

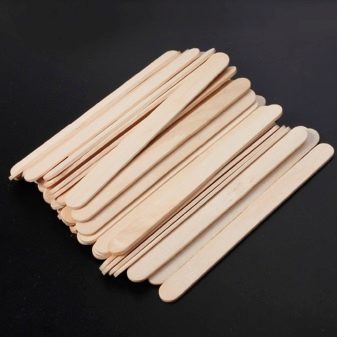
Very often, beautiful and useful crafts can be made from materials that seem to most people to be outright rubbish. For example, ice cream sticks almost immediately go to the trash can as soon as a cold treat is eaten. In fact, these components can serve as the basis for making a variety of homemade products.

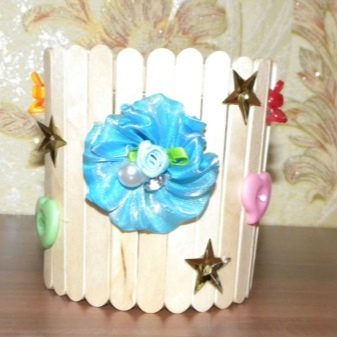
DIY house
It is possible to make bright and creative houses from the sticks under consideration. These can be the simplest crafts, and complex elegant huts with a lot of decorations. Making such things, the child can let his fantasy free, resort to any techniques and techniques.


If you want to make an attractive and non-standard house, for example, for small dolls, you can refer to the workshop on making a structure on wheels. To do it, you need to prepare:
- details from ice cream;
- wood skewers;
- 4 mm thick cardboard (plywood is suitable instead);
- glue gun;
- hinges for furniture;
- white paint;
- stationery knife;
- ruler and scissors;
- pencil;
- compass;
- wallpaper;
- a napkin;
decorative components.

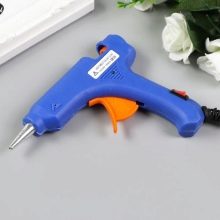

Let's get acquainted with all the features of this master class.
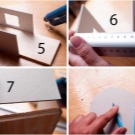
- A rectangular piece is cut out of a cardboard or plywood sheet. Its dimensions should be 24x9.3 cm. This will be the basis.
- A couple of rectangular parts with dimensions of 15x8.5 cm are cut out of the cardboard. The height values of these elements must correspond to the length of the sticks.
- Cut out a small window in the center of one of the rectangular elements.
- The rectangular piece is glued to the base, forming the walls of the house. Then measure the width parameter between them.
- A rectangular piece is cut out equal to the width that occurs between the walls. The height should be 8.5 cm.
- The top of the rectangular element is rounded off. The same is done with the second workpiece.
- The first prepared part is glued in the area between the walls.
- A hole is made for the door in another workpiece, after which it is glued into place.
- Make a frame for the window by sticking the skewers crosswise.
- The workpiece is completely pasted over with ice cream sticks.
- A rectangular piece with dimensions like a window is cut out of cardboard.
- It is cut in half, the upper corners are rounded so that the shutters come out.
- These parts are also pasted over with sticks. The furniture loops are fixed, and then they are fastened directly to the window.
- A window sill is formed from the sticks, and then it is glued.
- The door is covered with sticks, a furniture hinge is installed and the canvas is fixed.
- 4 wheels are cut out of plywood. Each two is glued on different sides using 2 skewers. These components need to be attached to the base of the house.
- They make a ladder from sticks, and then attach it securely.
- The interior of the house is pasted over with wallpaper.
- Lace will act as curtains. Cardboard and a napkin made of sticks are glued to the place of the roof.
- The finished structure should be painted white, and then wait until it dries completely.
The mobile home can be decorated in any way.




New Year ideas
There are many options for modeling aesthetic wood crafts in a New Year's way. Let's look at some interesting ideas.
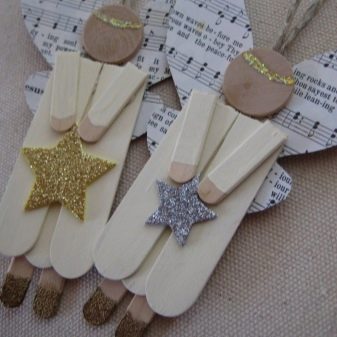
- From sticks you can make angels holding golden shiny stars in their handles. You can attach loops to them and hang them on the Christmas tree.

- Five-pointed stars glued from several ice cream sticks will look bright. They can be painted red, green, gold or silver, sprinkled with sparkles, and decorated with small twigs and balls. These crafts will also make chic decorations for the Christmas tree.


- Sticks will make very cute snowmen with funny drawn faces, an orange paper nose, little hats and scarves.


- Christmas trees made of multi-colored sticks look original. The tops of such trees are made of similar materials, but short and gradually lengthening downward.


There are so many cool New Year's ideas that can be realized using ice cream sticks. Such crafts are easily made at home.
Autumn crafts
From ice cream sticks it will turn out to make plenty of products, aged in the autumn theme. Such things are often made for kindergarten or just home decoration. There are incredibly many options for such crafts.


Consider an interesting master class.
- First, you should collect natural materials: cones, fallen leaves. You can use natural or artificial berries, apples, and so on.
- Take a small plastic container. Using a glue gun, it is pasted over the entire circumference with vertically standing wooden sticks.
- After that, a twine is taken and tied around the resulting blank. You can make a nice bow with beads out of it.
- After that, you can take the lid from the container pasted over with chopsticks. Drawn or natural yellow leaves, cones and other gifts of autumn are glued on top of it.
The finished piece is placed on top of the container, which has been converted into an adorable basket for autumn gifts.
For more information on how to make autumn crafts from ice cream sticks, see the next video.
What else can you do?
With ice cream sticks it is possible to make many cool crafts of various types. They can be both extremely simple and very complex. Let's take a closer look at several master classes on creating attractive and healthy products from sticks left over from a cool dessert.


Airplane
To make an airplane, you will need:
- 2.5 ice cream sticks;
- pin;
- scissors;
- glue;
- acrylic paints;
- brush.


Let's get acquainted with the instructions for the manufacture of the aircraft.
- All components need to be painted. Colors can be any. The child himself will choose what his craft will be.
- The base of the airplane will be a clothespin, and its tail is a shortened stick. It is advisable to paint these parts in one color.
- The two remaining sticks do not need to be trimmed. They should be painted in a different color.
- After that, a short stick is glued to the "tail" part of the base-clothespin, and 2 wings are glued from above and below this part, not far from the middle.


Trough
To make a feeder, you will need 40 ice cream sticks, glue, one large stick made of wood, and a string.
Let's analyze this master class into stages.
- A pair of sticks should be placed horizontally in opposite directions from each other. In a vertical orientation, another 12 sticks are glued to them. This will form the bottom of the trough.
- Next, collect its walls. For these purposes, attach 1 stick on each side, placing them in opposite directions. Some should be lateral at the bottom, and the other at the top. According to this scheme, 6 parts will be located on each side.
- A large stick will need to be glued to the central part of the trough.
- The string is attached so that later the craft can be hung.
You can put grain in the feeder.


Hot stand
Today, stores sell a lot of different coasters for hot dishes. These products have a variety of structures and designs. However, such a little thing does not have to be bought ready-made. You can make it yourself from simple cold dessert sticks.
To assemble the hot stand you will need:
- 50 sticks;
- larger and smaller wood beads;
- elastic;
- drill.

Let's take a look at the master class.
- Use a thin drill to make 3 holes in each of the sticks in one line.
- Prepare a long piece of rubber. Make a knot at the end.
- You will need to string the stick onto the rubber piece through the hole on top. Next, fix the large bead. It is necessary to further weave the product, fixing the sticks and beads in turn. When a semicircle is made, you can tie a knot and leave a ponytail so that you can tie it later.
- Take a piece of elastic and tie a knot at its tip.
- Pass the elastic through the middle hole in the stick, thread a small bead. Continue to weave in a similar pattern. When the semicircle is complete, make a knot, leave the tail of the elastic so that you can tie it later.
- Take another piece of elastic with a knot at the end.
- Pass this piece only through the bottom holes in the sticks, then make a knot, leaving the tip free.
- Make another circle in the same pattern. Then 2 blanks will need to be connected to each other.


Flower
The flower is made extremely simple. You will need 2 halves of the toilet paper roll, a few sticks, and a glue gun.
- Wooden bases must be painted in different colors. Glue is applied to the center of each of them, the next stick is glued. Glue is also dripped onto its center and another piece of wood is laid. For a beautiful color, 4 layers of sticks are enough.
- A paper sleeve is taken, and 2 circles are cut out of thick cardboard. Glue is applied along the edges of the sleeve, after which cardboard mugs are attached to the oiled areas. They must close all open areas.
- A hole is made in the upper part of such an impromptu pot. The side bases are pasted over with multi-colored paper.
- The flower is glued to the stem from a sushi stick. After that, the finished craft is inserted into the hole made in the top of the pot from the sleeve.
You can attach green cardboard leaves to the stalk.
For information on how to make a flower from ice cream sticks, see the next video.
Fence
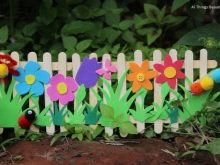
To make a beautiful fence, you need to fasten the sticks in the form of a grid. In addition, it is possible to take two regular long sticks and lay them horizontally. Slightly shortened sticks should be attached to them, but already in an upright position with rounded ends up. The finished fence should be painted, decorated in any way. Can also be varnished.


Star
First, it is recommended to draw a diagram of the future star. The craft should be collected based on this scheme. It can be absolutely anyone. The star can be made simple or more complex. Such a design can be painted in different colors, sprinkled with sparkles, pasted over with Christmas-tree decorations, supplemented with artificial snow or colorful accessories.


Web
Without much difficulty, it will be possible to make a web of sticks. For these purposes, wood parts are first glued together in the same way as in the case of a flower. They can be painted in any color. It is desirable that it contrasts with the color of a thin cord / rope, which will then be wrapped around the structure.
After that, the base of the sticks will only have to be braided with a not too thick rope.


Well
This craft is also easy to master.
- A glass or jar is taken as a basis. This element is pasted over with wooden elements.
- You can make an imitation of a log house. For this, the container is surrounded by crossing the sticks in a checkerboard pattern. There will be many corners. All unnecessary is cut off.
- The finished well can be decorated in any chosen way.


Military equipment
Various military equipment can also be made from the details under consideration. For example, it is possible to make the same airplane, but paint it accordingly, supplement it with images of stars on the wings. The design of this product can be made more complex. For example, not an ordinary clothespin, but a bunch of twigs, sushi sticks or other components can act as a basis.
There are many ways to make such a craft.


A bracelet
An unusual bracelet can be made from:
- ice cream basics;
- glass jar;
- paints;
- brushes;
- decorative components.


Let's look at the step-by-step instructions.
- Soak wooden parts in hot liquid. They should stay in this state for 7 hours.
- The stick should be placed in a small jar and left for 7 hours. This is necessary for the part to take on the desired shape.
- Take out the paint accessory.
- The product can be decorated in any way.


For more information on what else can be made from ice cream sticks, see the next video.


