Making a tree from plasticine flagella

Plasticine modeling is important for the mental development of a child, strengthening the psyche and nervous system. The kid learns perseverance, creative imagination, patience. Various techniques are used with this material - plasticinography, applique, sculptural modeling. In our article we will talk about the harness technique, and more specifically, about sculpting a tree using plasticine ropes.


Materials and tools
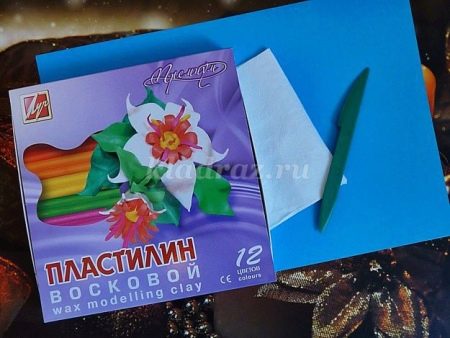
A tree is a simple object for creativity; children from three years old can be attracted to it. So that little fingers can cope with plasticine, it is better for babies to purchase wax sets. They are soft, colorful and leave no greasy residue. An older child can also be offered ordinary plasticine, but after holding it in warm water. Then the material becomes soft and pliable.
For work, we need a stack (a plastic knife for cutting plasticine) and sheets of stationery.
You should also prepare napkins for wiping your hands, an oilcloth or board on which we will sculpt wood.

How to make an autumn tree?
In autumn, the tree takes on bright colors. To lay it out of plasticine bundles on colored cardboard, you need to prepare a large number of elements in advance.
- To do this, take plasticine of red, orange and yellow colors., split it into small pieces and roll out thin flagella from them.

- You can do the work with an ordinary syringe without a needle. To do this, you need to cut off the tip of the plastic top to facilitate the release of the plasticine. Then remove the plunger and mix the softened plasticine into the syringe, insert the plunger again and, by extrusion, obtain thin flagella.

- Wrap each colored string carefully in a spiral. You will get a lot of details that look like snails, these are the leaves for our tree.


- Now from the "snails" in the center of the upper part of the cardboard, lay out the crown. Try to alternate shades beautifully.

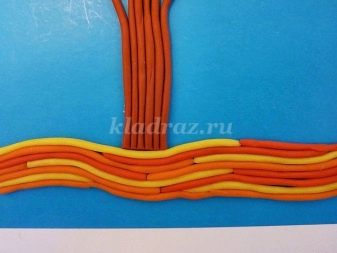
- Start making harnesses from brown plasticine... Then lay out the tree trunk from them with a little branching at the top. Make a straight cut with the stack to trim the barrel.


- Depict the fallen autumn foliage using plasticine ropes of yellow, orange and red colors... Place them under the tree, pressing them tightly together, without gaps. In the process, give the bundles a light wave.


- For the panel to have a finished look, prepare two edging braids, one orange, and the second of any contrasting color. Glue them around the perimeter of the cardboard for a thin border effect. The picture can be covered with colorless varnish and presented to a friend or to decorate your room.


Making a multi-colored applique
Let's try to sculpt another multi-colored tree. We will carry out the work in stages.
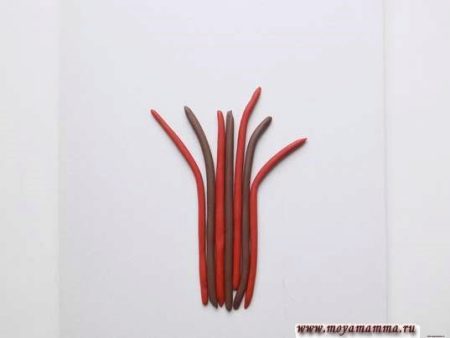
- Let's start with the trunk of the plant. To make it, take two shades of brown plasticine, the more contrasting, the better. Prepare tourniquets using a syringe or manually.

- In the center of the cardboard, in the lower half of the sheet, you can draw the outline of the trunk with a pencil. Then, alternating the color, lay out the bundles according to the drawing, pressing them tightly to each other.

- In the upper part, the flagella should diverge in different directions, imitating the branches of a tree.... A little higher, add more twigs with small pieces of plasticine.

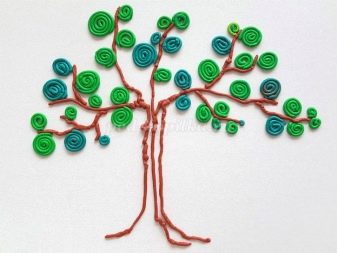
- Now start making leaves... For them, prepare a large number of flagella of three colors, roll each of them in a spiral.


- Lay the spirals on the branches and between them, filling the crown with leaves... Pay attention to the color scheme, shades should be mixed.


- We figured out the tree, now we start making grass. Make the harnesses again, this time from green plasticine.


- Cut each rope into small pieces. Bend the resulting parts in half in the form of a tick and lay them out at the foot of the tree.
The result is a colorful applique for an exhibition or decor.


How to make a green tree?
We will make the green tree using the plasticinography technique. This means that we will draw on a dense surface with plasticine. The image can be applied with your fingers, rubbing, rolling, pinching the material, but we will do this with a syringe.
We need an album sheet or cardboard, five pieces of plasticine of different colors, a medical syringe and hot water.

- We start with the trunk and branches of the tree. Take a brown block, cut it into pieces and place it in the syringe. Dip the filled syringe in hot water for five minutes.

- Then, using a syringe, carefully squeeze out the thin flagella, drawing with them a tree trunk and graceful twigs.


- Next, take two shades of green plasticine, first fill the syringe with one of them, squeeze out the tourniquets. Then do the same with a briquette of a different shade.

- Roll the resulting plasticine ropes in a spiral with a snail. Try to keep the leaves in different sizes. Arrange foliage over the branches of the plant.


- The tree is ready. Now let's fill in the empty space with details to get a beautiful picture. To do this, make a tight spiral from a yellow bundle and install it in the upper left corner. The sun appeared in the drawing. Supplement it with beams twisted in the form of paper clips.
Blind 12-15 pieces of green plasticine of the same type and "plant" them at the foot of a tree, imitating juicy grass.

- From the blue material, twist the oblong elements in a spiral and place them in the upper right corner of the landscape sheet - these are the clouds. The drawing is ready, it deserves to be shown to friends.

To learn how to make a tree from plasticine flagella, see the video.


