How can you make a house from plasticine?
Children are very fond of everything small - miniature toys, tiny babies and doll dishes are probably in every playroom... That is why kids are very interested in sculpting houses with their own hands. In our article, we will walk you through the steps on how to do this in different ways.


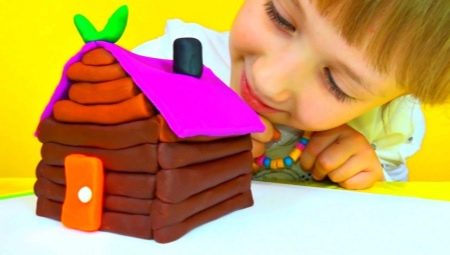
Classic house
For work, you need to prepare plasticine and a stack.
The work includes several steps.
- To create the base of the house take light-colored plasticineso that it is in contrast to the rest of the craft.
- Muddle a block of plasticine. Give it the shape of a rectangular parallelepiped.
- After that, you can proceed to the formation of the roof.... First, a pyramid-shaped roof is made from brown plasticine. Then they roll up a few mini-balls and flatten them - this will be a tile.
- Secure the shingles to the roof and draw the texture in a stack.
- Fasten both parts together.
- Roll a layer out of dark plasticine and divide it into thin strips.... Fix them at the junction of the roof with the walls and at the corners of the house.
- The same way shape windows.
- Build a door from a piece of plasticine, attach a pen to it and draw the texture with a toothpick. Draw a small arched visor above the door.
- To make the house more beautiful, decorate it with green grass from below.... Relief can be given to it using a regular pen.
If you want a winter-style house, the grass can be replaced with white snow.


Another option for creating a house involves building from bricks.
- Made of red or brown plasticine form a rectangular parallelepiped and cut it with a knife into equal pieces - these will be bricks.
- Green plasticine blind a quadrangle, it will become the basis for the house.
- Cover it with bricks... In this case, each subsequent layer is applied in such a way that it covers the junction of the lower bricks.
- When laying out the fourth or fifth layer, skip one brick - a window opening will be placed in this place.
- Form a square out of red plasticine and bend it in the center, so you get a roof blank... Blind two more triangles and secure them at the ends. The roof is ready.
- It remains only to blind a small rectangle and fix it near the window - this will be the door.

Other sculpting ideas
There are many other ideas for building beautiful voluminous houses. Let's get acquainted with the most interesting techniques for their construction.
With toothpicks
Such a house, rather, resembles a 3D constructor. The parent's task in this case is to develop fine motor skills and familiarize the child with geometric shapes. For work, you will need plasticine, as well as toothpicks.
It is not difficult to build it. First, invite your kid to stick a lot of plastic balls of different colors. After that, all that remains is to show him how, using wooden sticks and plasticine balls, to make different geometric shapes and combine them into one structure.

With a can
In order to make a house out of a jar and plasticine, you will need a container with a screw lid, plasticine of different shades, and baking tins.
The step-by-step procedure will help you in your work.
- Plasticine white roll out into a thin layer and carefully wrap the jar with it.
- With a square shape cut out the window. If there are no molds at hand, you can use a stack. Decorate the frame.
- Brown plasticine make a door. Do not forget to provide a box for it and a doorknob.
- From the cover form the roof, for this, it is covered with brown or red plasticine.
- The house is ready. All that remains is to decorate it to your liking, for example, with herbs and flowers.
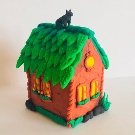
If you put an LED strip or a garland on batteries inside, then in the evening you can turn on the light in the house. Such a craft will look like a gnome's fairytale house and will become a stylish decor element in a children's room. You can use a bottle instead of a can.


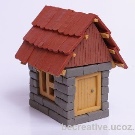
With cardboard
The easiest way to sculpt a small house involves using a box. First you need to prepare the basic materials - plasticine, a box, stacks and napkins for cleaning hands. The walls of the house should be logs, so you need brown plasticine. Tiles on the roof are depicted using a gray mass. Bars in bright colors such as blue or white are used to create doors and windows.
The work is not difficult, even beginners can cope with it.
- Knead a block of brown plasticine in your hands and shape some sausages the same length and width.
- The resulting sausages are attached to cardboard walls, creating imitation of logs.
- This way you need to cover the whole box. If the sausages are of different sizes, then the excess mass can be simply cut off.
- Cut a rectangle out of a piece of cardboard and fold it in the middle, to get a roof. Glue pieces of gray plasticine on it and draw the outlines of the tiles in a stack.
- Attach the roof to the walls... To close the corner span, you need to sculpt two triangles and fix on both sides.
- After that, all that remains is to stick the windows, shutters, pipe and other elements of the outer cladding of the house. If you wish, you can even cut out the door with a sharp knife to look inside.
Believe me, a child will be eager to play with his unusual toy.


With branches
Fans of a fairy tale about three pigs can be advised to build a Nuf-Nufa house with their own hands. This will require a certain set of materials.
- Cardboard... It is best to use a 15x15 cm sheet to create the base.
- Plasticine... Bright shades are suitable for decorating the foundation. Black, brown and gray tones are used to fix the branches, some green and red paints will be needed to create the entourage.
- Branches... It is best to take birch trees - you can find them at any time of the year. In addition, they break better than others in the right place.
- Dry leaves... They are used to decorate the roof, they should be like birch in size.
- Wire / rope. Used to fix the roof beams.
- A piece of wood. It will be needed to decorate the door. You can take a fragment of an old ruler, cork coasters or veneer, even ordinary matches will do.


- In order for the palisade to hold well, it needs fix as deeply as possible in the plasticine base. The thickness of the "foundation" should be at least 1.5-2 cm, otherwise the branches will not hold well on it, and you will not be able to adjust their height.
- First put corner posts - 4 pieces... Then the racks were in place of the door and window openings. They should be the thickest, about the size of a pencil. Above, you need to provide forks to fix the beams on them.
- Next, you should fill the walls with branches, they should be placed as tightly as possible. In a real house, the middle pig brother filled the cracks with moss, in a toy one you can glue dry leaves from the inside or caulk the walls with plasticine. This work needs to be done before you attach the roof.
- Next, the most difficult thing is the installation of rafter beams... They are tied together, and then, not sparing plasticine, they are attached to the corner posts.
- Leaves are attached to the roof using plasticine. This work must be done from the bottom up.


Helpful hints
And in conclusion, we will give some recommendations for working with plasticine.
- If the block is too hard, you can slightly heat it up in the microwave or near a battery... Alternatively, dip it in warm water for a few seconds.
- For young children, it is better to use a minimum of colors.... Thus, it will be possible to engage the baby directly with the sculpting process, without distracting him with the choice of shade. Older children need to be taught how to mix colors with each other and, thanks to this, get new colors.
- It's best to wipe off plasticine from your hands. denim.
- If the plasticine sticks to your clothes, you need to place the thing in the freezer for a few minutes or put ice cubes on the place of contamination. After that, the mass is easily scraped off with a plastic knife. Oily stains are treated with a stain remover or dishwashing detergent and washed as usual.


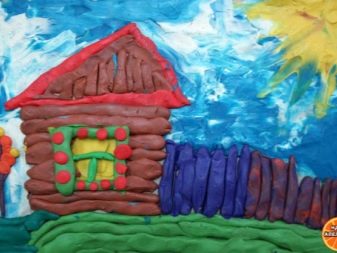
A house from plasticine can be created not only by sculpting, but also drawn - this technique is called "plasticine". It is very useful for a child - it develops fingers and prepares a hand for writing.
To create such paintings, you need a thick sheet of cardboard. The child puts small pieces of plasticine on it and smears it on the surface with his finger.
By the way, this activity helps relieve stress and get rid of negative emotions. Maybe it's time for you to try to make an unusual picture with your child?


For information on how to mold a house from plasticine, see the next video.


