How to mold a dragon from plasticine?

The exact knowledge of how to mold a dragon from plasticine can be very useful for enthusiasts of such a business. We'll have to carefully figure out how to sculpt a head, get acquainted with step-by-step sculpting schemes for children. A separate relevant topic is how to make a cute dragon with your own hands in stages.

How to make a fire breathing dragon?
A formidable, fire-spitting creature is the hero of myths and legends of various peoples. In fact, this is generally a general cultural archetype of humanity. That is why it is so important for children to learn how to sculpt it from plasticine with their own hands step by step. A similar undertaking is very useful for those adults who also join the art of modeling. The dragon figure is not too complicated, but it still contains a number of elements that will have to be worked out correctly.
At the same time, it allows you to show imagination and flexibly form compositions. Most dragons are colored gray or green. They need to make a large body and quite powerful wings corresponding to it, otherwise the figure will look ridiculous and it will be incomprehensible how it flies on them.

Details for the decoration of the figurine are selected at their discretion.
The usual sequence of steps is:
-
sculpting large and small balls;

- stretching a large ball to obtain the body, tail and neck (it is better to hurry up so as not to knead the mass twice);

- pressing the dorsal plasticine with the thumb and forefinger, followed by pulling the groove between the neck and tail. Applying a stack of notches to make it seem that the dragon's back is rough;

- preparation of wings from flat triangular cakes, creation of membranes from yellow plasticine;

- setting the wings on the back;

- creating a head from a small ball, shaping eyes and forward-looking eyebrows;

- sculpting dragon paws;


- adding legs to the torso;

- refinement of the eyes to give them a stern look, imitation of fire escaping from the mouth;

- covering the surface of the body of a mythical creature with a speck to enhance its roughness - after that, all that remains is to admire and enjoy your creation.

How to sculpt a sleeping dragon in stages?
The frightening, shocking image of the dragon in popular culture is increasingly being replaced by another - far from so formidable and even cute in appearance. The advantage of sculpting a good-natured version is not only that it is visually more pleasing, although this is completely obvious. There is one more important circumstance: you will have to sculpt less, and there will be much fewer small parts, fiddling with which takes a lot of time and effort. Therefore, it will be possible to rejoice at your creation faster. A small beautiful dragon can be shown not only asleep, but also simply thoughtful - such a change in image is achieved by the simplest aesthetic means.
The main nuances:
-
sculpting will be done in lateral projection;
-
the dragon itself resembles, rather, a wild cat;
-
it should be shown on a fallen tree.


The head of the sleeping animal will be oval in shape. It is necessary to determine in advance the size of the body, with how all straight and curving lines will pass. Then they are engaged in sculpting the head and neck. If some fantasy image is taken as a basis, then you need to add a mane and decorate it with curls.
The wings are shown folded and pressed against the body: this is a sign that the dragon is at rest and is not going to fly anywhere.

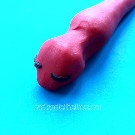


The animal rests on a tree trunk with its front paw. It is necessary to show that there is moss hanging from this trunk. You will also have to demonstrate all the other natural setting associated with such a composition. The modeling and designation of vegetation should be given special attention.
If it is decided that the dragon lives in the jungle, the hanging vines are shown.
Other options
Dragon from "Shrek"
This plot can be easily realized by children from 9 years old and older. The dragon will be purple. Its head is oblong. The nose on this head is also elongated. It is not necessary to create large eyes - with an average relative size, they are no less expressive; the main part of the eyes is yellow.
It is very important to take care of the expressiveness of the look. Let your eyes look a little obliquely. The following steps according to a simple instruction:
-
slightly raise the eyebrows of a flying creature;
-
draw the mouth more clearly;
-
arrange black pupils and the same eyelashes;
-
add red lips;
-
to blind a purple body (since purple plasticine is not common, they usually cover a ready-made body with it, on which you can even put a defective molded mass);
-
prepare an elongated body that is bent from bottom to top;
-
equip the dragon with an elongated tail;
-
put your head in the right place;
-
consistently and carefully smooth out all unevenness and deviations from the norm.


The ears are made in the same shape and color as the wings. However, they should be half, and sometimes three times less. The tail of a winged lizard should be embossed, as if inside there is a full-fledged ridge of bones. A collar is formed from a white plate, complemented by spikes; bone spikes are also placed on the cheeks. After that, you can limit yourself to attaching the ears and wings to their places, and even creating white marigolds.
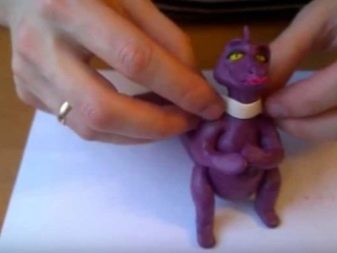

It must be understood that sculpting a dragon from Shrek involves the creation of a large number of small details.
Therefore, either adults or well-prepared and motivated children can do it properly. It is advisable to choose a material that wrinkles easily and has a long-term setting. To sculpt the figure more accurately and better, you must first watch the cartoon itself.Modeling is desirable in an easy, playful manner.
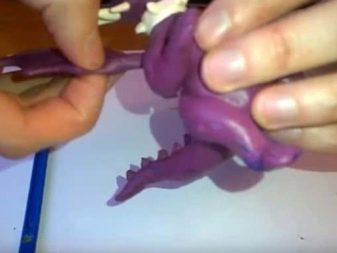

Toothless
It is about a character from the cartoon "How to Train Your Dragon". His image evokes tenderness even among the most strict people. The molding of the miniature figurine is flawless. It will be necessary to prepare for work thoroughly. Workshops will be of great help... The main role in modeling will be played by black plasticine - the simplest material intended for school work will also do.


Sometimes an airy plastic mass is used. Its long drying time allows you to keep the figure for a long time. For work, you will need more toothpicks and a stack. Plasticine, in any case, must be thoroughly kneaded. It will take a lot - at least 2 standard bars.
Stages of work:
-
dividing the bars into 4 fragments;
-
the formation of the largest fragment of the body of the future dragon (initially it is an elongated oval with a slight tapering upward);
-
smoothing uneven areas;
-
creating a dragon head (it needs a slightly smaller piece);
-
giving this head a triangular shape;
-
fastening the prepared parts using a toothpick (sometimes it is more convenient to split this toothpick in half);
-
an even smaller piece is used to prepare the legs.

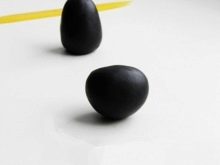

The hind limbs are similar in shape to a drop. The wide area should be slightly pressed down. The front legs are longer and thinner than the hind legs; the bottom of them is also pressed. Then comes the time to install the paws on the body. However, it is hardly possible to restrict oneself to basic stucco works.
Among the small details, the eye sockets are primarily performed. The eyes themselves are made yellow. The pupils will have a traditional black color. Both pairs of balls will have to be flattened. Then comes the time to install 4 ears.
They look like flattened drops. The tip of the ear must be sharpened. Be sure to create thorns in the middle of the skull - along the entire head. The same thorns are placed on the back of the dragon's body. Finally, they are placed on the sides of the skull.


Next steps:
-
with a stack or a toothpick, prepare the notches on the tips of the paws;
-
insert homemade white claws into these grooves (they are formed from plasticine and sharpened);
-
prepare the wings;
-
install them on the case;
-
use the rest of the plasticine to create an elongated tail, ending in a fin;
-
add white highlights to the eyes;
-
push the nose in the form of two points;
-
to outline the mouth on the muzzle (although this is already at the discretion of the people themselves).

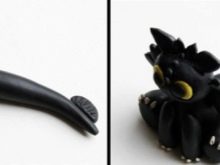

But Toothless can be fashioned in a different way - as even the students of the preparatory group of a kindergarten can do on their own. The main role in this version will be played by black plasticine. The detailed pieces are formed with the help of a stack. The material is distributed as follows:
-
1 large part is assigned to the body;
-
2 fragments are used when working with a tail and a head (identical heaps are needed);
-
create 2 pairs of paws in front and behind (eight-legged dragon);
-
reserve some plasticine for spikes and ears.


The body is made cylindrical, but the head initially resembles a ball. We must carefully monitor the proportionality of these parts. After connecting them, the parts are given the required shape. The head is slightly sharpened, visually bringing it closer to the state of a triangle. The front paws are pulled out, and claws are placed at their ends.

Then it will remain:
-
firmly fix the limbs on the body using toothpicks or matches;
-
prepare a tail that has an arrow-shaped tip;
-
smooth out the attachment point of the tail;
-
install thorns;
-
supplement the dragon with pointed ears;
-
shape the face with eyes and ears;
-
install wings with a relief pattern;
-
if necessary, pre-strengthen the wings with wire or cardboard.


Three-headed
As a basis, you can take the image of the usual Serpent Gorynych. His heads are made in one or in several colors - this is not fundamental. But be sure to stretch your heads and bend them. The spherical blank for the body must be turned into a "drop".Then they start getting paws; it is important that they are thicker, since stability depends on it.
The attachment of the limbs to the body should be stronger. With the heads and feet in place, it is time to form the ridge. It is created in the form of a series of balls placed on the back. Gorynych belongs to the group of dragons - which means that he definitely cannot do without wings. Then all that remains is to make his gaze meaningful, prepare the nostrils and mouth, and even establish the language.


Rainbow
This is a species of dragons whose head is covered not only with white horns, but also with complex-shaped protrusions that differ in various colors. Features of the composition:
-
paws brought together on the chest, ending in blunt sharp claws;
-
light gray ponytail;
-
massive lower legs and especially protruding thighs;
-
multi-colored split tail tip;
-
eyes are almost oval in shape, green, with dark pupils (in which order to sculpt all this, you have to decide for yourself).

Fiery
Sculpting such a figure will not cause any problems even for novice lovers of crafts. You can convey the style of a fiery dragon by painting it red. The key elements in the work will be cylinders, balls and arcs - they are prepared in advance. Further:
-
form the main frame of toothpicks;
-
sculpt the head;
-
create the belly of a flying creature;
-
collect the whole composition and rejoice at the achieved result.


To learn how to mold a dragon from plasticine, see the video.


