Dymkovo toy from plasticine

In the old days, Dymkovo toys were a popular decoration in almost every home. They were made of clay and painted with various bright colors. These products are still being created today. Today we will analyze how you can make them with your own hands, what is needed for this.

Peculiarities
Currently, Dymkovo toys are most often made not from clay, but from plasticine. They can be made in the form of a whistle, a baby rattle, or simply as decorative figurines for the home.
Craftsmen who have remained completely faithful to ancient traditions, as a rule, create various figurines of birds, animals, young ladies, and sometimes men. But you can also find more complex compositions, including people riding on horses, women holding a loaf in their hands.

When forming these toys, a simple pattern and a small amount of colors are used for painting. It should be remembered that in traditional production, the background is necessarily left white, but nowadays you can often see Dymkovo toys that are painted in different colors.
All the ornaments that are depicted on the surface of the figurine are smooth painting, which is combined with geometric small patterns.
Due to the simple manufacturing technology, this toy is often used for children's creativity. Modeling allows children to develop fine motor skills of hands, and painting helps to form an aesthetic taste.
Among single plasticine figurines, you can often see whole thematic compositions that demonstrate scenes of everyday life or plots of folk tales.

Tools and materials
Before you start making this statuette, you should prepare everything you need for this:
- plasticine for creating a base (white);
- plasticine for painting (blue, red, green, yellow, orange);
- stacks;
- plasticine board;
- primer;
- paints;
- protective varnish.

How to sculpt birds?
Often, based on Dymkovo toys, figures of various birds are made in kindergarten. Let's consider how to make some of these products in stages.
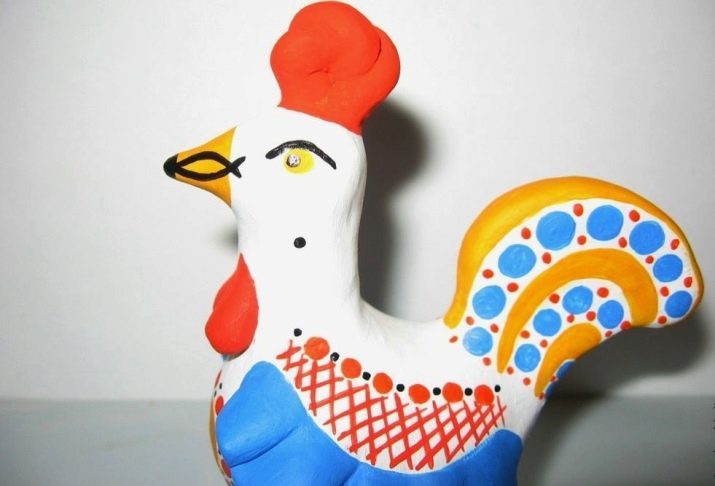
One of the most popular options is the cockerel.
- In order to make such a toy, you need to take white plasticine and knead it well in your hands. Then a workpiece in the form of a small cock is carefully formed from it. Sometimes special forms are used for this.
- After that, a red material is taken, wings are molded from it, the mass is divided into two balls of the same size and rolled out in such a way that as a result, blanks in the form of two curved ovals are obtained.
- Small folds are made along the upper edge of the resulting elements and attached in this form to the white base.
- It is also better to make a scallop from a red mixture, for this three elements are formed in the form of drops, they all connect to each other and join the white plasticine.
- At the final stage of manufacturing, a beak is created from a yellow base, black eyes, all this is also attached to the workpiece.


It will not be difficult to dazzle the duck too.
- For the manufacture of such a bird, it is better to take yellow plasticine. A small ball for the head and a volumetric oval for the body of the bird are formed from it. These parts should be carefully connected together.
- At the same time, it is necessary to take a brown mass for the manufacture of paws, several small pieces are pinched off from it, they are twisted into thin threads, all this is attached to the yellow base.
- A red material is also used to form the beak, and a small cone is made from it.
- Using white and black plasticine, they create eyes for the duck.
- When all the elements are combined into one toy, you can take a few bright colors and a thin brush, and then paint the body with simple patterns as desired.
- Such figures are often made without legs at all. In this case, a small stand of any shape is made separately from the same plasticine, and the finished product is fixed on it.


Another common craft is a turkey.
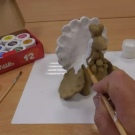
- In order to make this bird with your own hands, you first need to prepare white plasticine. The mass is thoroughly kneaded, and then all the constituent parts of the toy are formed from it: the body, two wings, a magnificent tail and head. Remember that the wings and tail should have a rounded pattern around the edges.
- Also, a comb and a beard are made separately from red material. It is better to create a beak from a yellow mass. All parts are connected to each other.
- After that, you can start painting. In this case, you should take blue, yellow, red paints, and the patterns should be simple. Most often, drawings are applied precisely to the wings and tail of a bird.
- At the end, the finished product can be coated with a transparent varnish, then it will have a shine.


How to make other crafts with your own hands?
Many other beautiful Dymkovo toys can be made from a plasticine base. Consider several step-by-step master classes and instructions.
Young lady
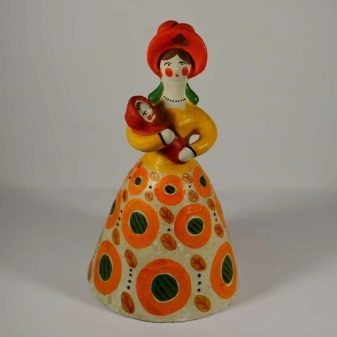
Its creation should start with making a fluffy skirt. To make it neat and beautiful, it is recommended to use a frame. The neck of a plastic bottle is often taken as it. It should be covered with a thin layer of plasticine mass. Moreover, on such a support it is also better to form the body and head of the lady.


On a plastic basis, it is worth sculpting hands, a hat and hair. When everything is done, you can start painting the statuette. More often they take 2-3 bright colors. With the help of paints, various patterns are applied to a fluffy skirt. Often they make some kind of separate small figure, which is placed in the hands of a young lady. It is better to cover the finished toy with soil immediately.


If you are planning to make a hat, you first need to sculpt a crescent moon. It is slightly bent so that the part turns out to be slightly wavy. The made kokoshnik is pressed to the head of the young lady. All joints are carefully ironed with your fingers. At the end, a volume is formed at the product.


Craftsmen also make statuettes that depict peasant women with children in their arms or with buckets on a yoke. On the head of a lady, as a rule, there is a kokoshnik, which can also be painted with paints.
It is important to note that when decorating such a figurine, a strict sequence of painting is applied: hair, eyebrows and eyes, cheeks and mouth, headdress, drawing on clothes.

Horse
Now we will consider a step-by-step scheme according to which you can easily make a horse with your own hands. In this case, a white mass is taken, it is divided into several separate pieces, from which the body, head, limbs, ears, tail and mane are formed. At the same time, the body is molded from the largest piece, and an oval-shaped blank is made from it.
It is better to make the legs of the horse in the form of cones, which will expand upward. At the same time, the ends are slightly bent. The neck and head should be sculpted from a bent plasticine strip. After that, conical ears are created, a mane, which will consist of two flagella intertwined with each other. They are combined into one closed ring and attached to the white body.


After the figurine is made, it is better to cover it with white gouache, which is bred in half with PVA glue. The product should dry completely, only after that you can start painting, for this it is easiest to use acrylic compositions.
The elements of the pictures should be simple: circles, rhombuses, rings and dots. You should use golden, yellow, orange, red colors. It is recommended to additionally cover the finished Dymkovo toy with transparent varnish.


Goat
To make a homemade goat, you should take white soft plasticine. It can be divided into several separate parts, from which the torso, head, horns and limbs are further created. Sometimes the figurine is formed from one single piece at once.


Horns are often made from a yellow mass. To do this, pinch off two small pieces, which are carefully twisted into two flagella. Then each of them is slightly folded at one end. Both elements must be the same size.

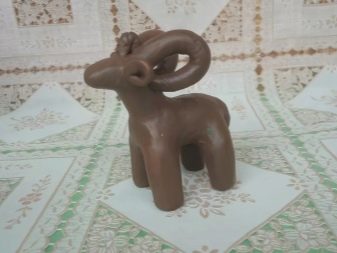
At the same time, you need to take black plasticine, from which eyes, ears and hooves are separately molded. All the details are combined into one craft, after which they begin to paint with acrylic paints. Typically, patterns are applied to the limbs and torso.


Dog
To make this figurine, you can take any plasticine. It is crushed into one homogeneous soft mixture. After that, a thick oval-shaped blank is made from it, it will be used to create the torso and limbs.
Then you should make cuts with a stack on the workpiece from both ends at once. The central part of the plasticine product is slightly bent, this will be the body, the ends are rounded. Later, take three more small pieces.


Two thin sausages are rolled out on the board (one of them should be larger), and one ball is also rolled. This will be the head of the animal. The ball is attached to the body of the dog. At the same time, all joints are carefully smoothed out so that the toy looks beautiful and neat.
Then we attach the tail to the base, having previously rolled it into a small sausage. At the end, ears are attached to the craft. To do this, knead a thin piece of plasticine from two edges with your fingers.

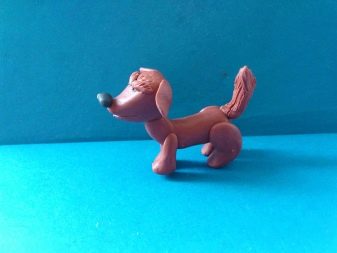
When the figurine is ready, it should be covered with white gouache. In order for it to lay down smoother, the composition should be mixed with PVA glue. It is recommended to start the primer from the bottom of the product.
When the craft is completely dry, you can start decorating. For this, different acrylic coloring compositions are used.


Helpful hints
In the process of sculpting Dymkovo toys, it is worth remembering some important tips.
- If you are only going to learn the technique of making these figures, then when creating a figurine, you must have before your eyes the very photo of such a ready-made Dymkovo toy.

- Particular attention should be paid to painting the finished toy. Remember that by combining circles and stripes, you can easily achieve a variety of interesting patterns. In this case, the main colors are blue, green, orange, red, yellow. If desired, individual elements can be made in pink or even gold.


- Do not forget that it is customary to use special symbols in the traditional Dymkovo toy. So, one strip will reflect a road or a river. Black dots symbolize traces left by a person. The color green is associated with life, land and nature. Red symbolizes beauty, good health and strength. Blue reflects the color of the sky.


- It is recommended that finished toys be primed and coated with additional protective compounds. This will not only significantly extend their service life, but will also make all colors much richer and brighter. But remember that if you use lacquer substances, the toy will become glossy, and traditional Dymkovo products should have a matte finish. It is permissible to start painting only after the surface of the toy is completely dry after applying a primer.


- Sometimes when decorating, plasticine mass is also used instead of paints. This option is considered more labor intensive and time consuming. In this case, the mixture must be applied as thin as possible.


Next, see a master class on modeling Dymkovo toys from plasticine.


