How to mold food from plasticine?

Plasticine sculpting is an exciting experience. This is a great way to spend time with children in a fun and useful way. Form creation develops fine motor skills and imagination, takes the child for several hours. Besides With the help of plasticine figures, you can diversify other games: for example, mold dishes for a dollhouse or send toys for a picnic with miniature food in bright colors.


Tools and materials
Today there are several varieties of plasticine. In addition to colors, different types differ in texture, filler, smell.
- Ball plasticine. Elastic mass of small balls. When elements are mixed, the colors do not change, and the balls do not deform. From such material, bright and unusual crafts are obtained, and the circles themselves, having carefully separated, can be used in conjunction with other types of plasticine for decorating crafts.
- Eraser. Special plasticine, which, when cooked, turns into a kind of eraser. The advantage will be high strength: mold the desired shape, throw it into a saucepan and play with the figure without fear that it will disintegrate.
- Vegetable plasticine, or "hand dough". It is a very malleable and environmentally friendly product. It is absolutely harmless, even if the baby takes a piece in his mouth. Even the smallest children can make a figurine from such a soft plasticine.
- Air plasticine. A mass of special lightweight polymer. Toys made of airy plasticine are very pleasant, velvety to the touch. The downside is that such material quickly freezes in air. But it is easy to soften it again by briefly dipping it into hot water.
- Paraffin plasticine. Everyone is familiar with the usual set of plasticine. Sturdy and budget-friendly, but the density can make it difficult for babies to knead in their hands.
Crafts from ordinary plasticine do not float for a long time, they keep their shape well.


To work with clay, you may need some tools. Sometimes they are sold in a set with the colored bars themselves. In any case, for these purposes, you can always adapt the things that everyone has in everyday life.
- Board. It is necessary in order to maintain the cleanliness of the surface where you will play with plasticine. This is especially true if you are going to do modeling on a soft carpet. It can be easily replaced with a piece of thick oilcloth, linoleum. You can also use an inexpensive plastic board. For additional fixation, it is convenient to secure the edges with masking tape. It leaves no residue and comes off easily when required.
- Rolling pin for rolling out. It is best to use plastic, because wooden can be painted and absorb small particles of plasticine into the texture. Instead of a rolling pin, you can take, for example, a small cylindrical cosmetic bottle or bottle. It is also convenient to fill the container with cold or warm water to speed up the process. With the help of such a roller, you can make an imprint of lace or a coin on a plasticine surface, roll the bar into a cake and cut different shapes from it.
- Slicing knife. It should be small and not very sharp. It is convenient for them to separate small pieces from a whole piece. Plasticine is quite malleable, and an old plastic card or a dull clerical knife is suitable for these purposes.
- Stacks. Special sticks, the edges of which have different shapes. They are pointed, pointed, rounded. With their help, the surface of the finished figurine is smoothed, pieces are separated, notches and decorative dots of various shapes are applied. It is convenient to grab a small element with a stack and attach it to the toy. You can replace the stacks with an old manicure set, ice cream sticks, coins and buttons, cut plastic of various shapes.
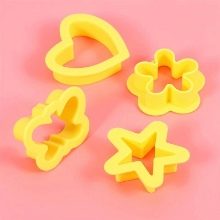
- Molds. You can work with plasticine in the same way as cookies or dough for pies and dumplings are formed. Roll the bar into a pancake and cut the different elements using the shapes. Over time, you will accumulate a whole box with useful things for needlework: these will be bottle caps of different sizes, buttons, Lego pieces, molds - everything that your imagination is enough for.
- Syringe. With the help of a large syringe, you can make even, identical plasticine flagella, for example, blind hair or noodles.
- Ruler and scissors. The easiest way is to give a geometric shape to the mass by simply measuring and cutting it evenly. Some tools for working with paper and cardboard will also come in handy in plasticine modeling.
- A container with water. To make it easier to form small elements, it is better to cool the clay. The warmth of the hands will melt it, and the material will begin to melt in the hands, making it difficult to sculpt. Dip your fingers in cool water and stick on as many small figures as needed.
- Cleaning rags. It is better to prepare this important touch in advance, so that later you do not stain cabinets and furniture in search of a rag for cleaning.
Have an unnecessary cloth on hand to wipe your work area and hands.


How to make pizza?
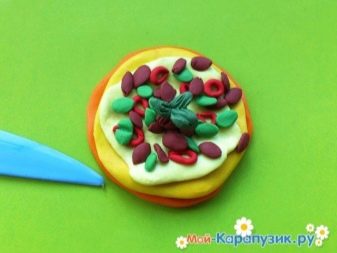
Many children love pizza, and, of course, will want to mold it for their favorite dolls as well. The process of creating a treat is not much different from cooking - with the only exception that all the products will need to be molded on their own. Bright and colorful plasticine food will help diversify the games in the dollhouse, and the process itself is a fun way to spend time with children.
First, choose the filling. As a rule, we need tomatoes, cheese, ham or sausage. Ask your child which pizza he likes best and repeat it in play. Photographic accuracy is not particularly important here.The main thing is to agree that these small yellow circles are pineapples, and the white dots are mushrooms. For the test, brown or beige plasticine is usually used. Form a ball and roll it into a flat cake.


Add ingredients as desired. The pink circles are the sausage and the red ones are the tomatoes. In large crafts, you can use a stack to draw a pattern on the clay, add seeds or texture to your products. To simulate grated cheese, use a syringe or simply roll out thin yellow sausages and cut them over the top of your pizza.
If you have a garlic press on hand, simply squeeze out as many cheese fibers as you need. To simulate the cooking process as much as possible, place the dish in a toy pan and send it to bake in the oven. Now you can cut the treat into triangles and place the toys at the table.

How to mold a loaf?
It won't take much time to mold the loaf. Roll the sausage from yellow or white plasticine in stages. Roll out the darker brown or orange plasticine thinly and apply on top - this will be our golden brown crust. Now you need to make notches, like on a real baguette, using a stack or a nail file. When sliced, this bread will look very realistic.
Add thin slices of yellow cheese, sausage or jam to the game - and you can make real sandwiches out of your "homemade bread"!


How to make grilled meat?
As a rule, children would like to repeat their favorite dishes while sculpting. For many, a shish kebab trip will be a vivid memory of the holiday. Of course, for a doll barbecue, we need toy meat on the grill. You can start by preparing your inventory. Foil makes an excellent grill, in which you can put real firewood - chopped toothpicks. Toothpicks are also useful for imitating skewers.
Now let's prepare our meat. Light circles will represent chicken, and darker red or brown circles will represent pork. To prevent small items from spreading in your fingers, immerse your hands in cool water. You can put the "food" in pots from matchboxes or a doll's set and go outdoors - or start frying right away. Put our slices on toothpicks and put them on fire. While the meat is cooking, you can add realism by sticking on fresh vegetables or tortillas.


Hamburger modeling
A very interesting multi-layered dish to create with your child at home.
- We make round buns from beige plasticine. Do not forget about authenticity: the lower half should be flat, and the upper half should be rounded. You can mold a ball and cut it neatly by flattening one side.
- Now put a thin green cake inside - a lettuce leaf. You can use a toothpick to plant a floral pattern on it.
- A pair of red circles will become tomato slices.
- Shape the cutlet out of dark brown plasticine and add texture to the meat with a stick.
- The yellow rectangle will represent cheese. You can also cut small holes on it, like in the present. For this, it is convenient to use a refill from a ballpoint pen.
- We cover our burger with a top bun, and with a toothpick we pick up a little white plasticine, imprinting on top - sprinkle the dish with sesame seeds.


What sweets can you sculpt?
Babies are a terrible sweet tooth. Of course, they will want to pamper their dolls with confectionery. Together, choose the child's favorite treat and mold the same from plasticine for games.
Cake
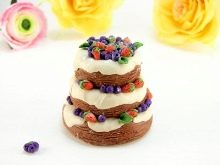
Arrange a birthday present for Barbie and make a beautiful cake. We choose the color of the base as desired: we sculpt the chocolate cakes from brown plasticine, we will make the cream white or pink, the berries - purple or red. We form three or four balls of different sizes from the main color of the mass. Slightly flatten them and collect several layers of the cake. Now let's make the cream decorations.Roll out the plasticine into thin straws or squeeze it out of the syringe.
Weave the filaments together and wrap the cakes joints for beauty. You can decorate the product with miniature roses. To do this, we will form thin strips of the desired color and roll them into spirals. Place roses on top or sides of the cake tiers.
Additionally, you can add bright berries from small circles. "Cherry" will be a candle made from a toothpick or a white plasticine flagellum with a yellow dot at the end.


Cake
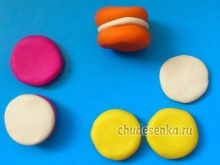
These sweets are so diverse that the main thing in such a craft is a beautiful decoration. Macaroons are molded from two cakes of colored plasticine with a white filling in the center. To create an eclair, shape a beige sausage, carefully cut in the middle and fill with colored filling.
Layered cakes look interesting. Roll out several cakes of different colors, cut a triangular shape out of them and collect doll sweets step by step. Top can be decorated with the same roses or berries, or can be glazed with small beads.


Ice cream
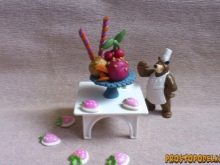
A very simple option for beginners. Use dollware or mold a gray plasticine vase. Fill it with several different colored ice cream scoops. Get creative and sprinkle the treat with confectionery sprinkles, coconut flakes, pour melted colored wax as a syrup. You can add self-made fruits - orange tortillas with a yellow one, fastened together, will become oranges. Fresh strawberries can be depicted from red "droplets".


Chocolate
To make toy chocolate with your own hands, roll brown plasticine into a cake and cut a rectangle out of it with a knife or using a mold. By the way, you can make your own molds from thin aluminum cans.
The thickness of the base should allow you to squeeze out a pattern of square cells with a toothpick or stack, as on a real tile. For reliability, you can mix pieces of cardboard or sand into the mass - these will be nuts inside. Foil or paper can be folded into a chocolate box to complete the composition.


Pie
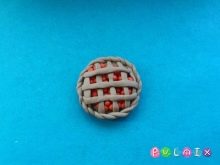
Another beautiful and simple craft. Form a brown or beige "dough" base. Add a circle of brightly colored filling on top. Apple will be green, berry will be red, lemon will be yellow, and so on. To simulate real food cooking, you can fill the base with individual plasticine fruit pieces. It is easy to add texture to the filling using wooden sticks or sticks from the handle.
Now you need to close the pie. Roll up many small flagella in the color of the base, and place the net over the filling. Now we will make a side from the sausage thicker, slightly flatten it, and wrap the finished baking. Let's send the sweetness to bake in a toy oven.


Donut
The donut assembly scheme is very similar to the cake creation. Use realistic dough-like colors. You can mix brown with white or yellow to achieve your desired hue. Donuts are usually baked in a ring. Roll up a dense base sausage. We need to place the frosting on top. Choose a color for it and sculpt a thin strip, place it on top of the blank. Now we form a ring, smoothing the joints with a stack.
To make the process easier, you can trim the tapered edges that form during rolling. With the tools, you can add drips to the glaze as if pouring sweetness over the top.
Now there are the final touches. It can be finely cut colored plasticine as a sprinkling or a thin dark-colored sausage laid in a zigzag - chocolate topping.


Candies
Candy comes in many different shapes. The simplest is an oval made from "chocolate" or "caramel". You can complicate the task and wrap a bright filling inside.If desired, sweets are packed in foil or real candy wrappers - or you can immediately mold plasticine sweets already in a wrapper. To do this, add triangular parts along the edges to the cylinders - the corners of the wrapper.
Also, if you have an old box of real candy, you can refill it. Form into round, pyramid or trapezoidal candies, with or without filling. You can add a “velor” texture to them with a stack or apply decorative notches. Place a ball of hazelnut or coconut white dots on top.


Cupcakes
Everyone loves beautiful cupcakes. They consist of two parts: a base cake and a cream cap. For the base, take sand-colored plasticine and form balls from it. Use your fingers to shape a cylinder slightly expanding upward. The sides can be stripped like paper baking tins.
To depict a cream similarly, we use a spiral made of a thin plasticine bundle. We put it in a pyramid, and put a cherry or other berry on top. You can diversify the toy by making two stripes of different colors instead of a simple plait in the manner of a pigtail. Sprinkle glitter, beads, or finely chopped clay on top of your cupcakes - the treat is done!


Bananas
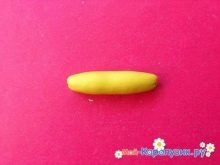
To simply make bananas, roll out the yellow plasticine into a wide strip. Put a white sausage on top and wrap our fruit with a peel. Cut off the excess, and bend the resulting banana with an arc. You can add a small stalk, like a real one. Several bananas can be bundled together.
Children may want to peel one of the fruits. If you first cut the yellow strip in wedges along, then it is easy to bend the plasticine skin to the middle, bending the free ends outward.


For information on how to mold different sweets from plasticine, see the next video.


