How to make a plasticine basket?

Beautiful plasticine crafts can decorate almost any interior. In addition, they are often used as children's toys and small gifts. There are a huge number of different options for such products. Today we will talk about how you can make a decorative plasticine basket.


Tools and materials
In order to make such a basket, you will need the following tools and materials:
- brown plasticine for the basket;
- red, white, orange and green plasticine for creating plants;
- toothpick;


Also, sometimes plain paper or cardboard is used. They are needed if you want to make a flat composition on the surface. Such products can be placed in frames.


Sculpting ideas
First, let's look at how to make a decorative flower basket for children in stages.
- One brown block of plasticine is kneaded in hands... You will need to pinch off a small piece from it and squeeze it so that you get a flat round workpiece. This element will serve as the bottom of the future basket. The rest of the mass is carefully pulled into one thin and long thread, it will imitate a vine.
- The resulting plasticine thread is bent in half. It is pressed with fingers along the entire length, twisted from the middle to the ends. The element is slightly pressed down so that the halves stick together in the form of a small pigtail. As a result, a part for the sides should be formed.
- The resulting pigtail is divided into 3 or 4 parts. From one create an oval handle for a basket. All other elements are closed in rings. The first of them is immediately attached to the bottom, each subsequent ring is attached to the previous one.
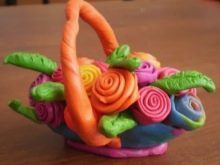
- Small blanks of petals are made from plasticine of other colors... They should be oval in shape. A small circle is formed from several parts obtained. A small ball of yellow plasticine is attached to the middle. Each of the petals is slightly pressed along with a toothpick.
- The entire surface of the basket is filled with made flowers. After that, a plasticine handle is attached to the finished craft, all the plants are slightly pushed to the sides so that the bouquet seems more beautiful and lush.


It is also worth considering how to make an autumn decorative basket with mushrooms in several stages.
- For starters, you can make the mushrooms yourself. To do this, take plasticine of a suitable color (orange, brown, beige, red will do), knead the mass thoroughly in your hands. Chanterelles can be made from orange material; for this, several small thin sticks and balls are formed. The first parts are lightly pressed with your fingers from both sides at once. The balls will also need to be flattened a little at the top and bottom, thus turning them into flat circles. The elements are fastened to each other. After that, plates are drawn from the bottom of each cap with a toothpick.
- You can also make artificial boletus. For this, it is better to take beige plasticine. The mass is kneaded and a small drop and a flat circle are formed from it. Small holes are made from the bottom of the future hat with a toothpick. After that, all parts are fastened together.
- You can do it yourself and boletus. Beige and red plasticine is taken. A thin and long leg is made from the mass, it can be slightly bent. Then a triangular hat is created. Both parts are connected to each other with a light press.
- After all the mushrooms are ready, you can start forming the basket itself. To do this, you should take brown plasticine. A small ball is rolled out of the mass, which will serve as the bottom. Also, several long and thin sticks for the sides are made from plasticine of the same color. A flat cake is made from a ball, and pigtails are made from sticks, which then need to be assembled into rings. One thread will be used as a handle for the basket. The rings are attached to each other, forming the sides of the product. A small handle is attached to the top.
- When the basket is completely ready, you can put the resulting mushrooms into it.... If necessary, they can be slightly pushed to the sides.


An interesting option would be a decorative basket filled with berries. Let's consider how to make this product.
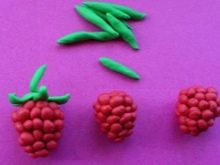
- Take red plasticine. From it, blanks for berries will be formed (strawberries, lingonberries, cherries, raspberries). Several balls of the same size are made from the mass. They should not be too large, 4 or 5 elements should be placed in one basket.
- You also need to take green plasticine.... It is used to make preparations in the form of sepals for berries. In this case, a small ball is sculpted from the mass, flattened a little, and then cut out triangular-shaped parts.
- Berry kernels are best made from black or brown material. Small particles are pinched off from it and rolled.
- At the same time, you can start making the basket itself. A bottom is formed from a brown or yellow mass in the form of a round and thin cake. Also, several threads of the same size are created from the same mass, rings are made of them, which are fastened together and connected to the resulting bottom. At the end, a small handle in the form of a plasticine braid is fixed. At the final stage, all the berries are carefully folded into the finished basket.


Sometimes in such decorative baskets, in addition to the berry harvest, they also put plasticine flowers made of white, pink, yellow or orange material. In this case, you need to ensure that they do not merge with other elements.


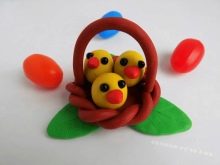
Such a product with Easter eggs will look interesting. They can be made from plasticine of various bright colors. In this case, small pieces are pinched off from the soft mass and oval-shaped parts are formed from them. You will need to make 4 or 5 elements.
In this case, a wicker basket can be made step by step according to the same scheme as in the previous versions. When it is completely ready, all the Easter colorful eggs are placed on its bottom.
Similar crafts can be made using the tape method. In this case, the products are more beautiful and original, but their production will take more time.


Helpful hints
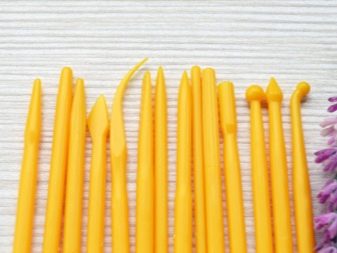
If you decide to make such crafts from plasticine mass with your own hands, then you should adhere to some important tips. So, remember that it is better to work with this material with special devices. It is most convenient to roll out the mass on a board, and you can easily cut it using a stack, which most often comes in the same set with plasticine.... In this case, all the details of the craft will turn out to be smooth and neat.
Also, do not forget that only fresh plasticine should be selected to create crafts. A low-quality mass will be too hard, it will not be possible to knead and soften it well, it will not be able to acquire the desired shape.


If you make a basket as a gift, then after making it, it is better to cover it with a special protective transparent varnish. Plasticine under such a coating will begin to gradually harden, and after that the composition will become much brighter. In addition, it is easier to remove dust from varnished surfaces.


When you plan to mold a flat picture from plasticine, it is better to take hard cardboard as a basis. On such material, various deformations will not occur during operation. Plain paper can easily wrinkle. Moreover, in this case, it is better to apply plasticine to the surface with the hand, and not with a stack, since the mixture warmed in the hands will lie more evenly.
To create various additional effects, you can use natural elements, beads, beads or plastic parts when creating crafts.


Next, see a master class on modeling plasticine baskets with vegetables.


