Modeling mushrooms from plasticine

Plasticine modeling is a traditional activity for children both at home and in kindergarten, as well as in labor lessons for elementary school students. Creative activities with this material develop fine motor skills, imagination, spatial thinking. Classic wax plasticine is not expensive, but you can invent and mold anything from it.
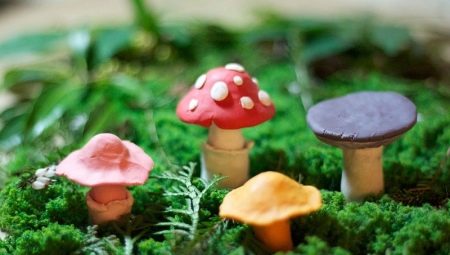
Making crafts in the form of mushrooms can be one of the creative topics that you can engage children with during several plasticine modeling lessons. Making such crafts is very simple. Both junior schoolchildren and preschool children will cope with this task. In addition to the basic skill, while sculpting, you can expand the horizons of the child by preparing a story about the variety of types of mushrooms. To invent and sculpt both individual types of edible or inedible mushrooms, and by making glades, you can mold many crafts in which mushrooms are collected in baskets.


How to mold a fly agaric?
Very often, when sculpting mushrooms for crafts, they choose such a species as fly agarics. These mushrooms turn out to be very bright, so every child, without exception, will like this craft. In order to make a beautiful inedible mushroom, it is necessary to prepare in advance plasticine of 3 colors: white, red and green. You will also need a plasticine spatula, a toothpick and a relief cap from a felt-tip pen.


For manufacturing, you need to follow the step-by-step instructions.
- Take a piece of green plasticine 4 cm long, knead it and turn it into a round cake 1.5 cm thick and 8-10 cm in diameter. This will be a stand for mushrooms.
- From white plasticine, it is necessary to make 2 legs with a diameter of 2 cm, and 6 and 8 cm long.
- It is necessary to insert a toothpick inside each leg so that they do not bend.
- Blind 2 red plasticine hats. The circumference of one is 8 cm, and the second is 5 cm. Attach the caps to the legs.
- Make a collar of white plasticine by rolling out a strip of white plasticine and rolling it with a felt-tip pen cap. Attach one part of such a corrugated strip to the bottom of the mushroom caps, and from the second part make a skirt and attach it to the leg.
- Place the products on the stand.
- Craft green plasticine grass. To do this, roll out a thin strip 3 cm wide, cut it with a spatula in a zigzag shape and divide.
- Turn around the stand with the resulting grass, laying the plates in 2 rows.
- Attach several white plasticine balls to the hats.
When making this craft, kids should pay attention to the fact that this mushroom belongs to poisonous plants.


How to make edible mushrooms?
While waiting to make edible mushrooms, you need to prepare colored cardboard, plasticine of different colors, a plastic knife and a spatula. It is better for children to offer to make well-known types of mushrooms, which are widespread and found in almost every forest.


Russula
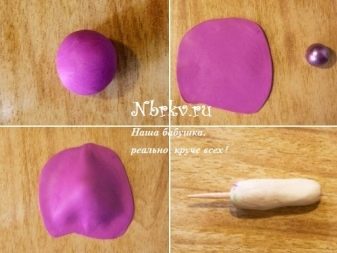
Russula is a little more difficult to mold than fly agaric. Such crafts are suitable for first graders. In order to mold russula, you will need plasticine: purple, white, green, toothpicks, a plasticine knife, a small bead, durable cardboard. You must adhere to this instruction.
- Roll out 3-4 thin round plates from purple plasticine.
- In the middle of each, put a bead in turn and press it so that a depression is obtained.
- Make a cardboard stand. To do this, cut out a circle the size of a small saucer. In the middle of the cardboard circle, put a lump of unnecessary plasticine so that an elevation is obtained. Then put a thin layer of green plasticine on top, which will cover the entire cardboard.
- Make grass. To do this, cut a thin rectangle in a zigzag fashion using a knife.
- Cover the clearing with one layer of such grass.
- Make 3 or 4 legs from white material with a length of 3 to 7 cm and a thickness of 1.5 cm. It is better if they are all of different lengths.
- The lower part of the cap should be made of the same color. To make it look more like a real one, you need to draw a relief cap from a felt-tip pen along a long thin rectangle made of plasticine, slightly pressing it to the surface. Then assemble on one side so that the corrugated plasticine resembles a skirt. And attach the center of the skirt to the indentation on the purple circle. Cut off the excess edges of the purple layer to the size of the white one. Do this for each fungus.
- Take toothpicks and pierce the mushroom legs with them along the entire length so that the toothpick protrudes 1.5 cm from the bottom, and does not show through at all from above.
- Stick the legs with protruding toothpicks into the plasticine base.
- Attach the hats on top.
The empty parts on the stand can be filled in by cutting out a few more clumps of grass from the sculpting green mass.


Chanterelles
To make chanterelles, you will need orange and green mass for modeling, toothpicks, a relief cap from a felt-tip pen, a plastic knife for plasticine. Next, you need to step by step perform the following steps.
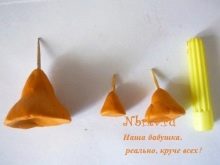
- Mold 3 cone-shaped blanks from orange plasticine.
- Pierce the blanks with toothpicks. At the narrow part of the cone, they should protrude 1 cm, while at the wide one they should not be visible.
- Extend the narrow part of the cone along the toothpick - this will be the leg.
- Draw a relief cap along the outer part of the wide side of the cone.
- Place the mushrooms on a cardboard and plasticine stand.
- Decorate with bunches of grass.


Honey mushrooms on a hemp
Such a do-it-yourself craft will be much more difficult to do than the previous ones.
Children should be offered to make honey mushrooms on a stump with their own hands, starting from grade 2.It will be difficult for younger children to cope with sculpting honey agaric, which will lead to a loss of interest in the whole process.
In order to make the craft more realistic, you should pay special attention to making hemp. To do this, you will need: brown plasticine of several shades, green mass for the stand. Next, we proceed to the execution of the craft.
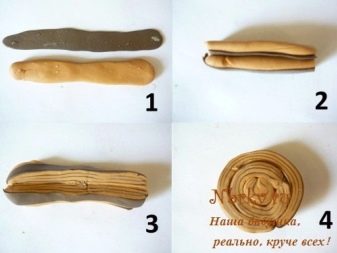
- Roll up plaits from dark and light shades of brown, cut them into 3 parts and roll them back into plaits. Then roll the sausage from the resulting mass, flatten it slightly and wrap it in a spiral. This will be the top of the hemp.
- Then, from a mass of any color, make a washer 2.5 cm thick, and stick it on top with a dark brown layer.
- Connect 2 parts by superimposing one on top of the other.
- Place the stump on a stand made according to the previous examples from green mass for modeling.
- Fashion 5-6 roots from the brown layer and attach them to the hemp.


When the stump is ready, you can start sculpting honey agarics. For the manufacture of mushrooms of this type, you will need brown plasticine of a light shade, a thin wire.
- Stick the pieces of wire 4 to 7 cm long with plasticine. These will be the legs.
- Attach a rim made of the same color to the legs.
- Make hats in the shape of small umbrellas.
- Stick honey mushrooms into the stump on one side, slightly bending the legs.
- On the other hand, the stump can be decorated with plasticine grass.
Making a craft in the form of honey mushrooms, you need to explain to the child that real autumn mushrooms differ from false ones precisely in that there is a kind of rim on their leg.


Boletus
Even a 3-year-old child will be able to do this kind of work. Since the legs and caps of boletus boletus are very thick, making them from plasticine will not be difficult. According to this scheme, you can also mold a boletus or boletus, using plasticine that matches the color. You will not need any other tools for this craft. The craft should be done in stages.
- Mold 2 legs from white plasticine.
- From brown 2 hats.
- Connect them together.
- Install on a cardboard and plasticine base.
- Add several layers of cut grass.
- If you wish, you can decorate such a craft with a sculpted bug or ladybug.


Create a basket composition
In order to mold a whole basket of mushrooms, you need the following.
- Prepare several small mushrooms.
- Make a basket. To do this, make flagella from brown plasticine.
- Make two circles of flagella, these will be the top and bottom of the basket.
- Then fasten them with plasticine flagella, placing them vertically.
- Finally, attach a handle to the basket and fill the basket with mushrooms.


How to create a mushroom meadow?
Making a mushroom clearing out of plasticine is also easy. To do this, you need a sheet of green velvet paper - this will be a glade. On such a clearing, you need to attach families of different mushrooms made according to the above schemes.
You can complement the composition by sculpting bushes, small trees, hemp. You can decorate with sculpted flowers and supplemented with plasticine animals.


For information on how to mold a mushroom from plasticine, see the next video.


