How to make a car out of plasticine?
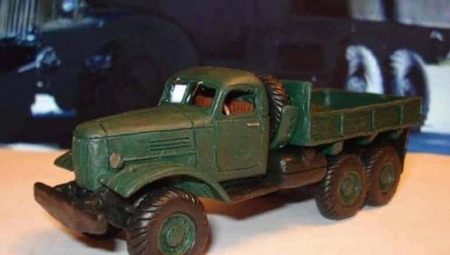
Almost all boys like cars. It is this toy that little guys dream of getting for a holiday. However, it is much more interesting to create a beautiful car yourself, and ordinary plasticine will help with this. For work, you will need several toothpicks, plasticine mass and the help of an adult.


Simple craft
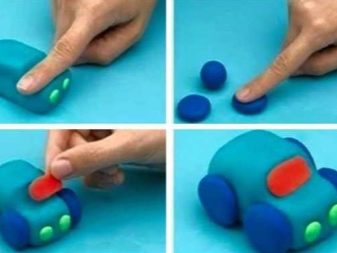
To create a beautiful plasticine mass machine, you need to complete several steps in stages.
- You need to take a plasticine block of the selected color. On one side, make a small hole that will become the future hood of the toy. It is also recommended to process the other end of the bar, on which the trunk will later be molded. As a result, the bar should take the contours of a passenger car.
- A semicircle should be marked on the body, which should later be more clearly delineated with a knife. A small amount of black material is rolled out inside.
- Wheels are formed from a black blank, which must be fixed in the grooves.
- Then, in the holes in the same way, you need to lay white plasticine. 4 rectangular windows should be made of light-colored material. Two rectangular holes should be larger than the rest - they will serve as the rear and windshield windows. The windows must be fixed around the perimeter of the workpiece.
- Now you need to build small mirrors that are attached to the sides of the toy.
Additionally, you can give your car a more modern look by carving stylish patterns on its surface. On the body or along the edges of the car, you can stick multi-colored parts.

How to make a truck?
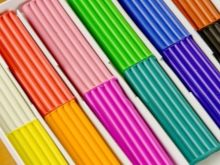
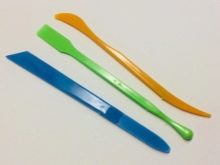
It is quite easy to make a children's car, but it is already more difficult to make a truck. For work, you will need matches or toothpicks, a multi-colored plasticine mass, as well as an oblong knife (a plastic tool is well suited).

Let's analyze a step-by-step algorithm of actions.
- You need to take a small amount of material and cut the sidewalls from the plasticine bar. Set these pieces aside - you will need them later.
- It is necessary to mold the body from plasticine of a different color, smoothing all the seams and irregularities.
- Tires should be formed from black material and attached to the product with wooden skewers.
- From two cubes, cut from a solid block, you need to form a cabin.
- For headlights, a yellow or white material is perfect.
- All finished parts are assembled into a truck.
The finished truck can be decorated with appliques that will look beautiful.
The child will definitely enjoy this pastime, because the baby will not only develop creatively, but will also be able to create his own work of art.


How to make a fire truck?
In childhood, many boys dreamed of trying on a fireman's uniform and driving a huge car. It will not be difficult to create such a car on your own. For work, you will need high-quality plasticine of all possible colors.
The instruction for creating a car consists of several stages.
- The body of a beautiful toy has two parts. The main color will be red, so you need to take the material of this particular color. Two rectangles are cut from a solid bar. One of the details should be slightly smaller than the first. A cabin needs to be made from a small part; for convenience, you can use a plastic knife.
- Then you need to shape the wheels. For work, you should take the yellow and black material. The plasticine is rolled out, and several circles need to be formed from it. The round parts are attached to the base of the machine; a thin black strip should be laid between the wheels and the body. Using a plastic knife, you need to cut out the holes in the tread; a notch is also formed in the yellow segment.
- Technical equipment is an important part of any fire engine. A nice ladder will turn out from black ribbons. The plasticine ladder must be glued to the body. Car windows can be formed from white material, yellow plasticine is perfect for headlights. There should be a blue flashing light on the roof of the toy. You can use a plasticine sausage for the hose.
- The bumper must be black. The traditional inscription "01" can be written in white letters.


Other options
There are other, no less interesting options for toy cars.



Racing
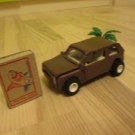
Boys just love racing, so there is no doubt that a child will be delighted with a sports car. It is not necessary to buy an expensive model, you can make it yourself.
To create a toy you will need:
- plastic knife;
- plasticine of different colors.
The sculpting algorithm is extremely simple:
- from a plasticine block, you need to roll out a small sausage, which will later become a body;
- wheels need to be made of black plasticine mass;
- dark blue material will be an excellent basis for a car spoiler;
- the spoiler is attached to the workpiece;
- you need to blind a small racer, make a small helmet for him;
- the driver must take his place while driving;
- at the end you need to stick the wheels to the machine.
The racing car figurine is ready to play. It will not be difficult to make such a car, and the child will be just happy.

Robocar Poli
To create such a toy, you need to stock up on plasticine of different colors: white, red, blue, yellow and white.
Consider the description of further work.
- You should take a small piece of plasticine of any color. It is best to give the material a rectangular shape. With your fingers, you need to press the corners, and make notches on both sides of the bar (for the hood and for the bumper).
- After that, using a match or a toothpick, it is necessary to outline the semicircles at the bottom of the part - this is the place for future wheels. With a knife, you will need to create a groove along the contour.
- You need to carefully roll out the black material from which you get beautiful tires. Small pieces are attached to the cut out outline on the sides of the toy.
- White plasticine is processed in the same way, and then rectangles must be formed from the material. The details will play the role of toy car windows. The windows are molded to the base of the car.
- Then, with the sharp edge of a toothpick, you need to outline the outline of the trunk. Headlights and tire caps need to be attached to the main part of the car


Police
The main colors of the police car are blue and white. Plasticine of any of these colors can be used as the main material.
The work should be carried out according to a certain algorithm.
- First, you need to properly knead the plasticine block so that two parts are obtained from it (one is larger, the second is smaller). Both elements are required to assemble the machine.
- The workpieces need to be shaped like smooth bars (the surface will need to be smoothed well with your fingers).
- We sculpt one piece of plasticine on top of another to create a body. The joints should be sealed with a thin layer of material.
- You need to prepare the wheels - small pieces of black or gray plasticine.
- We form the wheels, for this we need to create wide circles (tires) and cut discs on them.
- The discs need to be fixed to the case. Ordinary matches or toothpicks work well for this. The car will even be able to drive.
- Taking some blue plasticine, you need to form windows and stick them on the body. Don't forget about the headlights and the traditional white stripe.
- The final touch will be a bright flasher on the roof of the car.
So that the kid can immediately play with the car, you can give him a special board. Even if the clay is smeared, it will not stain anything, but will remain on the board.


Military
It is extremely easy to fashion a beautiful military vehicle. Even novice masters can cope with this. For this you will need:
- multi-colored plasticine mass;
- stack;
- matches.
Let's analyze the job description.
- You need to mix the colors until you get a shade that will be the main one for the toy. From most of the resulting material, you need to form a rectangular machine body.
- Then you need to create wide wheels, which will require a black or gray material. Four rings roll from the plasticine mass, small gray cakes are attached to them. The finished wheels are pierced with a match and attached to the body. The embossed parts should be cut with a plastic knife or a stack.
- On top of the body, you need to create a bump, which will become the driver's cabin.
- Rectangles should be sculpted from light plasticine - they will become windows and headlights. Armored windows can be made from gray material. All parts are attached to the base.
- A small rectangle in the main color will act as a machine gun. A flashlight can be attached to the roof of the car.
The armored vehicle is ready to play. The toy can become a wonderful exhibit in a child's personal collection or take its rightful place at a school exhibition.



Tractor
A tractor can be made from any material. You can take plasticine, which is the most.
In order for the machine to withstand all the numerous games, it must be created from a durable plasticine mass. You need to stock up on a plastic knife or a special stack.
The work consists of a number of stages.
- From a plasticine block, you need to form a cabin for a toy tractor. The piece is made in the shape of an angle.
- A cockpit is formed on the basis.
- Large wheels are made from a huge piece of black plasticine mass. Plasticine is divided into four parts, from which you need to mold cakes. Spikes and caps need to be cut out on round parts.
- The wheels are attached to the base. The structure can even move if you use matches or a pair of toothpicks as parts.
- Beautiful windows will be made from light material.
- The pipe can be made from a gray short ribbon.

With natural materials
A beautiful car for children 3-4 years old can also be made from natural materials. In the forest or in the park, you can collect a huge number of interesting parts for a future toy. For example, acorns, cones, chestnuts are good.
This is how such a machine is made.
- It is necessary to collect a lot of oak fruits, as well as a few dry twigs.
- Cut out an oval from a piece of cardboard, which will become the bottom of the machine. You will also need 4 small circles for the wheels.
- Acorns need to be glued to the cardboard blanks under the wheels. There should be four volumetric parts.
- On the car bottom, you need to stick the oak fruit in two rows (you can use a hot gun or superglue). The end result is a sturdy case. Instead of headlights, you can stick on several acorn caps.
- In the round wheels, you need to make small holes into which the sticks will be inserted in the future. They form an axial structure. In the center of the round parts, you can attach oak fruit caps. The machine is ready to play.


On cardboard or paper
On the basis of thick paper or cardboard, you can create an equally interesting toy. The main material for the machine will be blue plasticine.
The work should be carried out in stages.
- You need to crumple the plasticine in your hands and crush it until a homogeneous mass is achieved. A lump is formed from the material, as well as a plate.
- A little bit of blue mass should remain for the roof and anchorage points. If a soft material was chosen, then a thick cardboard should be placed under the main plate. Freezing the part is well suited - this way the machine will turn out to be strong and will not fall apart until the end of the work.
- From the lump, you need to mold a blank, which in the future will become a cabin. The openings for the wheels are cut with a stack or a knife.
- Create flat cakes from black circles. The rear tires should be slightly wider than the front tires. On the side, you need to create a hole on each wheel, for this you can use a stack.
- The two blue elements are attached to each other. You need to add wide tires to the rear. If matches or toothpicks are used, they can be placed in the center. In front, you need to attach a cab and several wheels.
- Then you need to mold 2 plates, which are glued to the sides of the workpiece.
- All parts are attached in front.
- A strip of white plasticine will make a great window.
- To create a roof, you need to bend the blue cake and attach it to the base. For beauty, you can add a few flashlights or stick tiny window wipers.
- At the very end, you can mold and attach to the mirror body and the smoke exhaust pipe.
A beautiful blue truck ready for active games. A bright van can be an addition to the toy. It is very simple to make it; you can use a small cardboard box as a base.




For information on how to mold a car from plasticine, see the next video.


