How to make a model of the Earth from plasticine?

Acquaintance with the basics of any science becomes much easier when it is played in a playful way. For example, to understand the structure of the Earth, it is worth using the visual aid, previously created with the child from plasticine.
Tools and materials
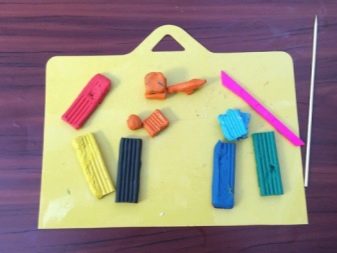
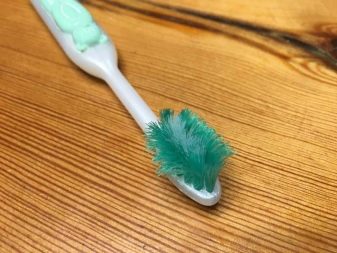
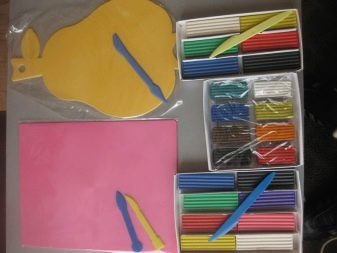
To work on a plasticine globe, a minimum amount of material is required and practically no special tools. The main costs are for plasticine - it is better to immediately prepare bars of blue and green, white and brown, black and yellow, red and orange shades. In order not to stain the table, the modeling itself is best done on a special board. You can cut the material either with a special stack or with a plastic knife, usually included with the main material. A skewer and a toothpick are useful for decorating small details, and an old toothbrush will allow you to create a relief on surfaces.


Naturally, if an additional frame is required for the structure, then the list of materials will expand.
Additionally, it is convenient to protect the surface with oilcloth or cling film. Before starting work, it is also worth preparing a damp cloth or a damp cloth. It should be mentioned that for the smallest creators, it is recommended to purchase a special safe modeling mass that will not harm, even if swallowed.


Simple option
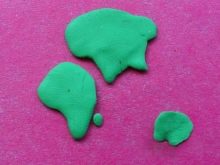
To make the simplest model of the Earth from plasticine with your own hands, you will need a plastic mass of three shades: blue, white and green. The process begins with a medium-sized ball rolling out of a blue material. A small piece of green plasticine is rolled into a cake, the thickness of which does not exceed 2 millimeters, after which continents, archipelagos and islands are carefully cut out of it using a geographic atlas. It is most convenient to do this with a plastic knife or a stack, first drawing surface lines, and then deepening them. White plasticine is processed in a similar way: first, a cake is rolled out, and then the contours of Greenland and Antarctica are cut out of it. Flat workpieces are fixed on a spherical base in the required places.




It will be even easier to build a model from plasticine if you use a regular grapefruit or a large orange as a base. In addition to citrus, for the craft you will have to prepare plasticine of different shades, a ballpoint pen and a stack. It will be easier to reproduce images if you look at a real globe. The fruit is thoroughly washed and dried. The contours of the continents and islands are drawn on it with a pen.
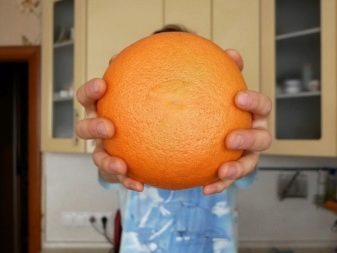

This can be done by eye, but it is much easier to first transfer the images from a real globe to tracing paper, and then cut out stencils and circle them on the base.
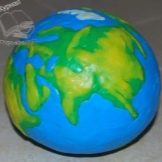
At the next stage, all that remains is to pinch off plasticine pieces of different colors and stick them to the orange. First, most of the surface is covered in bright blue to form oceans, and then land is green. Antarctica and Greenland are created using white plasticine. Applying a layer of yellow over the green will create deserts. Further, in accordance with the globe, it will be necessary to use the orange tint marking the highlands. For the most elevated points of the globe, you will need dark brown plasticine, and for the deepest, dark blue.



How else can you sculpt?
You can blind the globe in other ways, focusing on the age of the child and on the purpose of creating the project.

Planet with core
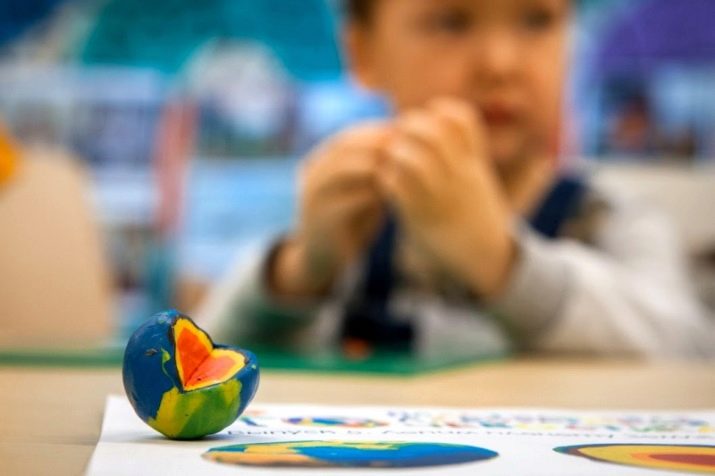
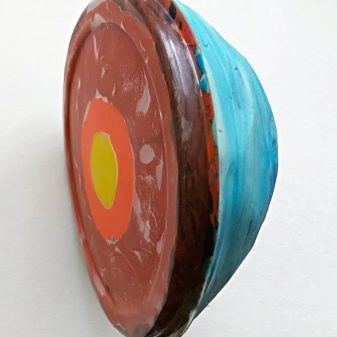
If novice geographers need to familiarize themselves with the internal structure of their home planet, then a fairly simple master class "Planet with a core" will do, which does not even require special accuracy. The sculpting begins by creating a small yellow ball that will symbolize the core of the Earth. Be sure to follow in stages, then you will need to take a piece of orange. By the way, if the set lacks the required shade, then you can get it by thoroughly mixing and then kneading the red and yellow material. The orange fragment is rolled out thinly and used to wrap the yellow ball to form the outer molten core of the planet.


At the next stage, it is necessary to do the same with a piece of red plasticine to create the Earth's mantle and black plasticine - for the thin earth's crust. After that, you can move on to creating the outer layers: the blue ocean and green continents. To indicate the relief, as well as highlight large cities and capitals, it makes sense to use beads, beads or even sawdust. If after some time the child wants to remember how the Earth looks from the inside, then the craft will need to be frozen in the refrigerator, and then cut in half. To study the rotation of the planet, a homemade model is placed on a long skewer.


A model with a core can be obtained in another way, if you use a transparent plastic cover., for example, intended for glass jars or sour cream. It is necessary to immediately clarify that such a craft requires a large amount of plasticine, so you can also use spoiled material. If you follow the instructions of the master class step by step, then you should start with the designation of the internal structure of the globe. On one side of the base, a yellow cake is glued in the center - the core, and a wide reddish mantle and a thin layer of the earth's crust from a black mass are formed around it.


It is better to press down the coating so that air bubbles are not visible on the back side.
On the other side of the lid, a volumetric bump is formed, denoting half of the Earth. First, it is more correct to use old and damaged material of different colors. Its pieces should be carefully kneaded, and then fixed by pressing with the palm of your hand. When the half of the ball reaches the required size, it can be coated with a mixture of white and blue shades, forming the surface of the world's oceans. A few green cakes will make continents, and yellow and orange masses will make mountains and hills.

Hollow
It is customary to design a hollow Earth in cases where the amount of basic material is limited. In these cases, the first step is to create a base, usually from a balloon and a small amount of adhesive mass. It is important that the inflated balloon has an even round shape, and does not resemble an oval or an oblong shape. Any paper, including old newspapers with magazines, is cut or torn into small square fragments with sides equal to 2 centimeters, or strips. The ball is coated with vegetable oil or petroleum jelly and covered with the first paper layer.
Further, the surface is gradually covered with PVA glue, and the next layers of workpieces are fixed on it. You can also dip the pieces of paper into the paste first, and then press them against the base. Ideally, you should get about 2-3 layers. Be sure to dry the hollow structure before the next steps.


To speed up the process, it makes sense to use a hair dryer or a room heater, although it would be best to just put it off for a day.
Then the ball is glued again with two or three layers of torn newspapers and dried again. In this case, the topmost layer should be formed from white paper. It remains only to burst the inner ball with a needle or a toothpick, remove it and immediately seal the resulting hole. Some experts recommend leaving this hole during the formation of the first newspaper layer. Before starting sculpting, it is convenient to outline the contours of the continents and islands on the figurine. Then everything happens according to the usual scheme: contours are applied with plasticine of different shades.


When doing creative work with young children, it is better to initially prepare a hollow ball with a diameter of 15-20 centimeters or a foam blank sold in creative stores. In addition to it, for work you will need a well-crumpled wax plasticine and stacks. The finished craft is fixed on a wire stand or supplemented with a thread that will allow you to hang it.



Flat
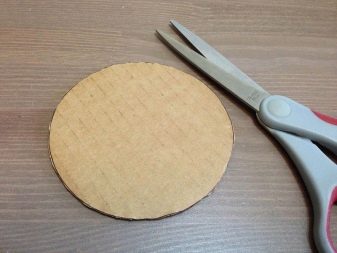
If the purpose of the craft is to create a model of the surface of the earth, then attention should be paid to a slightly different master class, the result of which is a kind of map scan. Of the materials, in addition to multi-colored plasticine, cardboard is also required, and many processes are carried out using toothpicks and wooden skewers. It all starts with the fact that an even circle is cut out of cardboard or a piece of thick paper. On it, with the help of a pencil, the contours of the land are immediately marked: continents and islands. Small pieces are gradually pinched off from a bar of green plasticine, which are rolled out to a thickness of 2 mm, and then gently glued to the base. All the remaining space is filled with blue or blue plasticine.
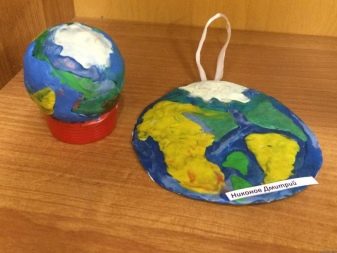
If desired, several small islands are formed at the very end in the ocean.
Helpful hints
When the main layout is created, its surface can be covered with schematic images of parallels and meridians. They are recreated using a thin silk thread, which is neatly laid out in the required direction and lightly pressed against the plasticine. To designate large cities and capitals of countries, you will need beads and beads.You can also write the names of major countries and cities on a large model of the globe. It is more convenient to do this with a toothpick, a pin or a thin needle. Buckwheat, semolina and other groats can be used to form mountains, highlands or eternal ice.


Small figurines of animals fixed in plasticine will allow you to visually study the habitats of different species.
Having mastered all the simple crafts, you can move on to creating a more complex structure from threads and plasticine. In this case, the list of required materials and tools is quite extensive. You will need threads of blue and white colors, as well as plasticine in green and white shades. You will have to prepare an inflatable ball, green paper, a plastic cup and 6 skewers. To fix the parts, PVA glue and a stronger fixing agent will be needed. It is customary to use alabaster and synthetic winterizer as a filler. Finally, the work cannot do without a couple of buttons, thread and needles.


It all starts with the fact that a balloon is inflated, which is immediately tied and lubricated with petroleum jelly. The blue thread is impregnated with PVA glue, after which it will need to be wound on the base, moving in different directions. While the workpiece dries out, the frame for the globe is formed from wire and wrapped with white thread. The axis around which the globe revolves is created from bamboo sticks connected with superglue. When dry, they should also be wrapped with white thread.


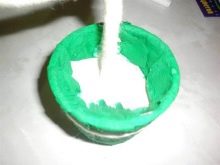
The dried balloon is punctured and carefully removed from the thread frame. The remaining structure is filled as tightly as possible with padding polyester and put on the axle. Plasticine continents are glued on top of the frame, the North and South poles are indicated. The wire frame is connected to the axle, and buttons are attached at the top and bottom for more reliable fastening. Finally, the disposable cup is decorated with green craft paper and white thread on the outside. It is half filled with dry alabaster, which is filled with water until it becomes mushy. The end of the wire frame is dipped into the substance and adhered until solidified.



For information on how to mold a globe from plasticine, see the next video.


