Modeling fly agarics from plasticine

Children are very fond of sculpting a variety of figures from plasticine. It can be not only cute animals or popular characters. For example, bright and beautiful fly agarics can be made from high-quality plastic material. They are easy to do, but they turn out to be very attractive. In this article, we will tell you how you can mold fly agarics from plasticine.


What is necessary?
Sculpting is an activity that fascinates so many children. Young craftsmen make a variety of figurines from plastic material. Among them there are both very complex and quite simple to perform. For example, beautiful and bright plasticine fly agarics are very easy to make, but at the same time they can turn out to be interesting and original.
To make a really beautiful plasticine craft, you first need to prepare several main components. These are the appropriate materials and tools for sculpting.


If you plan to mold fly agarics with your own hands, you will need the following components:
- high-quality plasticine bars of white, red and green colors;
- a set of stacks (there are plastic or wooden, it is convenient to use both the first and the second), they can be bought in the store if these tools are not included with the plasticine;
- a special sculpting board;
- if the modeling will be carried out not on the board, but on the table, then you will need to prepare a clean oilcloth, newspapers or paper.

It is not recommended to buy special sculptural material for making cute plasticine crafts. Such plasticine masses are designed to create professional-level figures.
The sculptural material is highly rigid, so it will be very difficult for a small child to work with it.


How to make an applique?
You can make a very beautiful applique with bright fly agarics from plasticine blocks of different colors. Such a craft will be available for children aged 3-4 years. To make it you will need:
- bright colored paper or cardboard;
- waste cardboard;
- scissors and plasticine.

Let's consider a step-by-step scheme for making such a craft for children.
- The applique may have an unusual shape... It is enough to take absolutely any waste cardboard. You need to spread plasticine masses of green and blue colors on it. It is advisable to use materials of different shades to form the horizon line. Next, cut an oval with scissors. This will serve as the basis.
- The oval should be glued to a blank sheet of colored paper. You must first carefully cut out a rectangular piece. Paper with a rich green hue will look attractive.
- Now we should proceed to making the center of the entire composition. - colorful plasticine fly agaric. To sculpt it, you will need to make several necessary blanks. It is necessary to fashion a red mushroom cap, a snow-white leg and a skirt.
- Further, in the central part of the cardboard oval, you will need to fix the white fly agaric leg. On top of it, you need to stick a hat in the form of a triangle with smooth, rounded corners. In the center of the mushroom, you can fix a plasticine skirt if it looks attractive here.
- It is necessary to supplement the mushroom with charming eyes. To do this, it is enough to take two small black plasticine circles. They can be supplemented with even tinier white particles to simulate sparkle in the eyes.
- Between the eyes you need to stick the round nose of the fly agaric. After that, you can move on to decorating the red hat with small white cakes.
- The application can be made brighter and more interesting, if supplemented with plasticine sun, flowers, insects.
On this, the manufacture of the original plasticine applique can be considered complete.


How to mold a bulky mushroom?
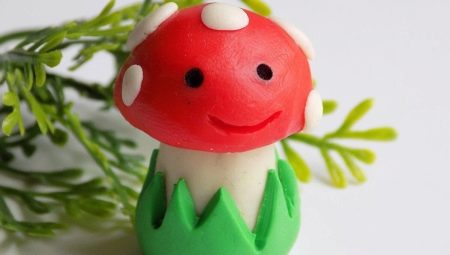
It is possible to make a very beautiful voluminous fly agaric from a plastic material.
A correctly executed craft will surely turn out to be effective and realistic. Young craftsmen will certainly be pleased with the results of their work.
We will figure out step by step how the modeling of a voluminous fly agaric from plasticine should correctly proceed.
-
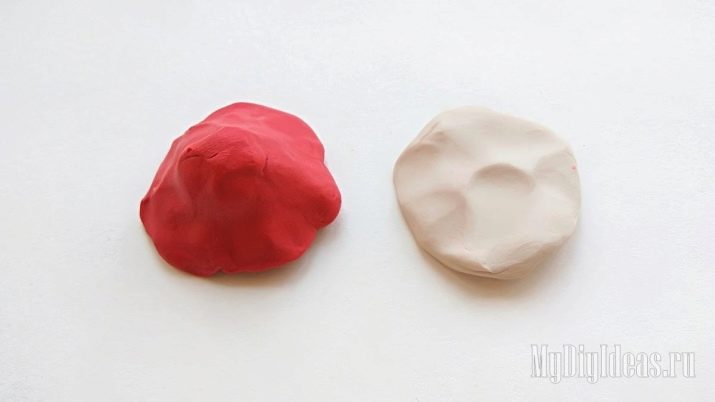
First, the young sculptor will need to prepare plasticine blocks of suitable colors.... These are white, red and green materials. Cut off a piece from each bar, then knead it well in your hands. Crumpled plasticine pieces will need to be rolled into balls.

- The green workpiece will need to be flattened with your fingers.... As a result of these manipulations, the ball should turn into a green cake.

- The tips of this part must be slightly raised upward, forming a kind of green vase for the future mushroom... The hole in the center of this vase will serve as a bed for the fly agaric leg. Through the stack, the outer part of the green blank will need to be supplemented with several notches to indicate the blades of grass.

- Next, you need to take a white plasticine mass. From it you will need to make a sausage, which will play the role of a mushroom leg. This component should expand towards the bottom. Additionally, you need to roll another white sausage, but thinner. It will be possible to make a collar for the fly agaric from it.

- The next step is to stick a thin white sausage across on the leg of the mushroom... This component will need to be very carefully and at the same time securely fastened around the entire circumference, pressing with your fingers. The collar should be selected, and then processed with a stack.

- At the next stage, it will be possible to deal with a red plasticine ball. From it you need to make a fly agaric hat. To do this, the red plasticine mass will need to be carefully pulled with your fingers in different directions. It is recommended to act carefully so as not to tear and re-roll the plasticine. You should try to distribute the plastic material as evenly as possible over the entire circumference. As an addition, you will need to make a white plasticine cake. Its circumference should correspond to the circumference of the already prepared red mushroom cap.

- After that, the white cake will need to be glued to the bottom of the red hat. You need to take a stack and use it to make some notches on the white part. This will create an imitation of thin plates under the mushroom head. Movements must be done from the center to the edge.

- On the entire circumference of the part under the cap, you need to make many small cuts.

- Now the fly agaric hat can be turned over so that its red part is directed towards the child. You need to use white plasticine pieces to form small round spots that decorate the fly agaric.

- Now the finished leg and cap can be safely connected to each other. A very beautiful voluminous mushroom is almost ready. At this stage, the lower part of the leg of the plasticine fly agaric will need to be fixed in a green blank, made in the first stages. Thanks to this component, the craft will be more realistic.


The result should be a cool plasticine craft. A voluminous fly agaric made in accordance with this master class will look very natural. The child will definitely be delighted with the results of his labors!


How to mold a fly agaric from plasticine, see below.


