How to make a rose from plasticine?
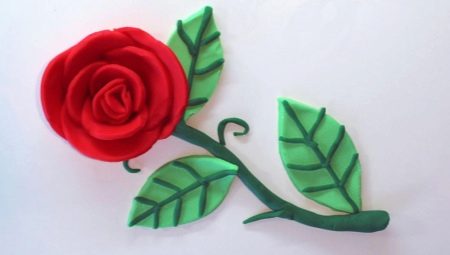
Plasticine is a material from which you can make a variety of figurines. Children really like to make not only animals, but also different types of flowers. It is possible to make a gorgeous rose from plasticine mass. This article will show you how to do this.


Classic version
There are many different schemes for sculpting roses from plasticine. Among them there are both very simple and intricate, amenable to children with the appropriate skills and abilities.
If the young master is still little familiar with plasticine, it is advisable to start with classical master classes that do not involve unnecessary difficulties. Having mastered the simple options, you can move on to more complex ones.



Despite the fact that a simple rose made of plastic material is made without unnecessary difficulties, it still turns out to be very beautiful and effective. The child will definitely be carried away by the process of sculpting a charming plasticine flower. To make such a craft, you need to prepare the following components:
- high-quality plasticine of different colors, it is recommended to prepare sticks of red or pink, as well as green shades;
- a set of stacks made of plastic or wood (this toolkit usually comes in a set with plasticine, so you don't have to buy it separately);
- a suitable work surface (a special sculpting board is suitable);
- a toothpick or cotton swab;
- pencil.


If everything you need is ready, you can proceed directly to making a simple plasticine rose. Consider detailed instructions for beginner young masters.
- To sculpt the flower itself and the sepal, as well as the leaf blades of the rose, it is necessary to knead the plasticine mass of red and green colors. Plastic material must be kneaded very carefully so that it is soft and pliable.
- Each rosebud should contain a sufficient number of wide red petals. To make them, you need to take plasticine of the appropriate color, and then divide it into several small segments. Each of the selected pieces will need to be kneaded again in your hands. After that, the prepared material will need to be rolled into small balls.
- Next, each of the balls made should be gently pressed down with your fingers. The workpieces must be slightly stretched while holding them in your hands. The result should be oblong cakes with wavy edges. These elements should not be exactly the same, so they can be given different sizes and bends.
- From the prepared scarlet petals, you can begin to form a bud. You should take the first cake to make the middle of the flower out of it. This component must be rolled into a small spiral.
- After that, you need to stick the remaining petals in turn around the circumference. It is necessary to continue such manipulations until the result satisfies the young sculptor. The plasticine bud can be made either fully open or half-open. For details of different splendor, you will need a different number of petals.
- Next, a green plastic material is taken. You need to take a small portion of it, and then knead it well. Then, a small rounded cake is formed from this component. Several notches should be made around its circumference, separating individual segments.
- Each of the segments must be slightly sharpened with your fingers, and then gently pulled out. This will be the sepal of the flower. The result should be a detail that resembles a small star with several thin sheets.
- The flower head should be turned over with the head towards you. In the center, you need to stick a sepal.
- You need to take a little more green plasticine to make the leaves. One branch can have 5 or more of these elements. You will also need to take a toothpick and a long stick. It is necessary to knead the brown plasticine mass, so that then lay it on this stick.
- When the brown mass is wrapped around the stick, it will need to be gently pressed down on top with the palm of your hand. Then the part must be rolled out on a hard surface. Each of the prepared leaves should be sharpened to form a neat diamond.
- The resulting brown stem must be glued to the bottom. Leaves should be fixed on the base branch.
- On this, the procedure for making a classic plasticine craft can be considered complete. If you wish, the stem of the finished rose can be supplemented with small thorns, also made of plasticine.
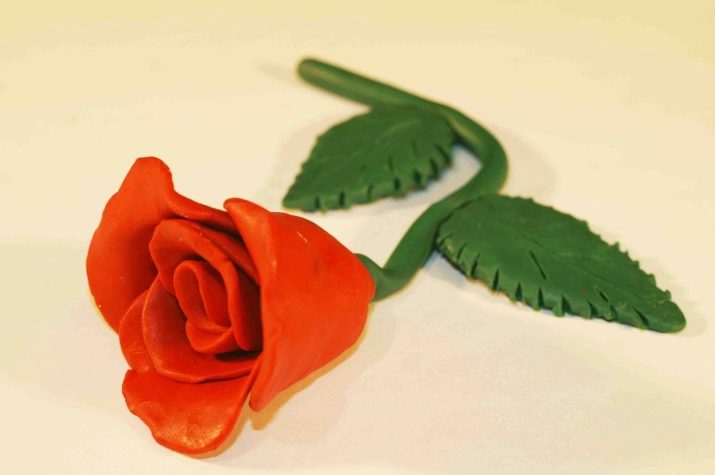


Modeling a branch of a tea rose
From high-quality plasticine mass, you can mold an amazing twig of a tea rose.
To make a handmade craft look even more original and attractive, it can be placed in a toy or just a small flower pot, or wrapped in designer paper.
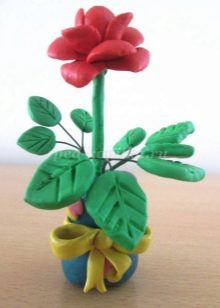


To make such an interesting craft, you will need:
- lid;
- wire;
- scissors or wire cutters to cut the wire;
- high-quality plasticine of pink, brown and green colors.


Let's consider in stages how to properly make such plasticine beauty.
- The lid can serve as a very handy container like a flower pot. From the wire it will turn out to make a reliable frame for a tea rose. With such a base, the twig will easily keep the correct shape. If you do not use a wire component, then you will not be able to give the craft the desired structure.
- Almost any wire can be used to make a tea rose. It can be thin and flexible.
- At the first stage, you will need to prepare a pot and soil for a plasticine flower. In your hands, you will need to thoroughly knead the brown plasticine mass. After that, the lid is stuffed to the very top of it. On pre-cut pieces of wire, brown plasticine is glued with a thin layer.
- The ends of the wrapped stems should be left open for now so that you can easily twist the twig later.
- It is necessary to separate several small pieces from the green and pink blocks. Of these, you will need to make leaves and petals for buds. Plasticine must be gently stretched with your fingers. The foliage should be teardrop-shaped and the petals oval.
- Next, you should start assembling the frame from brown sticks with a wire base. Several flower heads need to be collected. Not all of them have to be lush and voluminous. Their size can be gradually reduced. You should continue to layering the petals until the buds take on the desired appearance.
- Now you can make small green sepals for all harvested buds. These elements will need to be glued to the pink flowers from the back.
- Next, you need to continue to collect the twig. It is necessary to attach green leaves, buds, starting with the largest. When all the details are stuck to the branch, the bottom of the wire will need to be twisted.
- The lower tail of the craft is inserted into brown plasticine, placed in the lid at the first stage. The result is a very beautiful sprig of gorgeous tea roses.


How to make a panel?
It is very interesting for children to sculpt beautiful panels from plasticine mass. Such crafts look original and attractive, but they are made quite simply. On a cardboard base, you can arrange not only one rose, but also a whole bunch of roses.

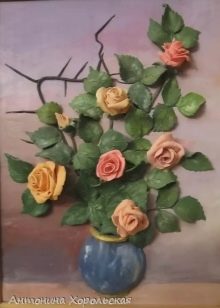

To make a beautiful plasticine panel, you will need the following components:
- plasticine bars of different colors;
- set stack;
- cardboard (both white and colored are suitable);
- special polymer glue;
- scissors;
- pencil.

Let's analyze step by step the correct course of work on the manufacture of an attractive panel with plasticine roses.
- First, the plasticine blocks of different colors will need to be cut into several small pieces. Each of them will need to make thin sausages.
- The made plasticine sausages will need to be slightly flattened in your hands. You can also use a rolling pin to do this.
- Next, each of the resulting flattened parts should be twisted into a small roll.
- The twisted plasticine elements will need to be gradually laid out on the base of a cardboard sheet. Thus, a beautiful floral arrangement should be formed.
- Each of the roses made will need to be glued to the base using a polymer adhesive. Instead of glue, it is permissible to use additional soft pieces of plasticine.
- This beautiful composition should be supplemented with green leaves. The latter components should be teardrop-shaped.
- Next, you need to take colored cardboard. From it you will need to cut out a detail in the form of a flower vase. This element of the composition can be decorated in different ways. A plasticine bow fixed on a cardboard vase will look very nice.
- Under the prepared basket, you will need to glue an additional backing base on the base. Its function can be performed by cutting out of thick cardboard, for example, from a box.
- When the backing is fixed to the cardboard base, you can glue the basket, cut from colored material, to it. After that, the panel should be supplemented with green leaves to partially cover up the unattractive edges.
- The craft is almost ready. The panel can be supplemented with other decorative components and decorations.In this matter, the imagination of the young master is absolutely not limited to anything. The simplest solution is to add a beautiful frame to the panel. It can be made from colored paper or cardboard of any color you like. The frame width can be 5–10 mm.
A spectacular flower panel of bouquets of roses is ready. If you do everything according to the instructions, the craft will turn out lovely and will certainly delight the child.



Next, see a master class on modeling a rose from plasticine.


