How to make a mermaid from plasticine?

Plasticine sculpting is a very unusual and educational activity that allows children to show their imagination. It is most interesting to do this business when you can create your favorite cartoon character or a magical creature with your own hands, and sometimes both together. In this article, we suggest you try to make your favorite heroine - the little mermaid on your own.


Simple option
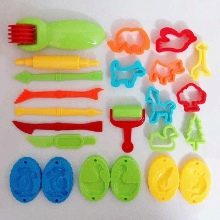
For many, sculpting a mermaid from plasticine may seem like a daunting task, but in fact, making such a craft is not at all difficult if you step by step disassemble the entire creative process. The first thing to do before crafting a mythical creature is to prepare all the necessary tools and materials. For creativity you will need:
- a set of plasticine;
- toothpicks;
- a stack with a sharp edge;
- modeling board.


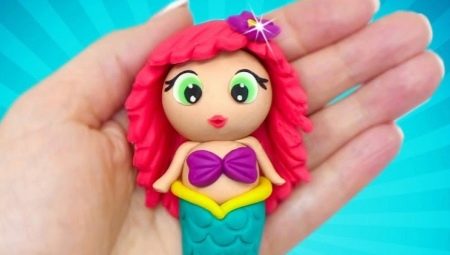
When you have prepared everything you need, you can start sculpting the little mermaid. First, make the head of the future sea beauty - cut off a piece of beige plasticine with a stack, knead and roll an oval out of it. Then create a beautiful head of hair by first choosing a color: it could be your favorite color, such as pink, yellow, orange, and even green. Roll 10 to 15 sausages of different lengths from the chosen plasticine and flatten them. Pin the strips to the crown, leaving a parting, and use your fingers to curl the ends of your hair into pretty curls.
The next stage of sculpting is the creation of the body, for this you will again need beige plasticine. Blind the body of a mermaid out of it, repeating the curves of the waist and hips - the workpiece should resemble an hourglass in shape. Insert a toothpick into your neck and attach your head to your torso, gently spreading out the curls.


Next, we make the tail of a mythical creature - you can choose the color yourself, it can repeat the shade of the hair, be bright or dark. Form an elongated droplet from the selected plasticine with an inverted V cut on the wide side. On the lower torso, make a V cut in the correct position, then use a toothpick to attach the body to the ponytail.
To hide the joint, roll up a sausage-belt a little lighter in color than the tail and “slip” it over the mermaid's hips, repeating the V-neckline. Now, if you wish, you can bend the tail to one side or back to give the little mermaid a sitting position. Create a bodice for a beauty - from plasticine, repeating the color of the ponytail, mold two flat triangular figures. Attach the resulting shells to the mermaid's chest.


The next step is to blind your hands - roll two sausages out of beige plasticine and make two folds: the first fold at the level of the elbows, and the second at the level of the hands. Attach your arms to your shoulders and position the mermaid as if she is resting on her hands, her tail raised.
Another important detail is the fin at the tip of the tail. It must be made in the same color as the belt. From two identical balls, create flat fins that resemble the shape of the leaves of a tree. Connect the two fins together by inserting half a toothpick in the middle. Then attach the fins to the tail using the free edge of a toothpick.


Next, blind your eyes and lips - two black balls will make excellent eyes, and thin red sausages with sharp ends will make neat lips. It remains only to draw the details and textures. Using a toothpick, draw the cilia, nostrils, and eyebrows for the sea dweller. Then draw stripes on the bodice, waistband and fin, and scales on the tail.
A do-it-yourself plasticine mermaid is ready, you can decorate her nursery or use it as a toy, because plasticine is resistant to water.


How to blind Ariel?
The little mermaid Ariel is one of the most beloved characters of girls. Let's take a closer look at how to create a figure of this heroine for children step by step.
- First, blind your head and outline the facial features on it - blue eyes with black pupils, pink lips and red eyebrows.
- Then blind the mermaid's torso and attach it to the head.
- Now mold the tail from green plasticine and bend it in half where the knees are. Attach the torso to the tail as if Ariel is sitting relaxed.
- Attach light green teardrop fins to the tip of the tail.
- Mold your hands from beige plasticine and attach them to your shoulders.
- The color of Ariel's bodice is purple, so we make two shells of this shade and attach them to the figure's chest.
- We make 5-6 wide plates from sausages of red plasticine and fix them to the head so that the hair falls on the back. Then we make two short plates and create a fluffy mermaid bangs.
You can add small details to the figurine - for example, thin black eyelashes, the texture of the scales on the tail, a small nose and glare in the eyes.
For information on how to mold the little mermaid Ariel from plasticine, see the next video.
Recommendations
When a child is engaged in modeling from plasticine, he develops fine motor skills of his hands well, so this activity is very useful at a young age. Toddlers are often strict with their creativity and give up modeling because the figures do not turn out as they expected. Be sure to encourage and approve of each step your child takes in sculpting.
Involving children in the creative process, give them the opportunity to fantasize and add new details to the little mermaid - this will stir up interest and develop imagination... The finished figurine does not have to be perfect - there may be some flaws or errors in it, but this is not so important - more important is the time spent together in a useful and exciting job.


