Modeling an airplane from plasticine

Plasticine sculpting develops hand motility, has a positive effect on the child's thinking. Your toddler's creative impulses should be encouraged. We offer to make aircraft - military, civil, from plasticine and natural materials. Our master class will appeal to creative children, especially boys.

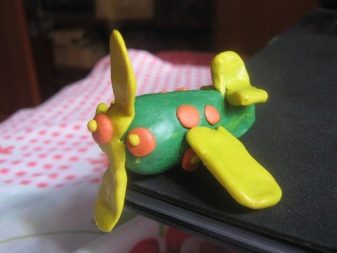


How to make a passenger plane?
Making a passenger plane, we will try to achieve a certain resemblance to real technology. Children 5-6 years old and older can make this model with their own hands.
- For the work process, you will need a board, a stack, napkins (wipe your hands) and plasticine of the desired color. The choice of shades depends on the purpose of the aircraft, we sculpt a passenger model, which means we can use white, blue or gray material.
- Take a briquette of plasticine of a suitable color, knead it well in your hands to make it warm and soft, roll it into a ball. From the ball, form an elongated carrot-like figure, wide - from the side of the cabin and narrowed - in the tail.
- Make a small smooth recess for the cockpit sight glass and start making it... To do this, take a piece of white material, roll it out and flatten it into a light crescent. It is important that the blank coincides with the recess that has been prepared in the front of the aircraft. For greater realism, you can stick thin separating plasticine filaments across the window.
- We turn to the manufacture of the tail. To do this, mold a flat piece like the tail of an airplane and set it in a slightly beveled position (at an angle of 120 degrees). Smooth it well with your fingers until it is evenly connected to the body.
- Next, we start making the wings and turbines.... Sculpt two plates with an extension, they will become wings, the same small blanks will be needed for the tail. Roll the turbines in the form of blocks, carefully make grooves with a match on the wide side, this will give them realism.
- When all the parts are ready, start assembling the aircraft. On the sides, at a short distance from the windshield, set the fenders at an angle. Glue small blanks at the top of the tail. Fix the turbines at the base of the tail.
- It remains to make the windows. To do this, roll tiny balls of the same size from white plasticine. Flatten them so that they are the same diameter. Install portholes on both sides of the hull.


The result is a beautiful passenger plane, which you can play with and show your friends is not ashamed.
More ideas
In the world, a lot of airplanes have been invented besides civilian ones; we will also consider other types of flying equipment. We have prepared master classes for kids who are 3-4 years old, and for older children, in which we will tell you step by step how to sculpt beautiful models from plasticine. Let's start with a combat aircraft.


Military
Military aircraft are distinguished by their special coloring, which we will try to repeat as accurately as possible in our work.
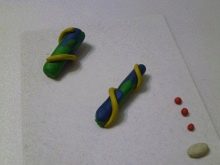
- Combine blue and green plasticine, remember in hand, to soften. Roll several cylindrical blanks from the blue-green mass, they will still have to be finalized. To do this, prepare a long rope of yellow material. Immediately set aside a piece of white plasticine for the cockpit, green for the propeller, and three pieces of red for the stars. That's all we need to get started.
- Divide the yellow tourniquet into two parts, wrap large blanks and knead them with your fingers, smoothing each separately... Please note that plasticine takes on a color similar to the color of military equipment.
- From one cylinder, make the body of the aircraft along with the tail, directed at a slight angle. The second blank is needed for the wings. Sculpt them with one rectangular plate, make the same piece, only in smaller sizes, for the tail.
- Prepare a drop-shaped cockpit from white plasticine. Flatten the red blanks, and cut out of them using a star stack. Use the green material to make a three-blade propeller.
- Let's start assembling the aircraft. We fix the large plate (wings) in the center from the bottom of the body. We install small wings in the tail section. We fix the screw in front of the plane. We glue the cockpit to the upper surface between the wings. It remains to decorate the wings and tail with small stars.




The military plane is ready for the game, even for the exhibition.
Light plasticine
Everyone knows that plasticine can be tight, especially at low air temperatures. It is impossible for the little fingers of a three-year-old to cope with it. Therefore, a lightweight, plastic safe material based on pliable wax has been invented for babies. It is a colorful product that does not leave greasy stains.
It is better to store briquettes of different colors in individual packaging, as they mix easily with each other.

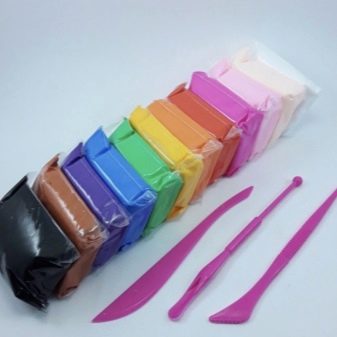
We propose to make the most simple model of an airplane, designed for young children. It will not be difficult for kids to master sculpting from large parts, but to work with small elements, they will need the help of their parents. We carry out the work in stages.
- Prepare two plasticine balls - white large and blue small. That's enough to make a cute baby airplane.
- Separate a piece for the wings and tail from the white ball. From the remaining plasticine, form the body of the aircraft, thickened from the side of the cockpit and narrowed from the tail.
- Separate a piece from the blue ball and mold a trapezoidal plate, it will act as a windshield. Install the part from the cab side.
- To make the airplane look fun, stick two eyes on the viewing window. Make them in the form of white round cakes with tiny dots from black plasticine. Draw a smiling mouth under the eyes.
- It's time to tinker with wings. Leave a small piece of white plasticine for the tail, and from the rest of the material sculpt two triangular wings with soft contour lines. Install the fenders perpendicular to the body on both sides.
- Sculpt and fix tail part.
- To make the airplane look brighter and more beautiful, roll a thin rope out of blue plasticine. Cut pieces from it and decorate the body, two wings and the tail of the plane.

Kids will surely like this funny craft.
With acorns
If you connect nuts, cones, acorns and other natural material to plasticine, it will become even more exciting to be engaged in creativity, and the airplanes will turn out to be unusual and interesting.
Making an acorn craft is not at all difficult. Take one fruit along with the cap. Make the nose, wings and tail from plasticine. That's the whole airplane.
Now let's complicate the process. Take an acorn and two separate caps. Make wings and a tail from plasticine. The hats are needed as turbines, attach them to the fenders.

Funny airplanes made of acorns can take part in a game started with friends.
With cones
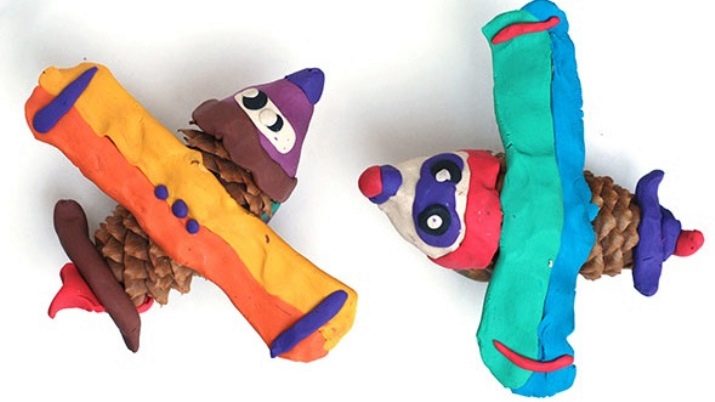
For crafts, you will need an elongated cone and multi-colored plasticine. Our goal is to make the airplane not so much reliable as funny and cute, therefore, the more shades of plasticine there are in the craft, the better.
Let's start the fun process of making wings. To do this, make two long plates of different colors and connect them to each other. The two-tone wings are ready.
Next, mold a triangular cockpit muzzle out of plasticine. Place it on the pointed end of the bump. Fasten the wings across the bump.


Make a two-tone tail and connect it to the rest of the craft.
To make the airplane fun, add eyes and a nose to the muzzle. Decorate the wings with colored plasticine stripes and dots. The plasticine-cone airplane is ready for an exciting game.
Recommendations
Our recommendations are intended for those who have no experience with plasticine, we hope they will help you.
- Plasticine is greasy, leaves traces... To keep the table clean, you need to work on a special board or oilcloth.
- You can achieve the softness of the material by kneading for a long time.... Sometimes, to speed up the process, the briquette is placed in warm water.
- Plasticine figures will look more spectacular, if you decorate them with beads, shells, pebbles and other natural materials.
- A large product will require a lot of material. To make the costs less, a frame is made and covered with a plasticine layer.
- If the figures are made for decoration, they are better process with colorless varnish. So they will acquire hardness, brightness and will not collect dust.
- Having finished the crafts, hands should be wiped thoroughly with a napkin and only then wash with warm water and soap.


The plasticine sculpting process is so interesting that it can captivate children and parents. Jointly made airplanes will be useful in the game or will become a decor for a children's room.


For information on how you can mold an airplane from plasticine, see the next video.


