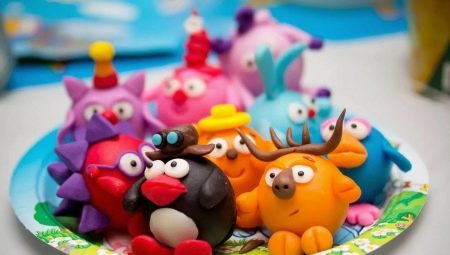
What complex can you mold from plasticine?

Sculpting is quite an exciting activity that not only helps to relax, but also develops finger motor skills. In addition, imagination and creativity can be developed through sculpting. Creating a variety of plasticine figures is a hobby that is enjoyed not only by children, but also by adults. It is worth considering in more detail what can be molded from plasticine.


Unicorn sculpting
Children love mythical creatures and fairytale characters. To spend time with your child, as well as teach him something useful, you can blind a unicorn with him. Before starting the process, you need to prepare the workplace, as well as tools and consumables.
To sculpt a unicorn figure, you will need the following materials.
- Plasticine. It is recommended to give preference to a high quality product. Plasticine should be soft and pliable at the same time. In addition, after sculpting, there should be no dirt or dye residues on the hands.
- Stacks. Designed to give the craft a more realistic look. The stacks also help cut the clay into pieces of the desired size. If you don't have such a tool at hand, you can take a toothpick or a clerical knife.
- Wire. Designed to create a frame for a future figurine. With the help of the wire, it will be possible to fix the position of the unicorn. Metal is inserted into the legs and neck of crafts.
- Warm water. Used to soften hardened plasticine.
- Rough cloth. Better to choose denim. With its help, it will be possible to wipe the plasticine from the skin of the hands and work surfaces.
When the materials are ready, you can start sketching on paper. Have a child draw a unicorn as a mythical creature.Parents can then make small adjustments to make the craft look cute and stable.


So, the materials and the sketch are on the desktop. You can start sculpting.
Main steps.
- Plasticine of the desired colors is cut into separate pieces, from which sausages are formed. To create the outlines of the future unicorn, they take a sausage of the main shade, fold it on both sides and use a stack to achieve the desired contours.
- Further, legs are made from sausages of the same color, which are attached to the lower part of the body of the craft. The contours of the hooves are shaped with a knife or toothpick.
- In the third step, the wire is cut into small pieces, which are then inserted into the four limbs of the unicorn. The figurine is placed on a stand.
- After that, eyes are made using white and black small pieces of plasticine.
- At the fifth stage, hooves are started, which are molded from multi-colored plasticine. If you wish, you can let the child choose a certain shade.
- Finally, start sculpting the main element of the unicorn. To create the horns, pieces of different colors are used, with the help of which a rainbow ball is formed. The ball is rolled into a long sausage, forming a horn, which is then placed on the head of the animal. A wire is first inserted into the horn.
- With the help of flagella of different shades, the mane and tail of a horse are made. Add ears.


Making beautiful bouquets
One of the interesting plasticine crafts is a bouquet of beautiful flowers. To work on creating such a composition, you will need:
- plasticine;
- stack or clerical knife;
- plasticine stand;
- sticks-skewers 18 cm long;
- colored ribbon.
When the materials are ready, it is worth making a sketch of the bouquet in order to choose the colors and shape of future plants.


The scheme for modeling flowers for a bouquet is as follows.
- First, a sausage is rolled from a solid plasticine bar, which is then flattened to form a tape.
- Then, from one end, they begin to twist the ribbon, thus forming a rosebud. The finished flower is planted on a stick.
- Then proceed to the leaves. To do this, take green plasticine and roll a ball out of it, which is then flattened into a cake.
- The flatbread is then squeezed from one edge so that the shape of a petal is obtained. The same must be repeated from the other side. Then you get a leaf.
- At the fifth stage, streaks are made in a stack, pressing the tool against the material.
- Then the finished leaves are attached to the stick, on which the rose is already attached.
Using this scheme, you can make a huge number of plasticine roses, from which you can then collect a bouquet. To assemble the bouquet, use a colored ribbon with which the skewers are tied.
In addition to a rose, you can mold other color options from plasticine: chamomile, cornflower, bell. Even pansies and iris can be made from sculpting material with the right effort.


More craft ideas
Before teaching your child how to model or trying to develop yourself in a hobby you like, you should consider the range of options for available crafts. What can be molded from plasticine? The list is actually endless. With the help of an elastic and pliable material, it will be possible to create the following sculptures.
- Animal world. With the right approach, beautiful hedgehogs, hares and even turtles will come out of the plasticine bar. The advantage of animals is that they are quite simple to perform and do not require a large amount of material due to the minimal coloring.
- Flowers. Here you can already turn on the fantasy. It is noteworthy that even the most unpretentious plasticine flowers look attractive, and cute compositions are obtained from them.
- Festive objects, fairy-tale characters. With the help of plasticine, you can sculpt a snowman in the summer, put up a Christmas tree or create your own mythical creature.


It is worth making out the diagrams of popular options for crafts for modeling.
Romantic cat
Children love cats - this is an irrefutable fact.Therefore, it will be interesting for the kid to mold a pet.
The process is phased.
- Take blue plasticine and roll out 4 balls from it, two of which will be small, one medium and one large.
- Make a body out of a large ball, it should be slightly convex. The middle ball will go to the tail in the form of a drop, the small ones - to the ears.
- Take a white block and cut off several small pieces from it, which then need to be rolled into thin sausages. These sausages then need to decorate the body and tail.
- Connect the cat into one whole by sticking the tail to one end of the body, and the ears to the other.
- Sculpt the nose, muzzle and eyes and also glue them to the head.
- Make paws. To do this, you need to take plasticine of blue and red colors. Four drops will need to be made from small bars, which will become the cat's paws.
The craft can be a decoration for a children's room or a great gift.


Fruit tree
Step-by-step instruction.
- Take dark green plasticine and make a large ball out of it.
- Form the trunk of the future tree from the brown mass.
- Take red plasticine, divide it into 10 small lumps, which will need to be shaped into balls.
- Form thin sausages (10 pcs.) From light green plasticine.
- Attach the sausages to a large dark green ball. These will be the leaves. You also need to attach red balls that will act as rowan berries.
- Place a ball with leaves and berries on the trunk.
- Strengthen the stability of the tree by placing a wire in the middle of the trunk.
- Stack the veins on the trunk, imitating the pattern of tree bark.
To enjoy the process, you need to do everything in stages. Following the scheme will help to take into account every nuance. Near such a tree, you can put do-it-yourself birds or other animals, for the creation of which plasticine is also suitable.


Over time, you can start sculpting more complex crafts. Plasticine will become a hobby of a child or an adult, if you initially instill an interest in the process.
If the child is doing the craft, then it is better to give him blunt and safe objects in his hands. During sculpting, you can turn on cartoons for the kid with bright characters and objects that will help develop imagination and increase the child's interest.


For information on how to mold plasticine crafts, see the next video.


