How to mold smeshariki from plasticine?
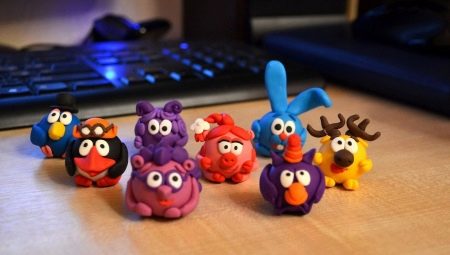
Plasticine is a versatile plastic material from which almost any figurine and structure can be made. Children really like to sculpt various characters of their favorite cartoons. In today's article we will learn how to properly sculpt smeshariki from plasticine.




Modeling on cardboard
Smeshariki made of high-quality plasticine can be performed in a variety of techniques. For example, crafts made on cardboard, made according to the type of application, are very original and beautiful.


Even the smallest craftsman can easily cope with the manufacture of these products.
In order for the child to be able to display his favorite characters on a cardboard with his own hands, he will need to stock up on the following components:
- plasticine (it is advisable to use a softer mass, with which it will be easier for the child to work);
- a special sculpting board;
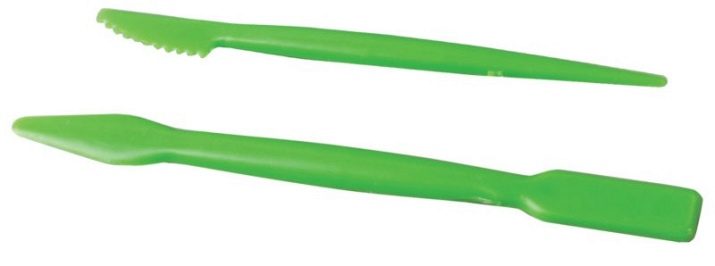
- stack (usually comes complete with plasticine bars, but can be purchased separately);
- blunt needle or toothpick;
- a sheet of thick cardboard;
- a couple of sheets of special craft paper of various colors;
- scissors with sharp blades (it is advisable to use a tool that is not too large);
- special sharp knife for cutting paper;
- PVA glue or other adhesive of a similar type.

The creation of an original craft will be simpler and more understandable if you first draw on a piece of paper all the planned characters of the famous cartoon. Such a sketch will serve as a kind of template-layout for further operations.
- First, the planned plot with your favorite cartoon characters will need to be depicted on a cardboard base using a simple gray pencil.

- Next, you will need to prepare plastic material in those colors that will match the painted details. To carry out interesting creative work, you will need to cut the plasticine blocks into small pieces. After that, they will need to be rolled into thin flagella. The thickness of these blanks should not be too large. The length of the flagella should be selected based on the convenience of further operations.

- When the base and all the components are ready, thin plasticine "sausages" will need to be carefully laid out along the contours of the drawn smeshariki. After that, you will need to fill in the inner planes of the selected images. Forming the contours of images using thin plasticine "sausages" is a very simple process. Even the smallest craftsmen will be able to cope with this matter without any problems.
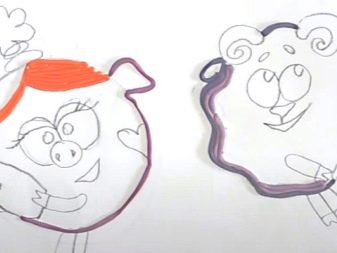

Due to such stages of work, perseverance and attention develop in children. In addition, the procedures in question have a beneficial effect on the child's fine motor skills.
- It will be easier to work if you use a stack or a toothpick. So, a thin plasticine roll can be laid along the drawn line, and then, using the tip of the stick, fix the outer contour line of individual parts of the Smeshariki's body. This way you can design all the main outlines of the characters.
- Using a marker of any color, you will be able to sketch various kinds of background elements of the composition. It can be a drawn field, many small hearts, clouds, the sun, and so on.

- After the image of the background decorative components, you can continue to deal with the layout of the plasticine flagella, only now it will be necessary to arrange the drawings in this way. Having selected the contours, the inner parts of the images are also filled with “sausages” of certain colors.

- Having completed all the work related to the drawings, it is necessary to proceed to the final design of the entire composition on cardboard. To do this, the young master will need to cut off excess sections of cardboard. It is advisable to do this under the supervision of an adult, since there is a high risk of accidental injury due to careless handling of the knife. It will also remain to choose a suitable reliable substrate for the original applique. You can make a frame or use a ready-made purchase option.

- The next stage is curly cropping of the characters. Next, a suitable general background is selected, on which the processed composition will fit. After that, with barely noticeable lines or dots, the location of all the elements is highlighted. Then the picture is removed from the background. Gently turning it over, PVA glue is applied with a thin layer on the reverse side. Next, the picture is fixed on the background sheet, starting from the marked points.
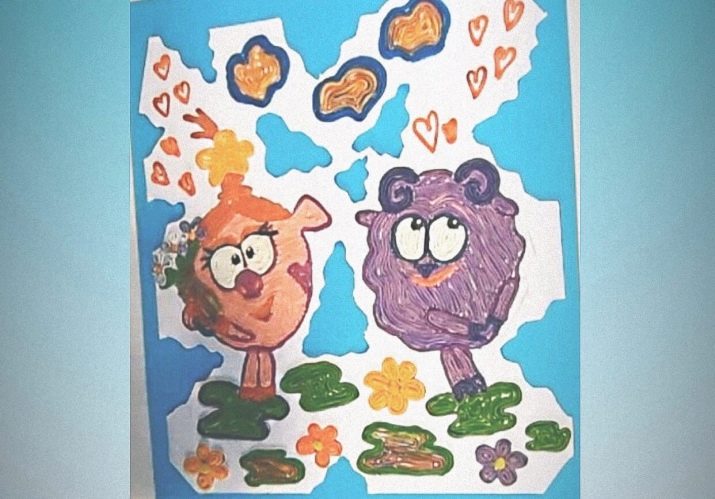
- The last step is gluing the frame.

This is one of the possible options for making a creative plasticine applique on your own. You can also not draw the main sketch with a pencil, but print it on a printer, so that you end up with more attractive characters.

Creation of volumetric figures
From the plastic mass, the child can make not only unusual and bright applications, but also model attractive volumetric figures. Such things can be created both as simply and quickly as possible, and provide for a complicated order of actions.


Hedgehog
Plasticine can be used to make a very funny and cute prickly character of a famous cartoon. Consider the step-by-step instructions for modeling such an interesting figure with your own hands.

- At the first stage, you will need to roll a fairly large plasticine ball. This element will act as the figure's round body. The arms and legs of the character are formed from additional pieces of plasticine, after which they are glued to the corresponding surfaces: below and on the sides.
- Further, from the blue plasticine mass, it will be necessary to mold needles of a cone-shaped structure.It is necessary to prepare several such elements, after which they are attached to the back of the figure's body.
- At the next stage, you will need to start preparing additional parts for the craft. You will need to make 2 red triangles for the nose and the tip of the ponytail. You should also mold the tail itself in the form of a flattened triangle. A couple of small balls and a couple of small "sausages" of the same color as the body are formed.
- To make eyebrows and ears, you need to mold additional blanks. To design the eyes, you need to make 2 small white circles.
- To mark the pupils, it is advisable to prepare flattened black circles. You will need 2 more stripes of blue to make the temples of the glasses. To depict the lenses, a pair of long flagella is rolled out, which are then rolled into rings.
- All finished elements are fixed in place. It is recommended before that, using a stack or a toothpick, draw a line of the mouth. The expression of the cartoon character's face can be absolutely anything: it is at the discretion of the young master.


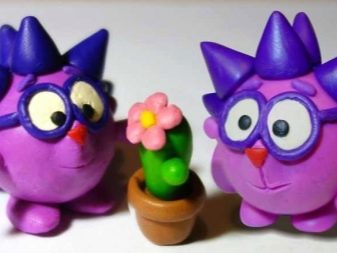
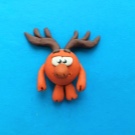
Losyash
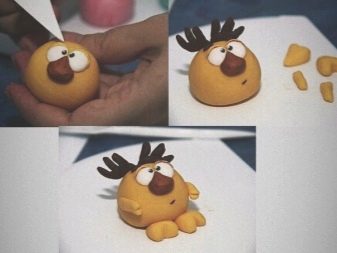
Modeling this three-dimensional figure is in many ways similar to the option discussed above. In this case, at the first stage, it will also be necessary to roll a large plasticine ball representing Losyash's body.

- You will need to mold a couple of medium white balls. They are carefully flattened and then stuck to Losyash's body. This will highlight his eyes. A triangular "sausage" made in the form of a nose is formed from a brown plasticine mass. This part is also attached to its place.
- Now you need to roll up the small black balls. They are attached on top of the white ones and closer to the nose. These will be the pupils.
- Form two thin "sausages" of the same color as Losyash's body. They are fixed above the eyes, straightening with a stack. These details will play the role of the eyebrows. With the help of a stack, the nostrils are shaped.
- Next, horns are made from brown plasticine. These components are formed in the form of 4 flagella of suitable sizes. Then they are glued together in the form of the letter "W", stuck to the head.
- Then, from the mass of the main colors, legs-hearts are prepared, as well as the character's arms in the form of even, but not too long flagella. Each handle should have a dent on one side to shape the hoof. A mouth is made from small "sausages".
- Now all the finished elements are attached to the base. A beautiful figurine of Losyash is ready!

Kopatych
This figurine is made very simply. A master class on modeling plasticine Kopatych is perfect for beginners.

- First, roll out a large ball for the body. Next, formed arms and legs made of 4 flagella are attached to it.
- The character's head should be covered with a hat made from a pair of flattened round pieces. A thinner, wider circle will act as the brim of the hat, and a denser one will act as the top.
- The hat is made by rolling a medium-sized ball, and then attaching it to the place of the tail. 4 more such small balls of the same color are made. A larger pair will be for the cheeks, and a smaller pair will be for Kopatych's ears.
- Then they form round white parts to decorate the eyes. Smaller black elements are needed for the pupils. To highlight Kopatych's eyebrows, black flagella will be needed. A potato-shaped brown blank will serve as a nose.
- At the final stage, Kopatych is drawn with a mouth using a convenient stack or toothpick.


Nyusha
Very simply, the young master will be able to model the plasticine figurine of Nyusha. Let's consider how to do it in stages.

- As in the master classes discussed above, first, Nyusha's body is formed by rolling a large plasticine ball. Make white round eyes. Flatten the pink round nose piece. To make a patch, a couple of holes are made on the nose with a stack or a toothpick.
- Pupils are formed from small black balls.After that, they are flattened by squeezing between the fingers, so that the result is flat specimens. Eyebrows are made from uneven additional "sausages". Through the stacks, thin and neat plasticine flagella that imitate eyelashes are attached.
- Roll out a couple of round "pancakes", fix them asymmetrically on the head. 4 balls are prepared from plasticine of a similar color. Each subsequent one should be slightly larger than the previous one.
- A round part is made of white material, and then a stack is divided into 4 parts. This will be Nyusha's bow.
- Having formed several thin flagella, they are attached with one edge into a single structure.
- The tail made is attached to the main braid, completing it with a bow.
- Next, prepare 4 identical short "sausages", complement them with plasticine hooves of a different shade.
- The arms and legs are fixed in place, complementing the figurine with a mouth in the form of a "sausage".


Krosh
- First, a large torso ball is made. 2 drop-shaped blanks for the nose, 2 medium-sized white balls for the eyes, 2 rectangular white blanks for teeth are being made. The details for the eyes must be flattened and fastened tightly to each other.
- A nose is attached under the eyes, and two white rectangles are attached under it.
- Roll 4 short "sausages" of the same shade as the body. These parts should have a bulge at one end. This is how Krosh's arms and legs will be formed. Ears are formed with longer "sausages" of the same color.
- Next, the nose and eyebrows are attached in the form of a pair of thin flagella. Pupils are formed from small black balls. Strengthen arms and legs.
- The final chord is a ball. To create it, roll a brown ball with thin black stripes. The detail is placed under the character's arm. Finally, attach the tail.


Barash
Consider a master class on modeling this character.

- It is difficult to mold this character. First, the ball-body is rolled. White balls-eyes, a pink triangular element (nose) and small balls of black color - pupils are attached to it. The mouth is isolated with a stack, and the eyebrows and nostrils are distinguished with plasticine "sausages" of the corresponding colors.
- Ears are formed from a pair of large triangles, legs are formed from 4 thin bundles, and hooves are formed from small segments.
- All over Barash's body, you can attach different-sized plasticine balls. They will imitate wool. It is not necessary to fasten them only on the front part.
- The rose will turn out to be made from conical "sausages". They are attached with a thickened part to the head and in a folded state.


Sovunya
We will learn how to make a funny and cute heroine from plasticine - Sovunya.

- As always, a ball is rolled from the plastic mass to form the body of a bird.
- Further, from plasticine of the same color, triangular parts are formed - ears. They are attached to the workpiece. Eyes are formed from white rounds, a small ball is fixed between them. The stack of the ball is divided in half, but not completely. Thus, it will turn out to make a beak.
- Roll up small black balls. After that, they are flattened between the fingers, and then the pupils are formed with their help. Short black plasticine flagella, divided into three parts at one end, will imitate paws. These components will need to be fixed in the lower part of the round body made in the very first stage.
- Wings are formed from flattened triangular plates with rounded corners. They are attached to the body with the narrowed part. On the wide half, notches are made using a stack to imitate feathers.
- A cap is attached between the ears, formed from several balls fastened to each other.


Plasticine crafts with other materials
Very original characters of the famous cartoon are obtained if you use not only plasticine, but also a variety of improvised or natural materials. For example, unusual and spectacular crafts are made using apples, chestnuts, onions, potatoes (and other vegetables), cones, and so on.


The easiest way is to model an interesting volumetric figure of smeshariki from a combination of plasticine and cones. Let's see how you can make a funny figurine out of such components.
- The bump will play the role of the character's torso. First, the natural material must be cleaned of any debris and dust. It is advisable to use cones without defects or damage.
- All plasticine parts of the body of this or that character must be glued to the body-bump.
Figures can be supplemented with any decorative elements. Using a pine cone and plasticine elements, a young master can model absolutely any hero of your favorite cartoon.
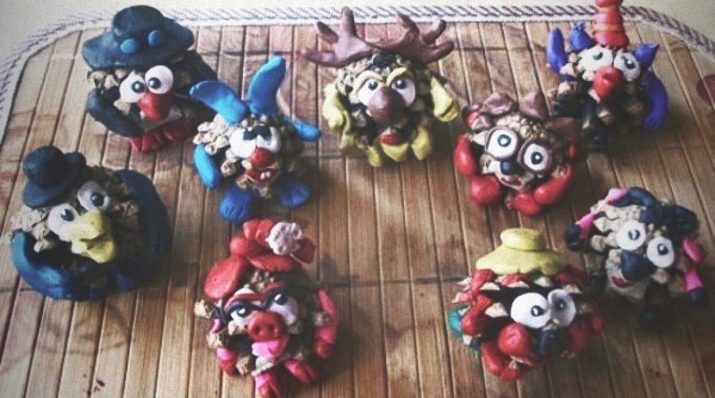
In a similar way, you can model all smeshariki using a chestnut or some kind of vegetable.
For more on how to mold Smeshariki from plasticine, see the video below.


