How to make a phone from plasticine?
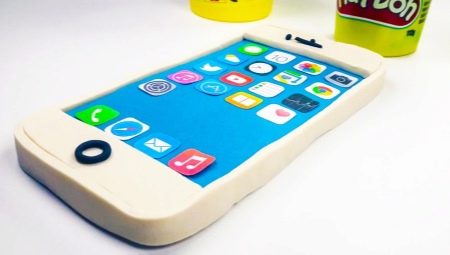
Fans of modeling will be interested in learning how to make a phone from plasticine. Sometimes it is very useful to find out how to blind a city phone for children to play. Modeling a small mobile for dolls with your own hands, finally, also turns out to be quite an attractive activity.

How to blind a landline phone?
Many children and even adolescents no longer have the slightest idea what this device looks like. At best, they've seen him in illustrations, in photographs, and in films. Therefore, the idea of making a small wired phone out of plasticine with your own hands will be pleasant almost with a guarantee. Telephone cases could be very different in geometry and colors. Yet in most cases it was a rectangular or square "box" of white or black color.

In order not to suffer with the choice of color, they usually give preference to a gray tone. 2/3 of the entire plasticine mass will be spent on making the ball.

Further step by step:
-
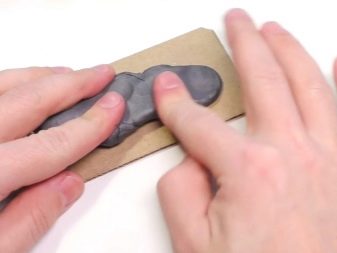
press the ball to the board;
-
press on it from 4 sides at once;
-
achieve the appearance of a truncated-type quadrangular pyramid;
-
the remainder of the gray mass is formed in the form of a thick sausage;
-
bend it arched;
-
by pressing the fingers, they achieve external similarity with a simple telephone receiver;
-
prepare a white or blue typesetting disc;
-
add a small amount of gray mass to its middle;
-
install the disk on top of the case;
-
squeeze out the numbers with the end of an empty rod from a ballpoint pen;
-
instead of a lever, they put a pair of blue balls;
-
put the phone on the lever;
-
connect a thin black cable between the handset and the body of the device.


But many would like to get not a gray, but a nicer red phone.It is not difficult to do this - however, the algorithm is somewhat different. To start:
-
cut off 2/3 of the bright bar;
-
thoroughly knead this mass;
-
roll it up like a ball.

Such a workpiece must be flattened at a certain angle. Such a plane will become the front face of the case and the support for the dial, so it still needs to be given some angularity. Some of the manipulations are performed with a stack, some with a knife and fingers. Ultimately, there should be a place for attaching the tube.


Next, you need a cap from a tube of glue or from a stationery marker. They create a contour of the future disk in a circle. A circle of approximately suitable cross-section is formed from white plasticine, glued to the surface and the contour is again drawn. You should not adjust it by millimeters - you will almost certainly have to trim or add material anyway. You will need to create grooves on the disc.

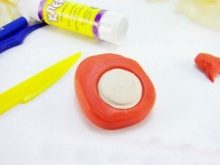

Next steps:
-
mixing white plasticine with black;
-
attaching a gray sausage over the disc;
-
installation of a black patch in its center;
-
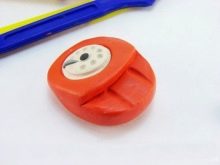
preparation of levers from reddish plasticine;
-
forming indentations for these levers;
-
creating dents that allow you to firmly fix the tube;
-
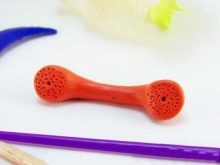
rolling off a strip of orange material, which then gradually turns into a tube;
-
preparation of a mass of holes at its ends;
-
the formation of a "telephone cable" from black plasticine;
-
preparation of recesses for its fastening;
-
the disc is framed with a red stripe.




Modeling a mobile device
But children are also interested in other communication devices of a more modern type. It is quite possible to imitate them for dolls.
One of the coolest phones available today, the iPhone 11, can be taken as a basis. Moreover, it will cost an order of magnitude less than its original prototype.
- The body is made rectangular, light gray. But this is just the foundation; then it is completely covered with coal-black material, after which you will have to use saturated red plasticine. The same strip (originally unrolled in a "sausage" manner) is attached along the entire perimeter. The red material is slightly modified, giving it a little relief in some places.
- The next step is to prepare a not too thick gray square. It will represent the panel on the back of the smartphone. She is encircled in a stack around the perimeter in order to get the most clear and expressive outline.
- 3 black rounds are glued to the surface of the panel. One of them - a camera - is tied around the perimeter with a thin plasticine thread. Then the time will come to move on to the design of the corporate symbol. This emblem is made from light gray stucco mass. The decoration is placed strictly in the middle of the body. When it is delivered, it can be cut into the side of the smartphone to simulate connectors. After that, only minor improvements and additional drawings will be needed. In skilled hands, the work will take very little time.


Useful Tips
If the craft is planned as a gift, or is going to be stored for a long time, it is useful to cover the surface with transparent varnish. The plasticine underneath will harden and become brighter, and cleaning will be much easier.
In the process of sculpting the phone, you need to take breaks periodically. Rolling the material with a kitchen rolling pin is much easier than using your hands or improvised tools.
If something does not work out, it is better to pause and return to it later than to be disappointed.
The place for sculpting should be comfortable and well lit.

The very manufacture of a phone from plasticine is available only to those who have already got their hands on this hobby. It is imperative to master not only the formation of sausages and pancakes, but also simpler shapes and compositions. There may be different stacks at the disposal of lovers of sculpting - and you have to try which tool is individually suitable for a particular job. There are no more special subtleties and nuances.
How to mold an iPhone from plasticine, see the video.


