Polymer clay toys

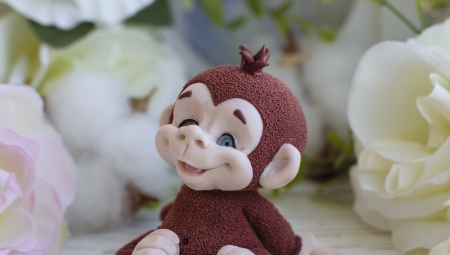
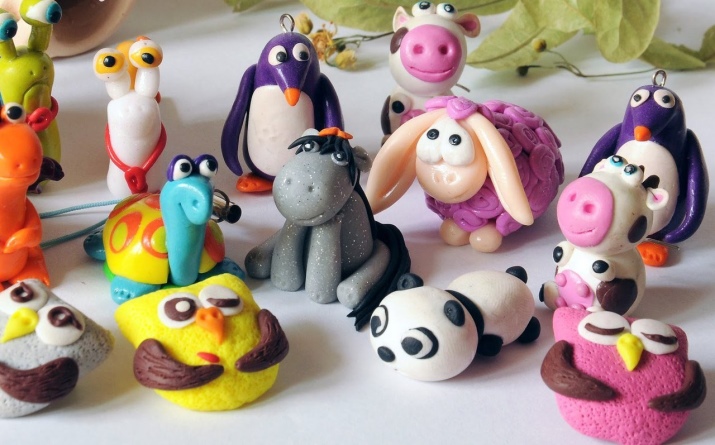
Sculpting is a very exciting activity that is enjoyed by both children and adults. If you don't want to mess with regular clay, you can try its improved counterpart, polymer clay. Plastic toys turn out to be so cute and realistic that they become the center of the home collection and stylish interior decoration.

Peculiarities
Polymer clay is better known as plastic. It is an easily deformable substance, when used, the risk of fractures and cracks is minimized. Simply put, with polymer clay, the fraction of marriage is negligible - if the craft does not turn out as planned, you can add a little clay, level it, smooth it out, or simply sculpt it again. This material is malleable, like plasticine, it is no coincidence that needlewomen love it so much.
When the figurine is molded, the craft is fired, and it becomes hard, like a stone. After that, the product keeps its shape well, does not crumple from external influences, does not melt from heat and does not crumble into small fragments.
And in this, clay compares favorably with ordinary plasticine, with which, unfortunately, the opposite is true.


There are two types of polymer mass for hand sculpting.
- Self-hardening - hardens in air, therefore it must be stored in a vacuum package. In turn, it can be divided into heavy plastic, lightweight, and cold porcelain.
- Baked - when heated to more than 100 degrees, this material hardens, since plasticizers begin to evaporate at high temperatures. On sale it is presented in liquid or regular form, it can be with fillers or translucent.


Plastic forms the basis of sculpting. In addition to her, you will also have to stock up on tools.So, in work, you cannot do without a rolling pin for rolling out the composition, a clerical knife and brushes of different thicknesses. Be sure to prepare a thin wire for the frame and a set of stencils for the shapes.
Plastics are baked in the oven. The microwave oven, multicooker and grill are used, but much less often, since these devices will not allow full control of the firing progress.
The required temperature regime is usually indicated in the instructions for polymer clay - and you need to be guided by it.


Creation of interior figures
Polymer clay is often used to create interior decor items. Such crafts are especially popular in the child's room. Be sure - a "cute" character is what you need for a children's area.
A very simple (and unusually cute) bunny is made from plastic.
- First, a neat ball rolls down.
- Small indentations for the eyes are made on it.
- And then it is quite simple: paws, nose, as well as ears and eyes directly.
- You can stick chamomile for decoration.

An adorable chick is made using a similar technology. The same ball as a base, only instead of paws-sausages, two wings and a larger tail are attached here. All elements are designed in different colors, so you don't have to paint anything.
If desired, you can add glare to the eye. To do this, roll up very small white balls and glue them onto the black ones.


The flat figurine of an exotic parrot will become a stylish interior decoration. For such work, paint is not needed, here one pupil is tinted and the veins on the flower petals are tinted. Also, paint is applied to the beak, usually pastel colors are chosen. That's all, the rest is just a shade of the working material.

If you wish, you can mold more complex figures. For example, you can try to make the same bunny, but more voluminous.
For sculpting you will need:
- plastic in four shades - white, light pink, hot pink and deep blue, in addition you need to prepare a little black clay;
- clerical knife or scalpel;
- stack with balls;
- solid work surface;
- rubber gloves.


The algorithm of actions step by step includes several steps.
- Roll a ball out of white clay in the usual way, and then flatten it slightly to form an equilateral triangle with rounded edges.

- We shift the workpiece to the work surface, smooth the corners with our fingers so as to maintain all the proportions.

- We form a droplet from blue plastic, flatten it slightly so that an elongated triangle is obtained. Then we move it to the work surface and connect the head to the body.

- We take a knife and carefully make an incision in the body to indicate the legs.

- We mold a small circle from the white mass and cut it into two equal parts. We fasten one half under the head - this will be the neck.

- We roll a couple of sausages of different lengths, separate two identical pieces from each. We form droplets from them, carefully flatten two droplets - they will make ears. The rest will play the role of legs.

- We stick the paws to the body, and fix the ears on the head. One eyelet can be slightly bent.

- We roll up two white balls, fix them on the muzzle. We sculpt a tiny nose from dark pink plastic.

- With the help of a stack of balls, we form the indentations for the eyes. Then we sculpt small balls from the black mass, flatten them slightly and fix them in the prepared grooves.


- From a pair of tiny pink blanks we make cheeks for a bunny.

- We roll the thinnest thread from black plastic, cut it into pieces - these will be cilia. We glue them with a needle, three for each eye. We also stick them over the eye to make eyebrows.

- The hare is almost ready, all that remains is to bake it in accordance with the instructions.


Experienced craftsmen sculpt decorative tiles from plastic for interior decoration. Of course, you can't make a lot of such tiles - the material is consumed too quickly, but you won't need a lot.One or two will be able to set the style of the entire room. Products with natural motives look especially beautiful.


Mixed techniques are often used to create interior toys. For example, a soft doll can combine polymer clay and textiles.
And funny monsters with human faces are usually made of plastic, wool and fur.

Christmas decorations and their production
Creating a New Year's decor from polymer mass is a sheer pleasure! This handicraft brings a lot of positive emotions both during and after work. You can start by creating the simplest toys, for example, traditional balls. Keep in mind that the balls cannot be made entirely of plastic as they cannot be baked properly. The limiting thickness of the clay should not be more than 1 cm. It is better to make the "filling" from some other material, for example, from foil or foam.

The master class is not particularly difficult.
- Prepare a ball with a diameter of 3-4 cm.

- Cover the foil blank with clay and roll it all in your hands to form an even ball. Take a metal paperclip and stick it into the ball so that the tab sticks out slightly.

- Roll the figure again: the paper clip is firmly fixed in the plastic. That's it, now the workpiece can be sent to the oven.

- Let the clay cool after baking.

- It remains only to decorate the resulting toy. It is advisable to apply the background tone with spray paint. After it dries up, you can use other colors to depict whatever you want: a symbol of the coming year, gentle snowflakes, a mischievous snowman or good Santa Claus. Insert a thread into the staple's protruding ear and make a loop.

- The exclusive ball for the holiday tree is ready, just like a factory one!

For the Christmas tree, you can make other decorations, the easiest is flat toys. To do this, you need a little polymer plastic and pastry molds for cookies.
- The clay is placed on the table and gently rolled out like dough. After that, you need to take metal molds and start "stamping" blanks, they can be in the form of rhombuses, Christmas trees, hearts and bears.


- Insert paper clips or twisted metal wire eyelets from above. Place them on a parchment lined baking sheet and bake like a cookie.


- Further design is limited only by your imagination. You can paint them with New Year's paints, or you can glue the festive decor.

Bulky plastic toys look very stylish on the Christmas tree, however, they require much more attention and perseverance. For such crafts, you need to sculpt individual elements from the polymer mass, and only after that add a single figure out of them.
For example, a New Year's snowflake.
It is made from a base and completed with many graceful petals and circles of different shapes.


How to make Christmas tree decorations from polymer clay, see below.


